Create and share a crowdsourcing survey for disaster management using collection links and a reviewer’s section
When responding to a disaster, accurate, quality data must be accessed quickly. If the affected population has the power to record and report damages directly to a disaster management team, the response time can be increased significantly.
Then, if the disaster management team has the means to filter through reported damages easily, they can prioritize and assign tasks much faster. This can also support ‘triage’, that is the allocation of limited resources during a disaster.
Crowdsourcing –which is what the process of obtaining information from the public is called– can be leveraged in such situations and ActivityInfo can support and enhance such an activity.
In this guide, we will design a form for a simple crowdsourcing survey to collect information from the public about damaged entities in an affected area. We will also add a Reviewer’s section to the form which will only be visible to the disaster management team. This section will allow the team to prioritize the response for the reported damages and make faster decisions on what the next steps should be. Then, we will use a Collection link to share the survey with the public using social media and other dissemination channels. Finally, we will see how the disaster management team can prioritize the response to the reported damages using maps and the reviewer’s section in the form.
To be able to share a form using a Collection link, you need to have been assigned the ‘'Manage collection links' permission.
To be able to view a Reviewer’s section in a form you need to have been assigned the ‘“Edit ‘reviewer only’ fields” permission’.
Read the article “Review records with the “Edit ‘reviewer only’ fields” permission” to learn more.
If you are interested in a more thorough walkthrough on building a complete data collection system for Monitoring and Evaluation activities, please consider taking the online, free self-paced course "Mastering the basics of information management with ActivityInfo".
Step 1: Design a form for the survey
In this step, we will start designing the first part of the form. This is the part that the public will fill in so we need to include all the questions that will help us make decisions afterwards.
In our example, after adding a database using the Blank database template, we will design a simple form with a few fields.
You can download the template for this form and import the fields to a new form. Please note that the template uses a Reference Field type; make sure to use the id of the form you want to reference to or to completely omit that row. Also, please keep in mind that after importing the fields, you need to check the Property ‘Reviewer Only’ for the fields under the Reviewer’s section. Then, by altering the Labels or adding more fields you can create your own crowdsourcing survey.
Download the template for this form.
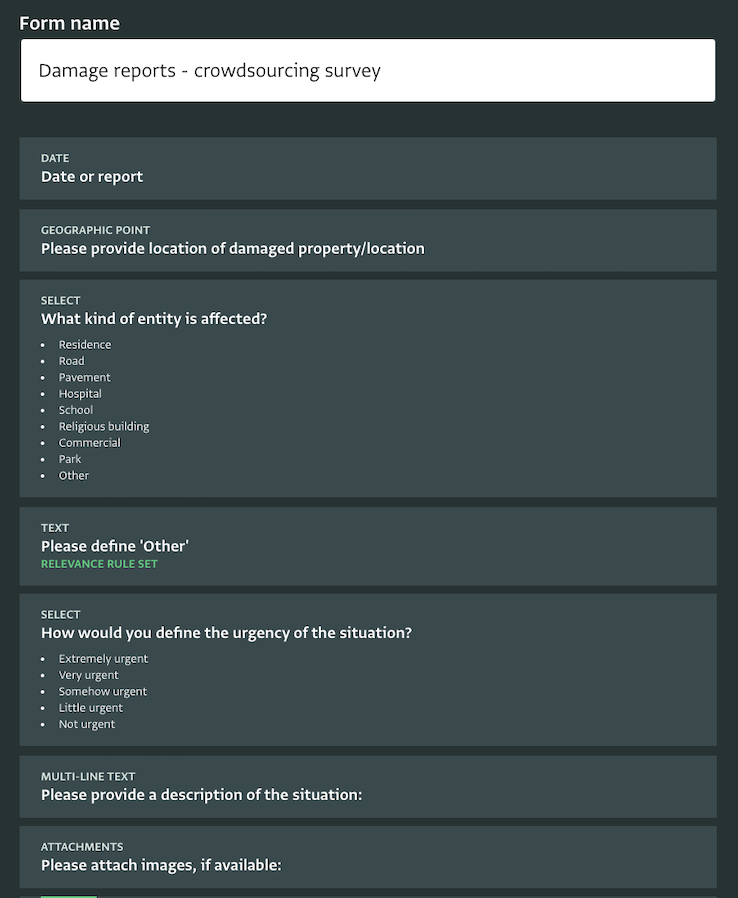
We will use a Date field to collect the date the damage is reported and a Geographic point field to collect the exact location of the damage. Optionally, we can also use a Reference field to reference the geographic database of ActivityInfo and bring in a list of municipalities or other administrative levels.
We will also use a Single Selection field to collect the type of entity/location affected. In the options of the Single Selection field we can add all possible entities/locations and add the option ‘Other’ to cover additional cases. Using a Text field with a Relevance rule we can collect more information in case the ‘Other’ option is selected. Because the field will use a Relevance rule, it will only appear if the respondent selects ‘Other’ as a reply. Then, we can add another Single Select field to ask about the urgency of the damage report.
Another field we can add is a Multi-line text field where we can prompt the respondent to provide more information about the damage. Finally and optionally, we can add an Attachment field to collect images.
Step 2: Add the reviewer’s section
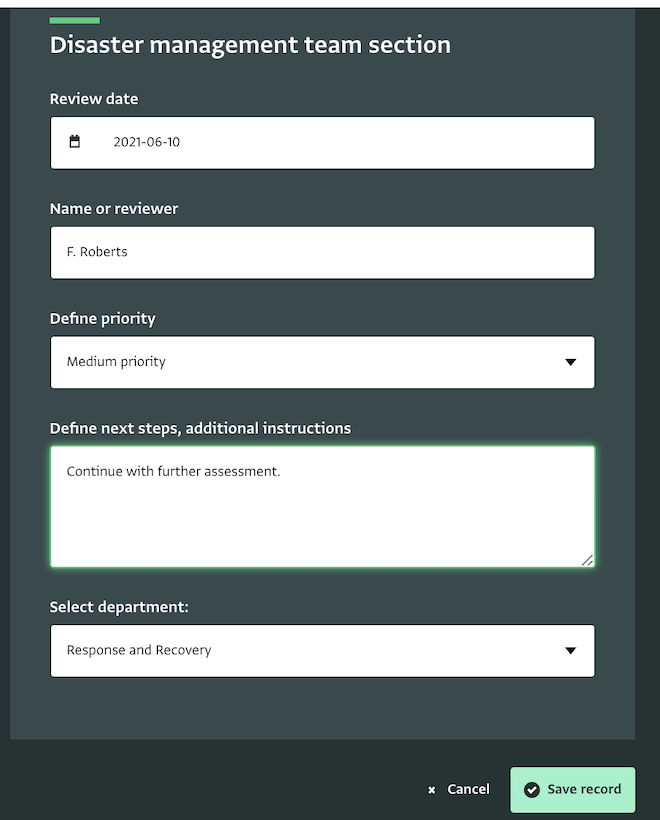
Next, we will add some fields and mark the property ‘Reviewer only’ to make sure they will be visible only to reviewers. Reviewers in our case would be the disaster management team. We can also add a Section header to distinguish this section from the rest of the form and help the people reviewing the incoming reports navigate more quickly in the form.
We will use a Date field to collect the date of the review and a Single Selection field to mark the report as high, medium or low priority. Optionally, we can add a Multi-line text field for additional comments such as next steps or specific instructions. This part of the form can be further adjusted to the needs of your disaster management team. You might want for example to add Text fields to collect the name and contact details of the team member responsible for the damage report or a Reference field to link to another form which might list all offices or departments participating in this activity, for example.

Step 3: Share the crowdsourcing survey using a collection link
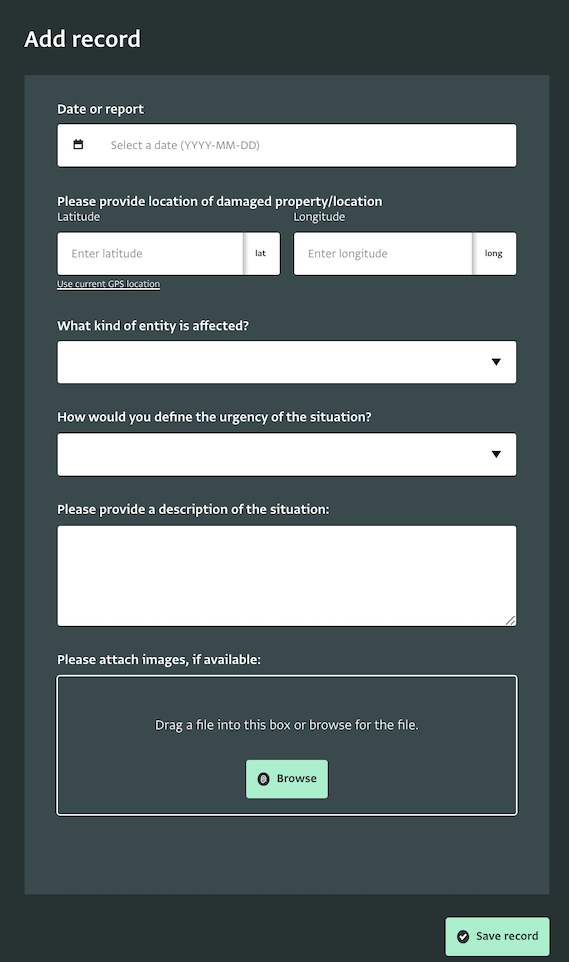
Once the survey is ready you can click on ‘Collection link’ to get a shareable URL. You can copy this link and paste it to the text of the messages you are sending out. This could be for example simple SMS alerts, posts on social media campaigns or other dissemination channels you are using.
The public will be able to see all the questions you added to the form according to the relevance rules you set, except for the fields that have been marked as ‘Reviewer’ only’. This will be only visible to your team. You can visit the URL to preview how the form will look to the public too. You can close the Collection link any time.
Please note the following:
- You need to be the owner of the database or be assigned the 'Manage collection links' permission to be able to open a Collection link to a form.
- Offline data entry when accessing forms using a Collection link is not supported.
- If your form links to a reference form and its records, you need to change the visibility of the Reference form to 'public visibility' so that the respondents can view the Records in the shared form. This refers only to the part of the form that will be shared via the collection link, and not to the reviewer’s section.
Step 4: View, filter and sort the collected records
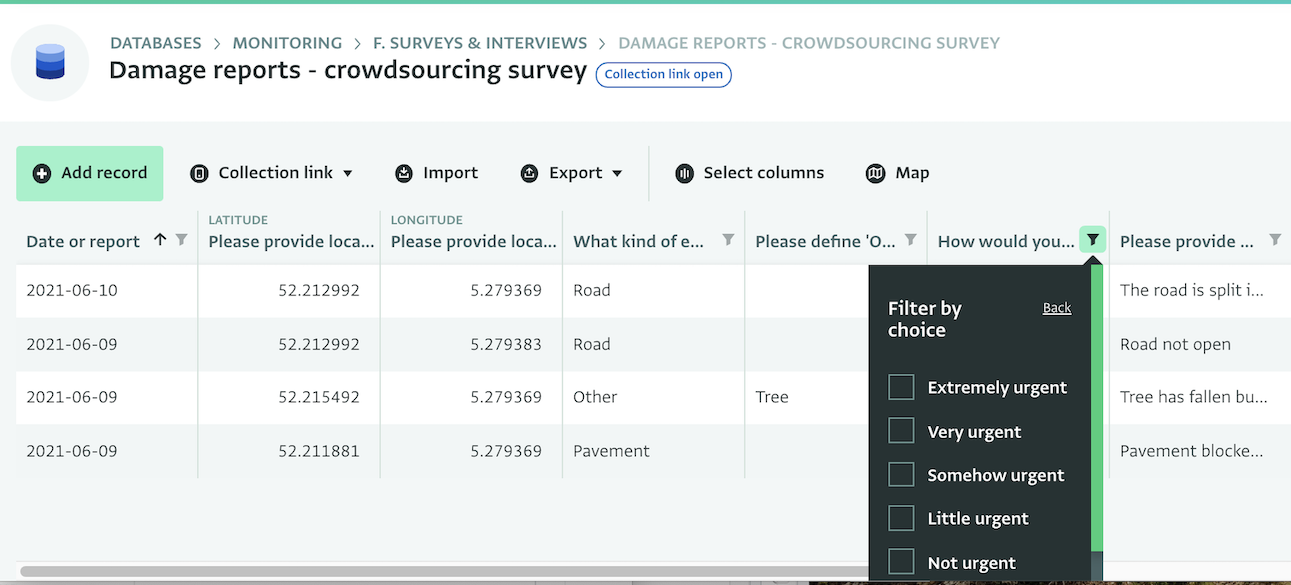
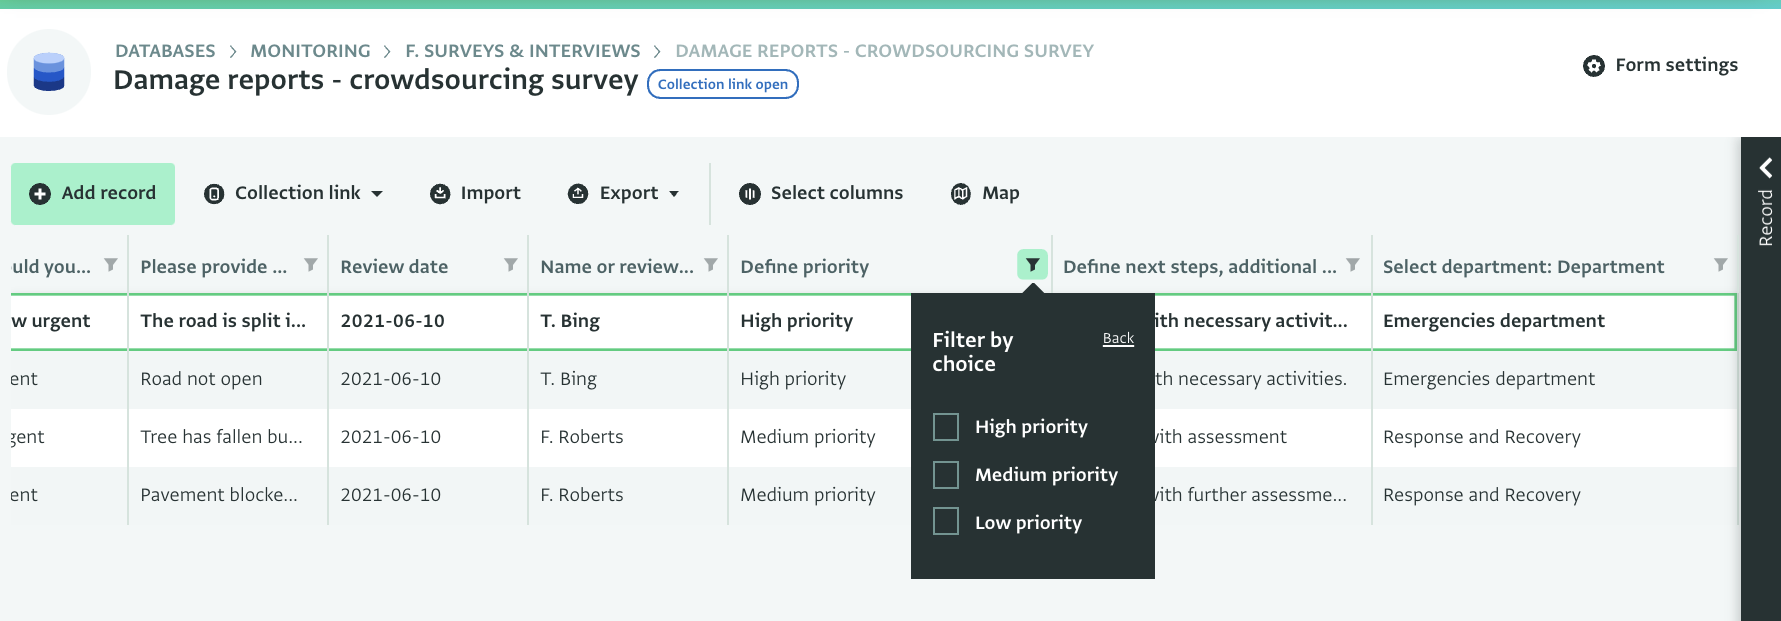
As people start using the link to report damages to the form you shared, you will see new records appearing in the Table View for each new damage report added. You can filter and sort these records based on your preferences to work faster. For example, you can filter based on urgency.
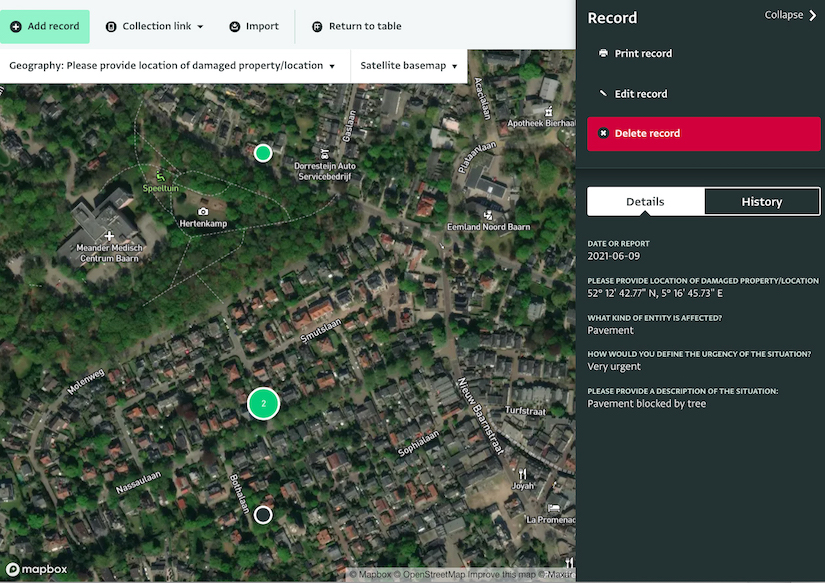
Another option you have is to use the Map View. This will give you an overview of all damage reports on a map. To be able to see records on Map View, they need to have either a Geographic point field or a reference to the geographic database.
You can use various base maps to examine the situation. For example, the World population map (2020) could help you assess how critical damage is based on how many inhabitants live –and may thus be affected– in an area.

Step 5: Start prioritizing
With the records –or in this case, the damage reports– available on Table View and on Map View, the disaster management team can start prioritization. To do that, a reviewer can click on a record and then on ‘Edit record’ to open it and start filling in the Reviewer’s section.
The updated records will appear in the Table View and you can sort and filter based on your needs. For example, based on priority.
Well done!
You have completed the guide for creating and sharing a crowdsourcing survey for disaster management using collection links and a reviewer’s section.
Don’t hesitate to contact us if you need help setting up your disaster management system in ActivityInfo.