Language: English
ActivityInfo is listed in the Claude directory as the ActivityInfo.org connector. Add the connector from the directory and sign in, then you can ask Claude about the data in your ActivityInfo databases. You do not need to enter a server URL.
Before you begin
- An ActivityInfo account, and a database you can view.
- A Claude account.
- Permission to change the database settings, or a database administrator who can do Step 1 for you.
Read Using AI assistants with sensitive data before you connect a database that holds personal data. Use an account on a plan your organization has bought, not a personal one.
Step 1: Enable the MCP server for a database
Claude can only work with databases where the MCP server is enabled.
- Open the database in ActivityInfo.
- Open “Database settings”, then click “Security”.
- Select “Enable the MCP server for this database.”
- Click “Save”.
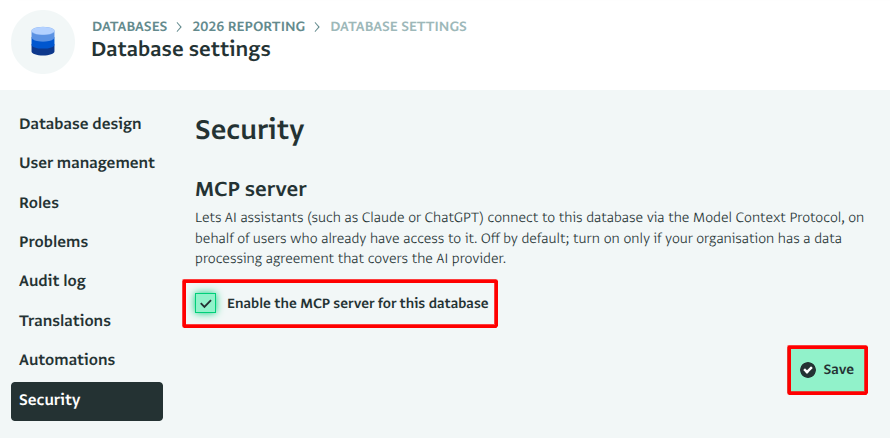
See Enabling the MCP server for a database for more about this setting.
Step 2: Add the connector from the Claude directory
On an individual plan
In Claude, open “Settings”.
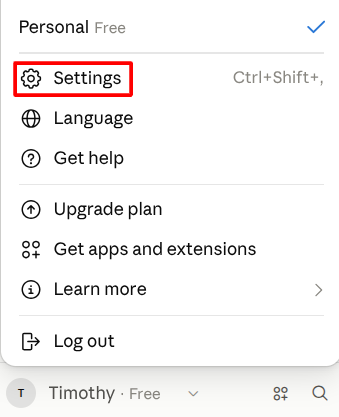
Claude Settings Select “Plugins”.
Select “Discover” and search for
ActivityInfo.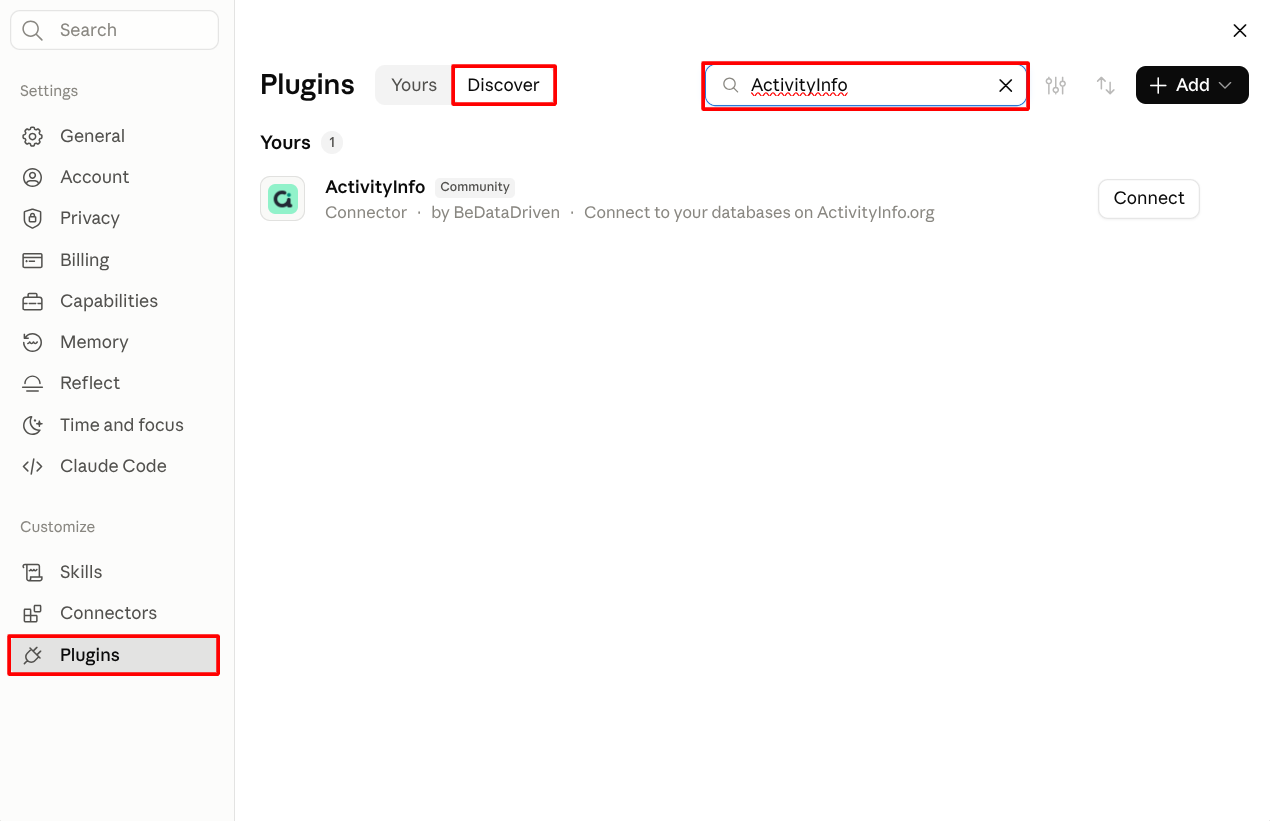
ActivityInfo in the Claude directory Click ActivityInfo to open its page, then click “Connect to Claude”.
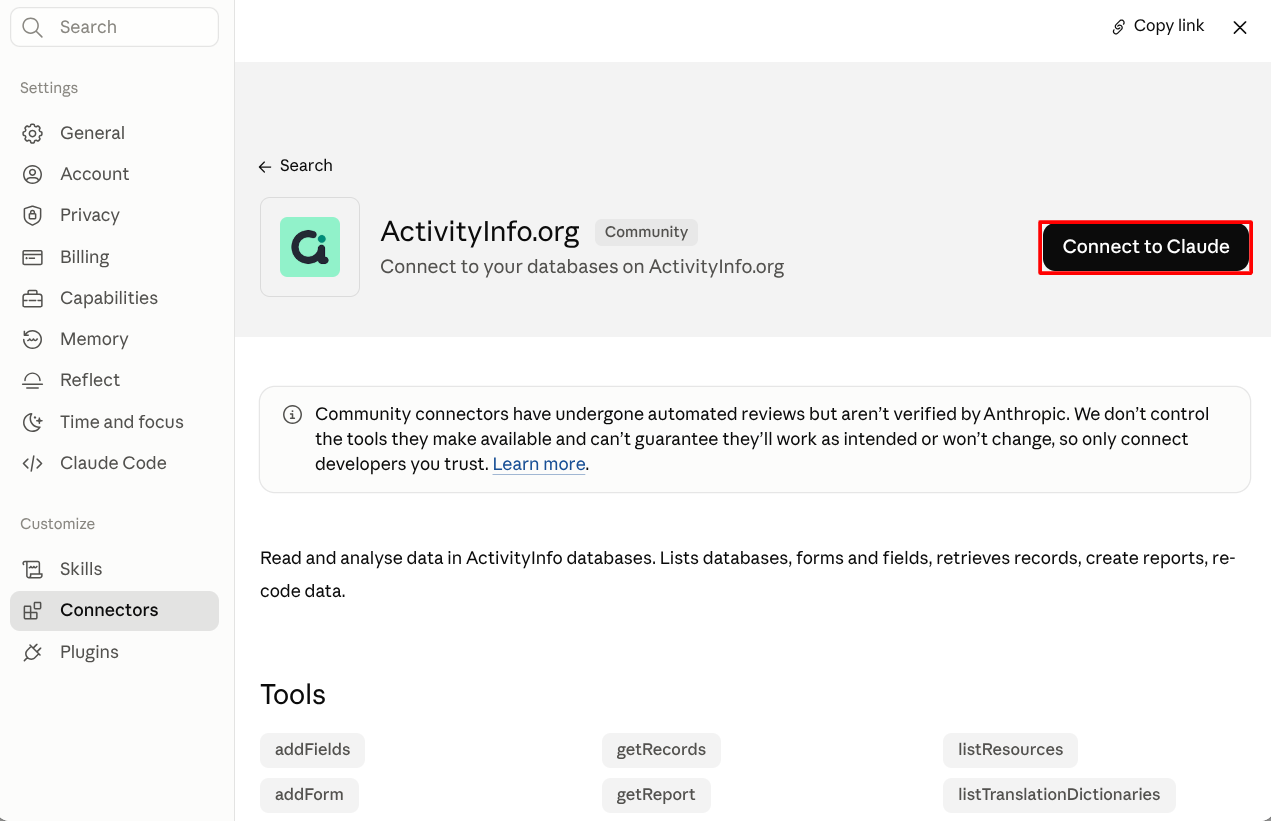
Connect to Claude
ActivityInfo opens so you can sign in. Continue with Step 3.
On a Team or Enterprise plan
An Owner adds the connector once for the organization. Each member then connects their own ActivityInfo account. Adding the connector for the organization does not give anyone access to ActivityInfo data.
If you are an Owner or Primary Owner:
- Follow steps 1 to 3 of the individual plan to find ActivityInfo in the directory, and open its page.
- Click “Connect for your team”. This adds the connector for everyone in your organization.
- Click “Connect to Claude” to connect your own ActivityInfo account, then continue with Step 3.
To try the connector before you add it for everyone, click the arrow next to “Connect for your team” and choose “Connect just for me”.
You can also add the connector from “Organization settings”, then “Connectors”. Click “Browse connectors” at the bottom of the page, find ActivityInfo, and click “Add to your team”. On an Enterprise plan, a member whose custom role includes managing the organization's libraries can also add connectors.
If you are a member:
- Follow steps 1 to 3 of the individual plan to find ActivityInfo in the directory, and open its page.
- If an Owner has added the connector, click “Connect to Claude”, then continue with Step 3.
If an Owner has not added the connector yet, you see “Request” or a note to ask an Owner instead of a connect button. On a Team plan, clicking “Request” sends the request to your organization's Owners. They see it under “Requested by your team” in “Organization settings”, then “Connectors”.
Step 3: Sign in and authorize Claude
Sign in to ActivityInfo if you are not already signed in.
The “Authorize application” screen appears. Check that the authorization code will be sent to
claude.ai. The reported name, Claude, is marked “Unverified” because the application reports its own name. The domain is what you check before you allow access.Clear the “Also make changes on your behalf” checkbox. This checkbox is selected by default. Clearing it gives Claude read access only, which is enough to read and analyze your data.
Click “Allow access”.
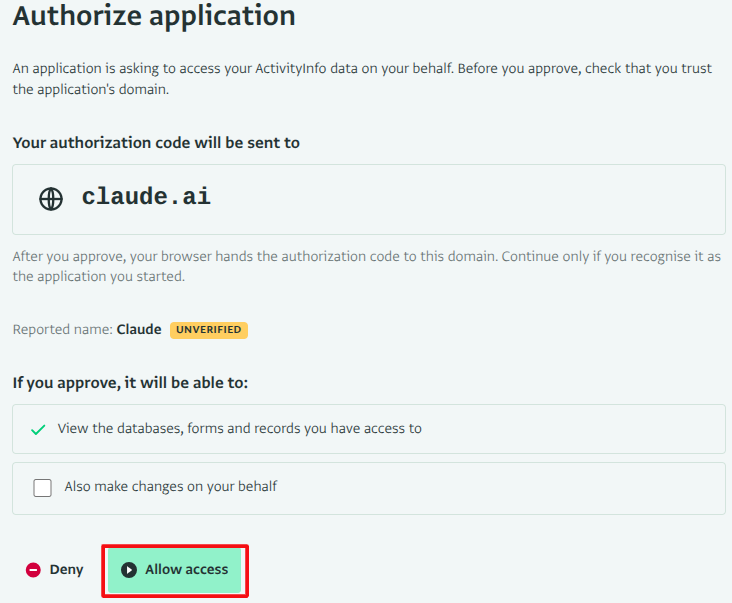
Allow Claude to access your ActivityInfo data
The connector now shows as connected in Claude.
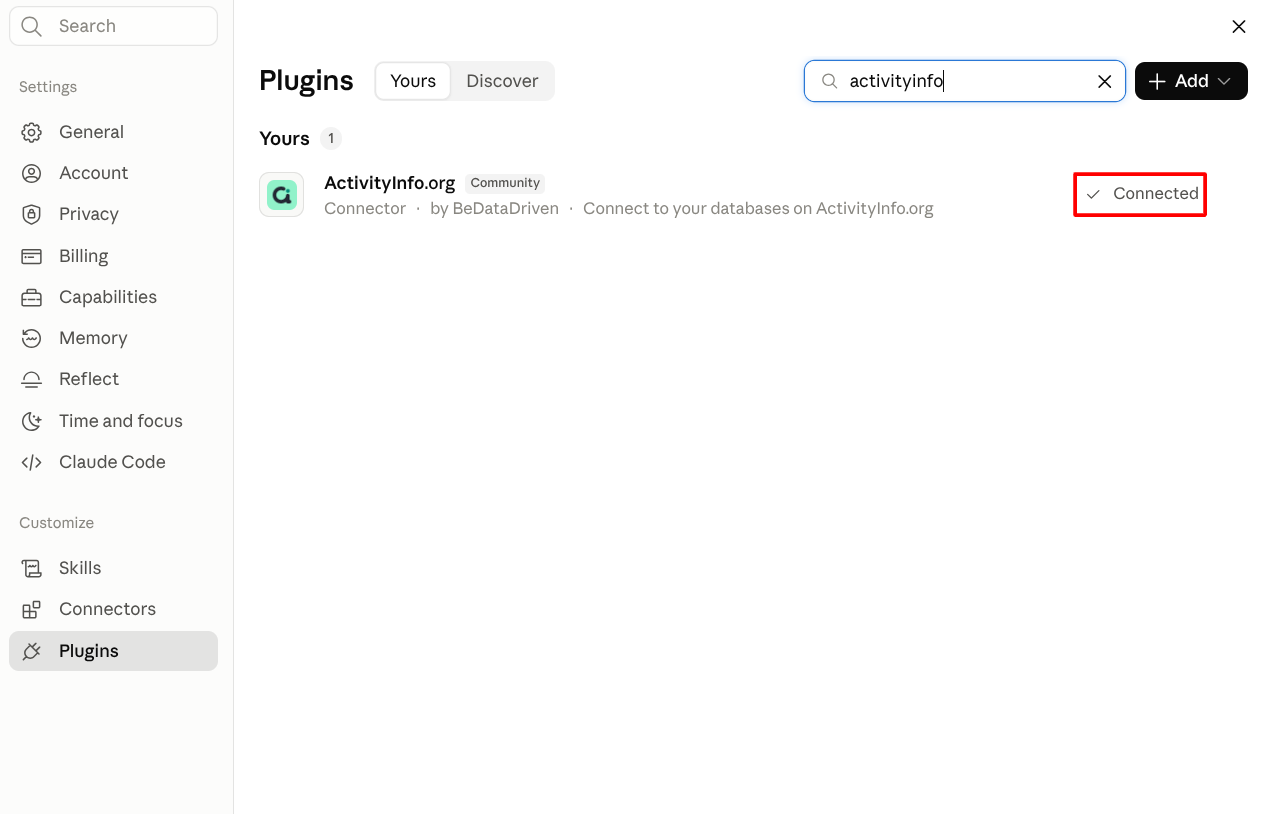
To let Claude create forms or add records later, disconnect the connector and connect it again, this time leaving the checkbox selected.
The authorization also appears on the “Authorized Applications” page of your ActivityInfo account settings. You can revoke it there at any time. See Reviewing and revoking connected assistants.
Step 4: Confirm the connection
Start a new chat.
Click the “+” button at the lower left, choose “Connectors”, and check that ActivityInfo.org is switched on for the conversation.
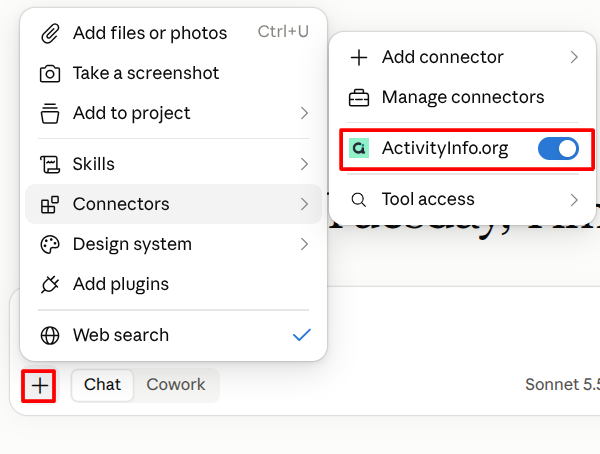
ActivityInfo.org connector switched on Ask Claude to list your databases:
List my ActivityInfo databases.Claude asks your permission to use “List Databases” from ActivityInfo.org. Click “Allow once”, or “Always allow” to skip this prompt for this tool in future.
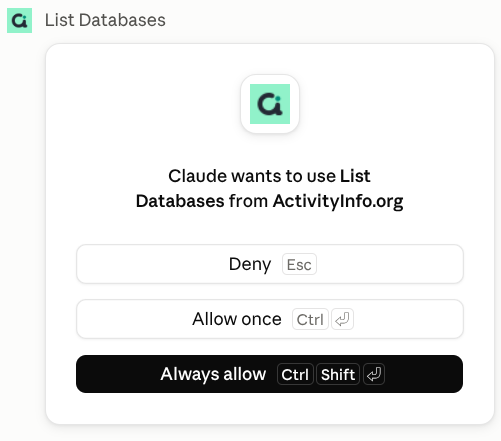
Allow Claude to List Databases Claude lists the databases you can view and tells you which ones have the MCP server enabled.
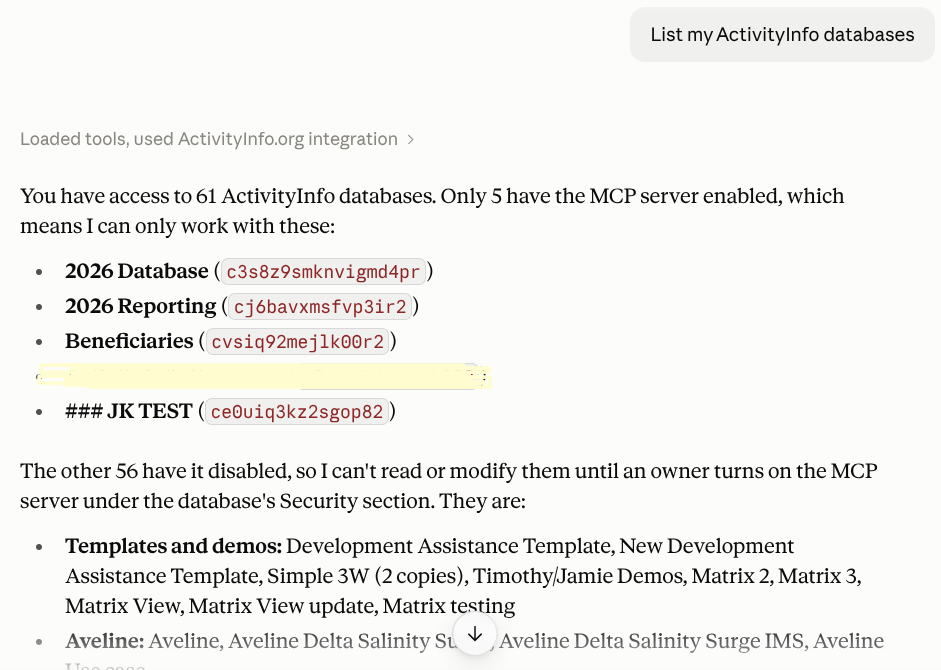
List of ActivityInfo databases Ask about the structure of a form. Replace
<name>with a form in the database you enabled in Step 1:Show me the fields in the <name> form.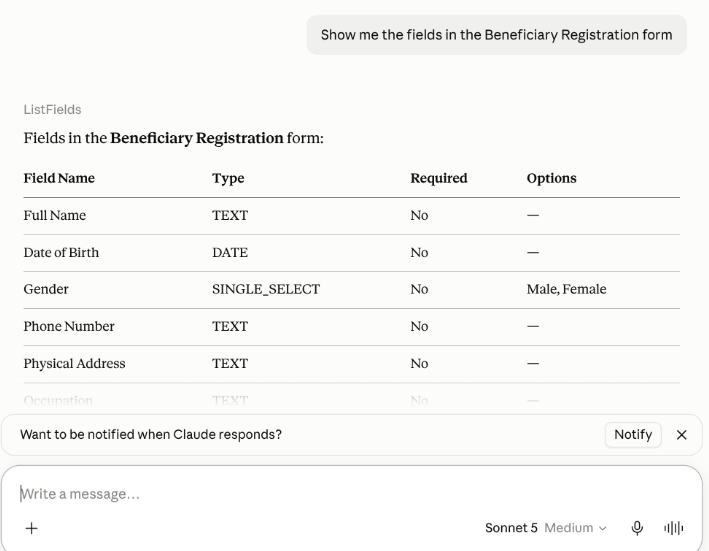
Fields in a form Ask a question about the records:
How many records are in the <name> form?
Claude may ask your permission before it uses other ActivityInfo tools. Read each request before you allow it.
Claude sees only what your ActivityInfo user can see. If you cannot view a form or a record in ActivityInfo, Claude cannot read it either.
Troubleshooting
| What you see | Cause |
|---|---|
| “Request” instead of “Connect to Claude” | On a Team or Enterprise plan, an Owner has not added the connector for the organization. Click “Request”, or ask an Owner |
| Claude does not offer ActivityInfo in a chat | The connector is switched off for this conversation. Switch it on from the “+” menu, under “Connectors” |
| “The MCP server is not enabled for database …” | Nobody has enabled the setting for that database. See Enabling the MCP server for a database |
| “Forbidden: this tool modifies data, but the authorization is read-only” | You granted read access only. Disconnect the connector and connect it again, this time allowing changes |
| A database you expect is missing from the list | Your ActivityInfo user has no access to it. The connector cannot see more than you can |
| The connection stops working after a while | The authorization was revoked, in ActivityInfo or by an administrator. Connect again |