The following section describes how to add a field as a Row and a field as a Column for the creation of a Pivot Table. These are the Dimensions of your Pivot Table and they make it more readable and detailed.
There are several options as to what to display for a Dimension, which can be added to add more detail to your Pivot table:
Totals
Blanks
You can add a vertical Dimension or a horizontal Dimension or both.
You can get the percentages for a Measure in relation to a Dimension using the Measures panel.
How to add a field as Row
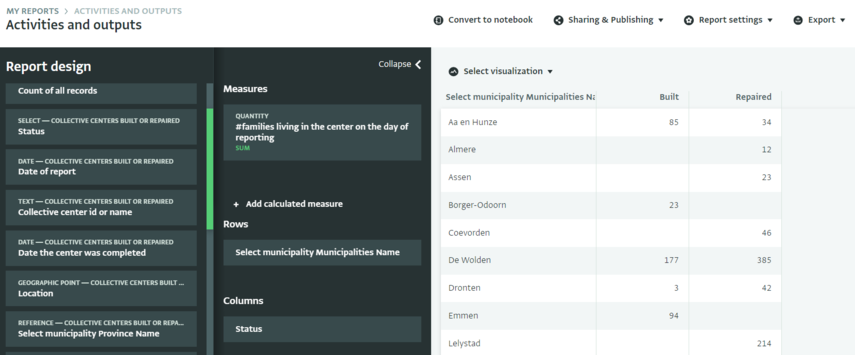
- After selecting the source of data for the Pivot Table and adding a Measure to it, select the field you want to add as a horizontal Dimension to the Pivot Table from the list of fields in the Report Design side panel.
- Drag and drop the field to Rows to add the horizontal Dimension and view it on the Pivot Table.
- To select more options as to what to display, click on the Dimension you added to reveal the Display options and select the options you want by ticking the boxes next to their names.
- View the new Display options on the Pivot Table.
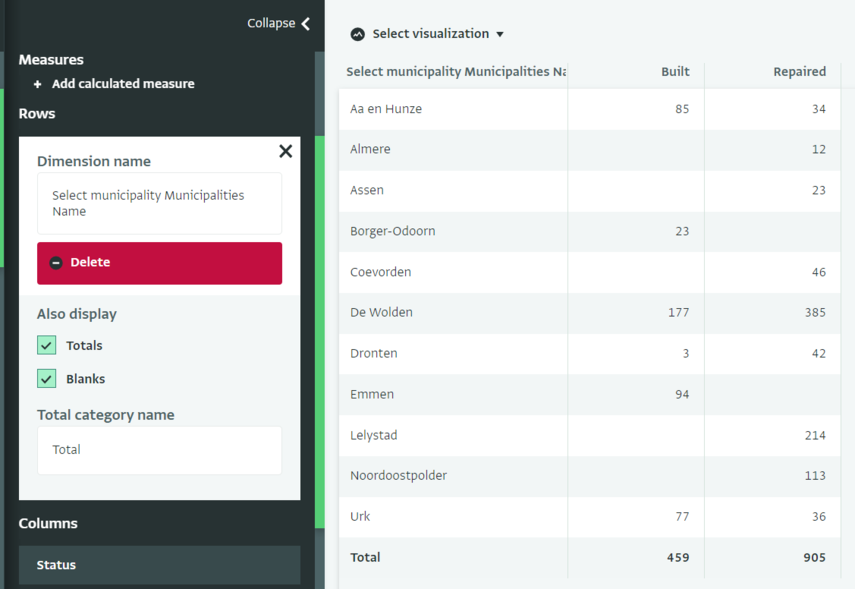
In the Rows card, you can also edit the Dimension name and the Total category name or delete the Dimension entirely.
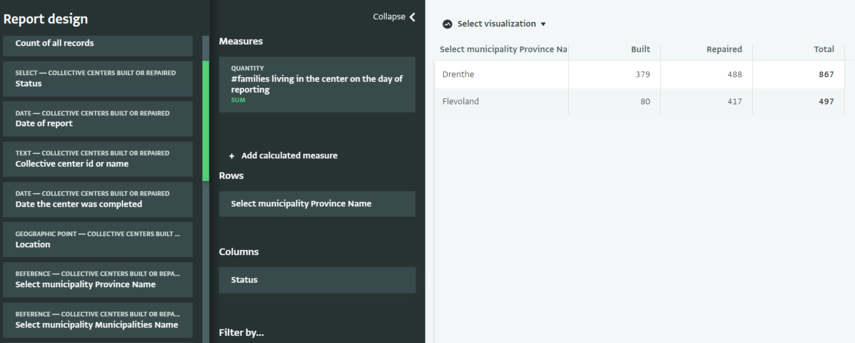
- Select the field you want to add as a vertical Dimension to the Pivot Table from the list of fields in the Report Design side panel.
- Drag and drop the field to Columns to add the vertical Dimension and view it on the Pivot Table.
- To select more options as to what to display, click on the Dimension you added to reveal the Display options and select the options you want by ticking the boxes next to their names.
- View the new Display options on the Pivot Table.
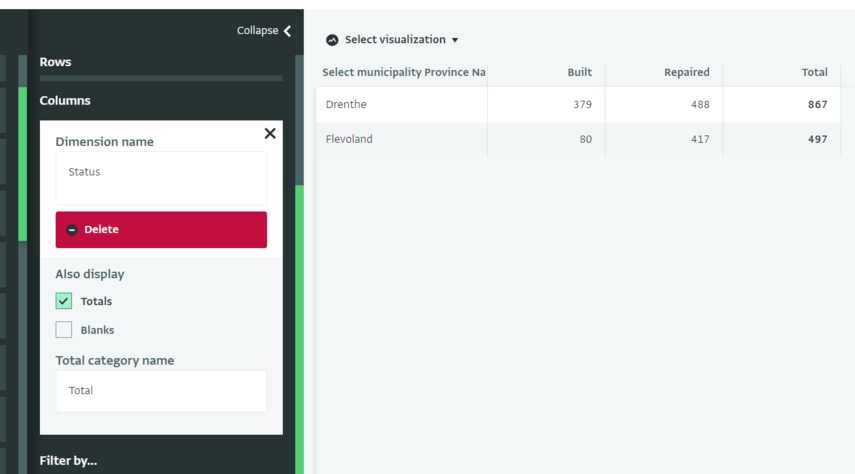
In the Columns card, you can also edit the Dimension name and the Total category name or delete the Dimension entirely.