Rapid Response Mechanism database template (English & French)
This template can be used to manage data related to a Rapid Response Mechanism.
What is a Rapid Response Mechanism?
A Rapid Response Mechanism is a mechanism put in place when there is a need to capture real-time data so as to assess a sudden crisis situation rapidly and provide quick support by planning and mobilizing resources to address multi-sectoral needs arising from that crisis. Such crises include epidemics, natural disasters and conflicts.
Following an alert on a crisis situation an assessment team is deployed to assess the multi-sectoral needs arising from the crisis. Based on this evaluation an intervention is planned to provide immediate relief. Then, a post-intervention evaluation examines the impact of the intervention and how much the situation has improved. Depending on the urgency of the situation a step might be omitted.
What is included in the database template?
The database includes two reference forms where you can replace the Partner Organizations and the Sectors involved. It also contains four data collection forms to assist reporting an alert, running and monitoring interventions and conducting an evaluation and a post-intervention follow up. The forms are linked to each other using Key fields (Alert code, Intervention code, Evaluation code, Post-evaluation code). This makes sure that all data related to a specific code can be linked together.
All forms are available both in English and French. After you copy this template, you can customize the database, forms and fields as well as add records to meet your needs. Click on the button below to add the database to your ActivityInfo account. If you don’t have an account with ActivityInfo, you will be prompted to start a Free trial.
Create your own database based on this template
If you need support for a different setup you can always contact us and we can help you with a more tailored approach.
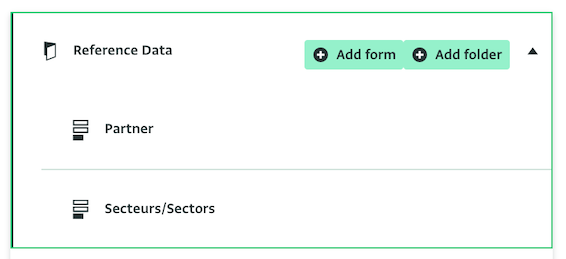
Customize the reference data
The Reference folder includes two forms and some dummy data to which the data collection forms will refer. We have already included some data so you can practice with the existing forms but you can choose to delete this data and add your own.
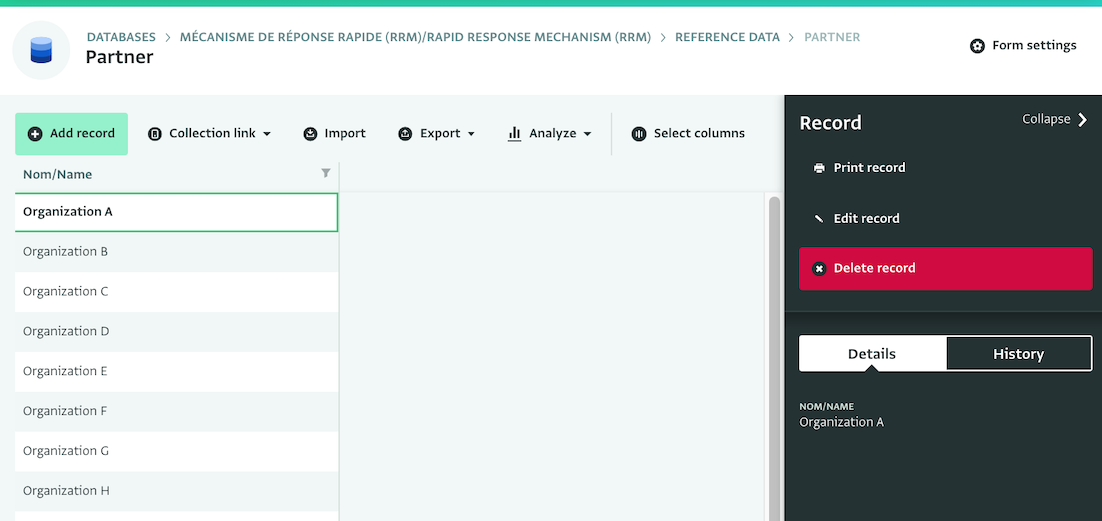
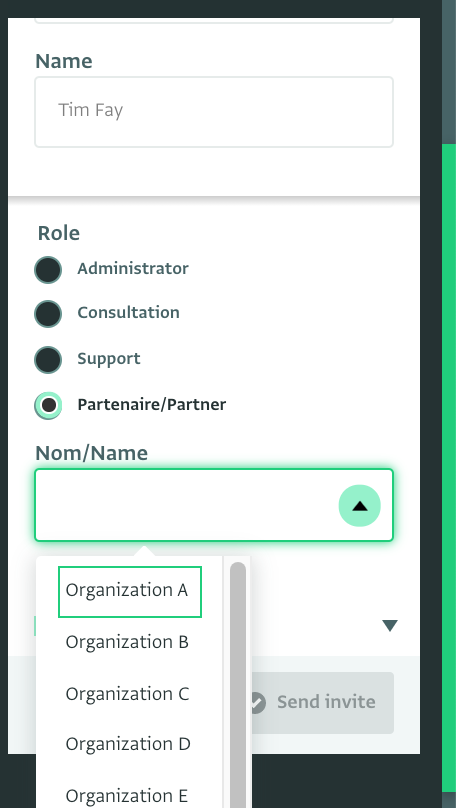
To add your own data, navigate to the contents of the folder and add the Partner organizations to the 'Partner' form by clicking on "Add record". Make sure to delete the ones that belong to the template, if you don't plan to use them (use Shift+Click to delete multiple). When inviting users to this database template you can assign them to a specific Partner using the Role "Partenaire/Partner".
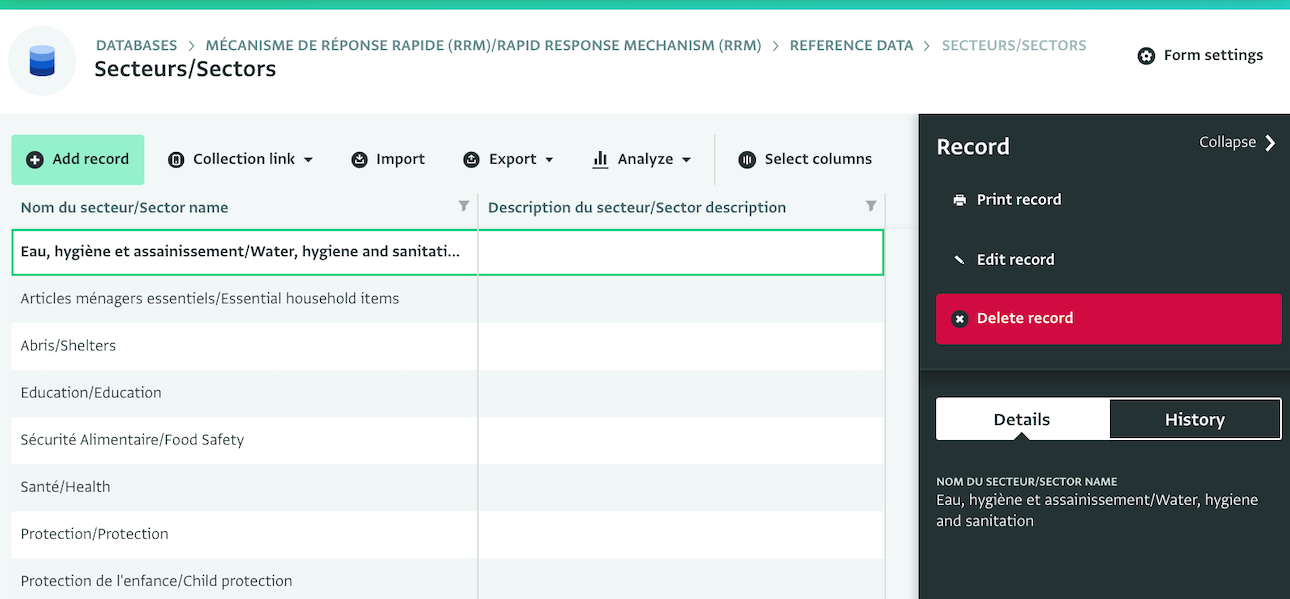
Then, navigate to the "Secteurs/Sectors" form and edit the current sectors or add new sectors. You can optionally provide a description for each sector.
If you have long lists of partners and sectors, you can alternatively import this data to the lists.
You can also create your own reference forms by simply designing a form, setting one or more key fields and setting its visibility to reference.
Customize the data collections forms
Next, you can optionally customize each of the data collection forms to meet your needs or you can leave them as they are and practice with data entry instead.
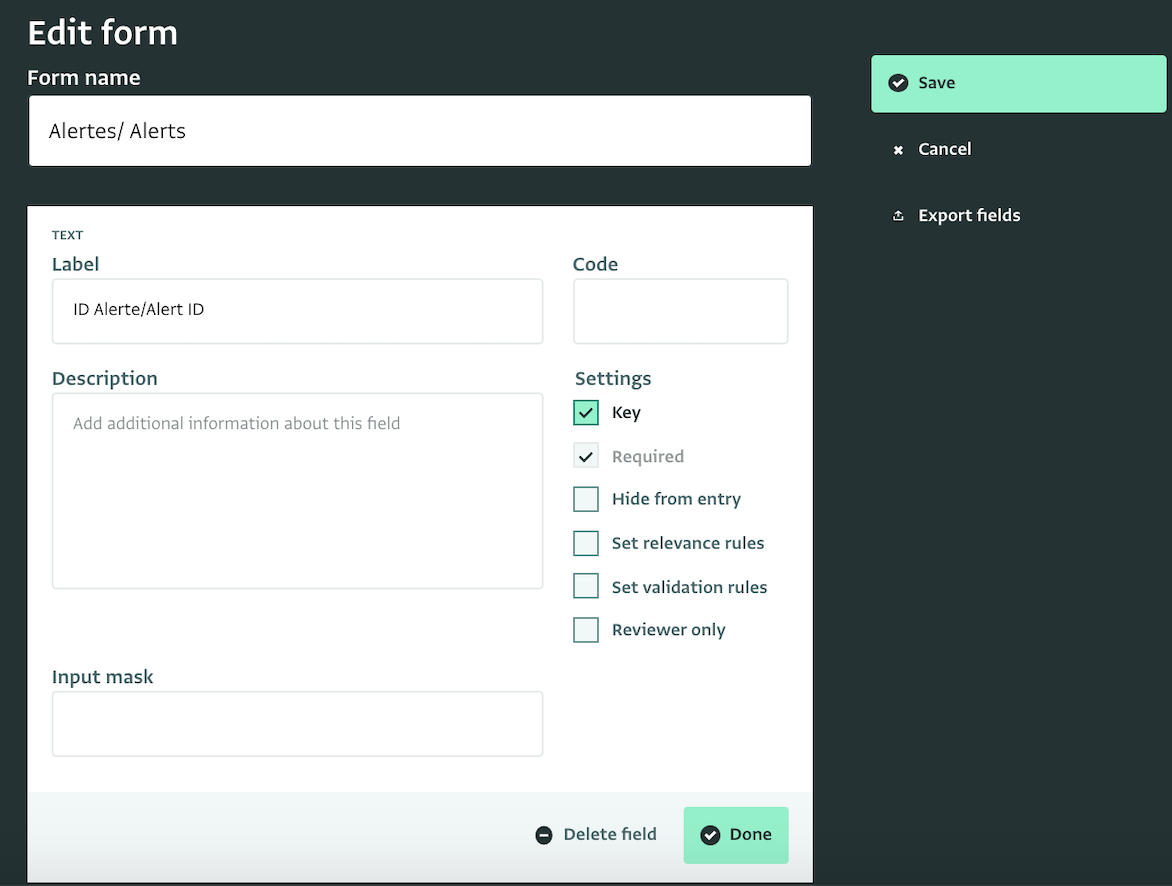
To edit a form, click on it and then click "Form settings" to customize the fields.

To change a field click on it to open the field card editor, make the changes and save the form.
All forms use a Reference field which references the built-in geodatabase in order to bring in the administrative levels for Burkina Faso. You can delete this field and add another reference field to reference the country of your preference in the geodatabase or another reference form of locations which you can create. If you consider a field irrelevant you can delete it or check the box "Hide from entry" to hide it entirely.
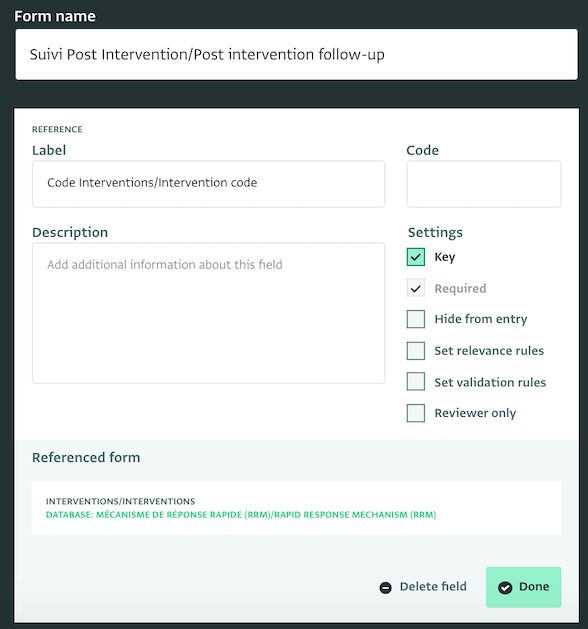
Other reference fields refer to the reference forms in order to bring in the list of sectors or partners or refer to the keys of data collection forms to help link the forms to each other. So for example the form "Suivi Post Intervention/Post intervention follow-up" uses a reference field to link to the form "Interventions/Interventions" and bring in the respective codes.
The form "Alertes/ Alerts" includes a subform which collects data about the severity of needs related to each sector. You can choose to delete or hide from data entry that form too.
Invite your team to report
You can invite your colleagues to practice with data entry or to cooperate on the form design.
Click on "Database settings" and then navigate to "User management." From there, you can invite others to access the database with different roles. You can click "Add user" to invite a team member to access the database. Select the Role you want this colleague to have and the forms you want them to be able to access with this Role.
This template is configured with four roles:
- Administrator: can make any change to the database, including customizing the forms but cannot share and publish reports based on data.
- Consultation: can view and export all data.
- Support: can do everything with the data and the database, except filling in Reviewer's fields. This is a role that can be assigned for example to an ActivityInfo team member to help you out with the forms.
- Partenaire/Partner: can work with records (view, export, add, edit and delete) that belong to their partner organization.
You can easily edit the roles to meet the needs of your team. Click on a role and then click on 'Edit permissions' to open the list of available permissions. Select the ones you want to keep and click on 'Save'.
Start reporting
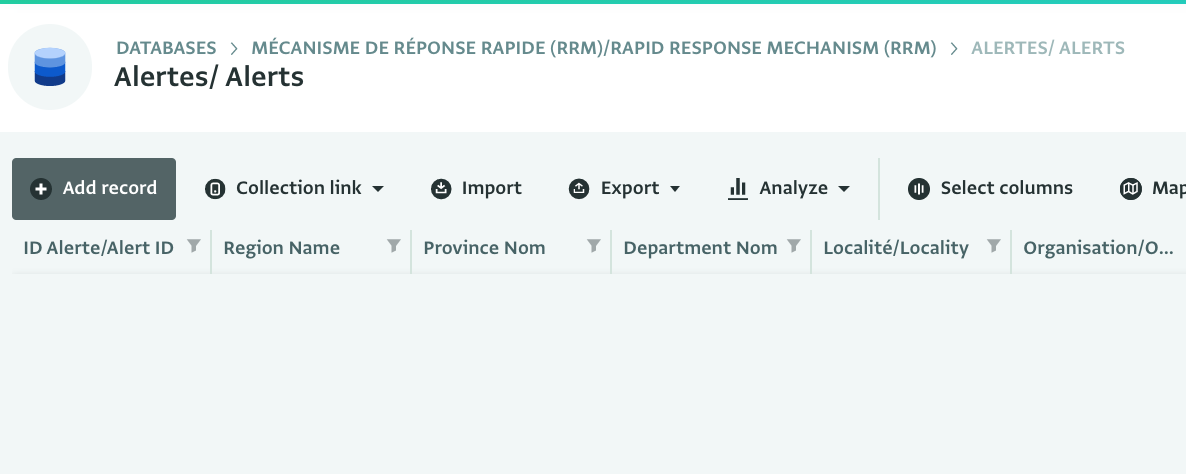
You can start adding data using a desktop or a mobile device. Navigate to the "Alertes/ Alerts" form and click on 'Add record' to add a record. You can also import your own data.
You can edit or delete records (use Shift+Click to delete multiple).
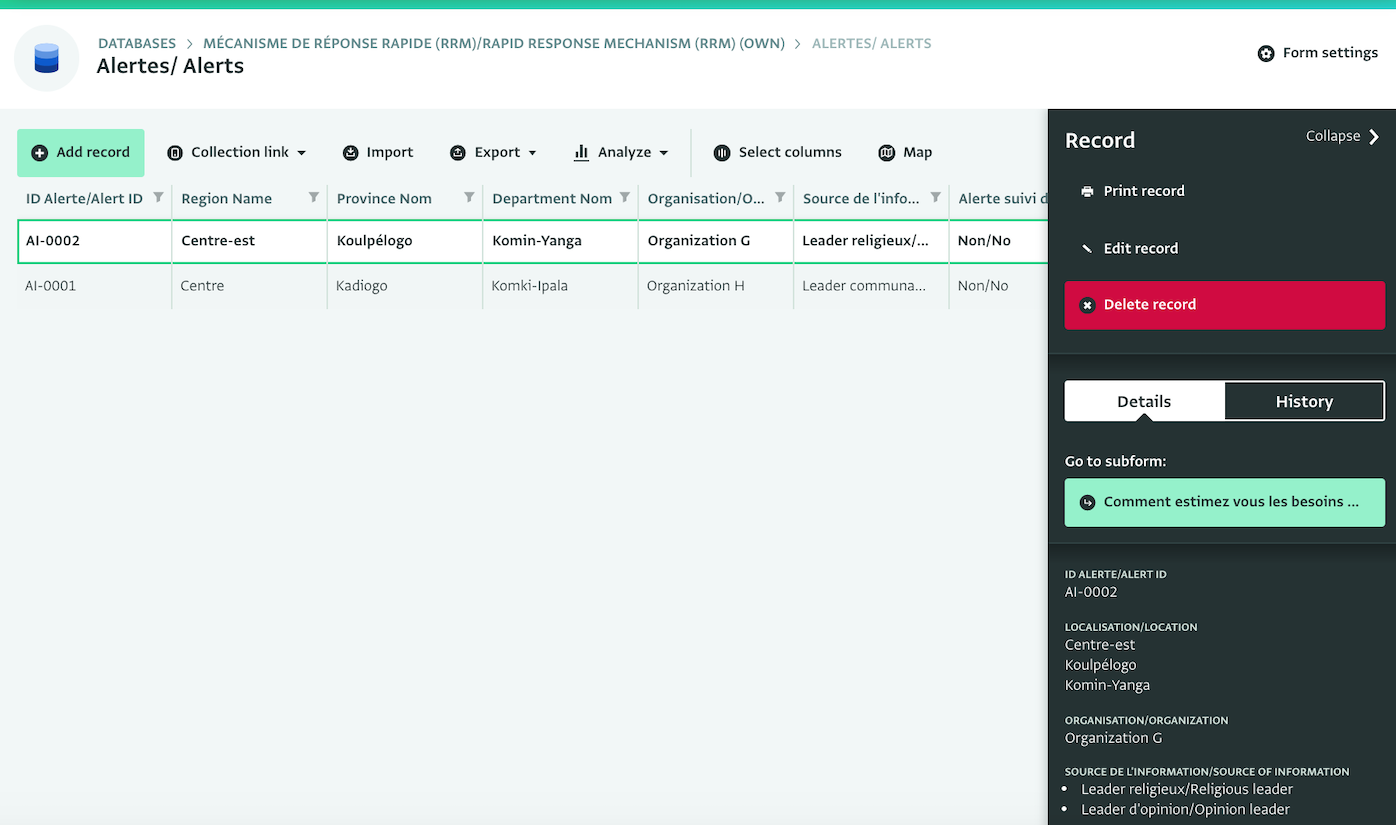
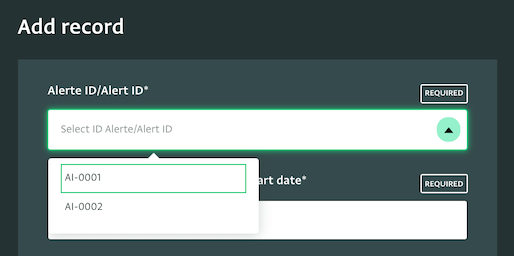
Continue adding records to the "Alertes/ Alerts" form and then practice with the "Évaluations/Evaluations" form. Notice how the field "Alerte ID/Alert ID" in the "Évaluations/Evaluations" form presents you with the list of Alert IDs you added in the "Alertes/ Alerts" form. This is how the forms are linked to each other.
Then, start working with the "Interventions/Interventions" form. Notice how the fields "Code Alerte/Alert Code" and "Code Evaluation/Evaluation code" presents you with the codes added to the forms "Alertes/ Alerts" and "Évaluations/Evaluations".
Finally, add records to the form "Suivi Post Intervention/Post intervention follow-up".
Explore the data as they are added to the forms
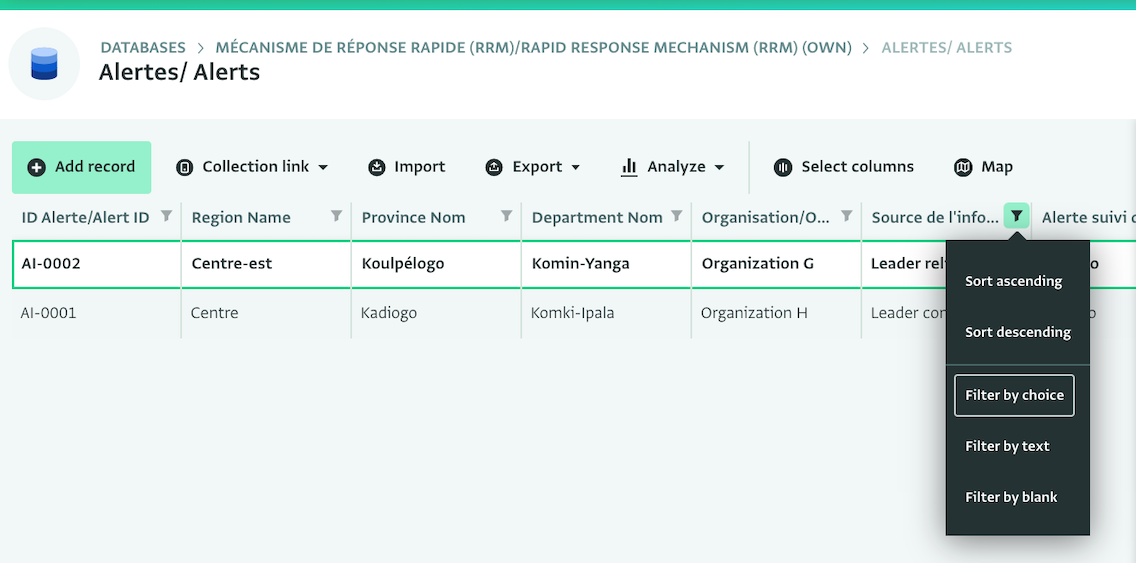
As you and your team start reporting, you will see new records appearing in the Table View. You can filter and sort these records based on your preferences to work faster.
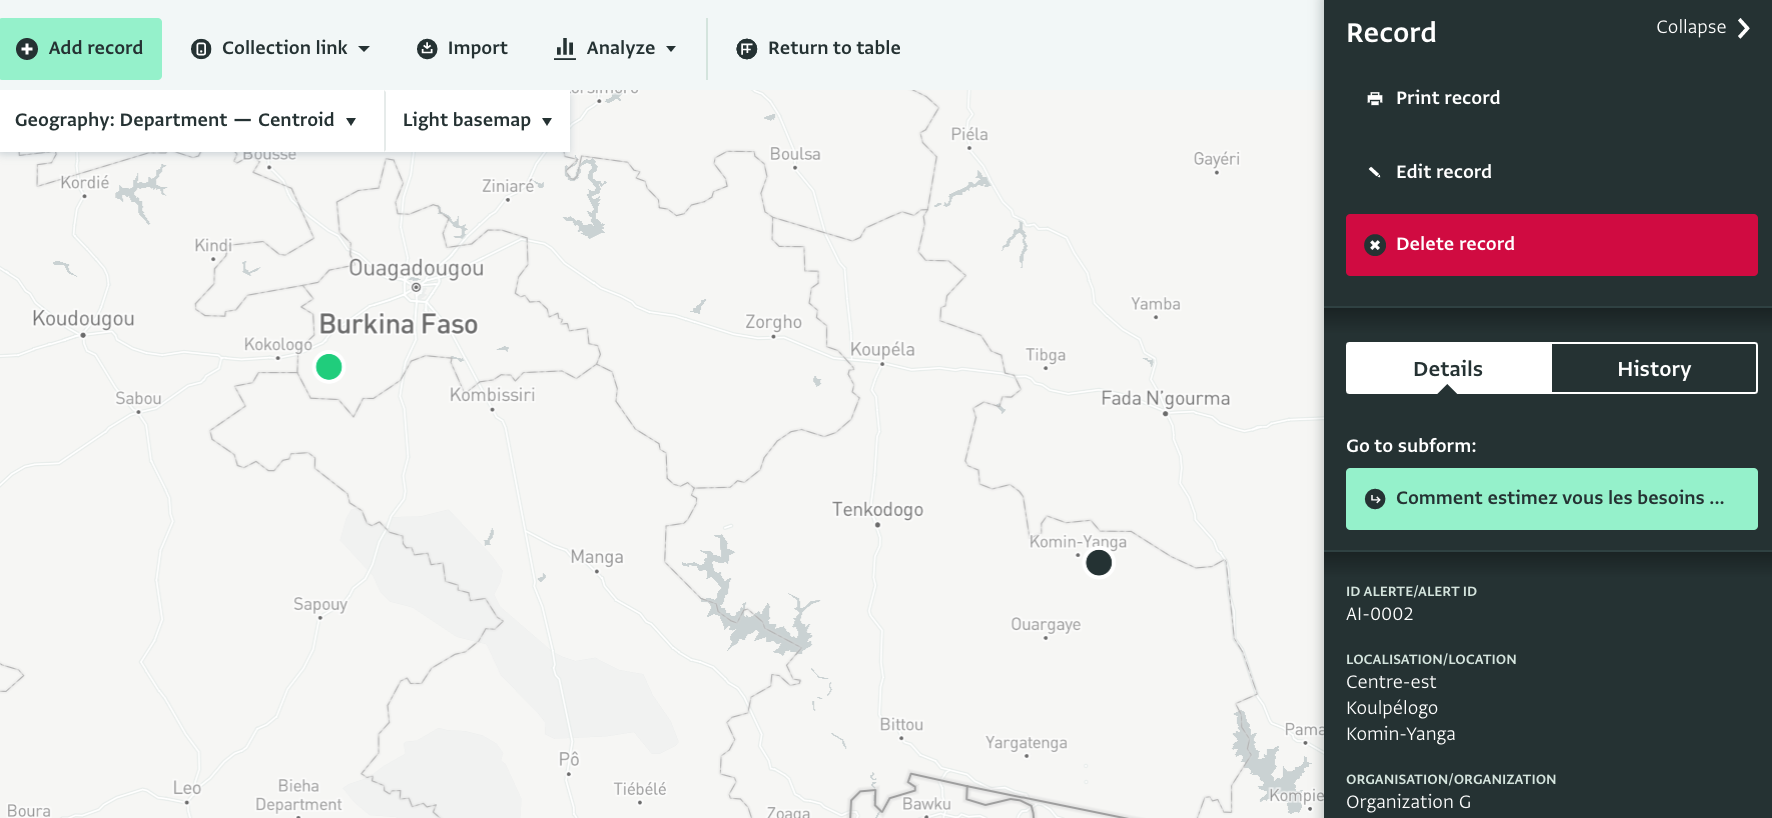
Using the Map View you can get an overview of all damage reports on a map. To be able to see records on Map View, Records need to have either a Geographic point field or a reference to the geographic database.
Well done!
You have created a complete database for a Rapid Response Mechanism. You can always add more forms and reports based on your requirements.
Don’t hesitate to contact us if you need help setting up more forms for monitoring emergency response in ActivityInfo.