Language: English
In this tutorial, you will learn how to limit a user’s permission to view only the records that are related to the organization they are working for. We will do this by adding a role with a parameter and a condition.
Before you start
- Make sure you have already added a database and
- You have been assigned to a role with the “Manage roles” and “Manage users” operation permitted.
- If not, you can use the Who's doing what where (3W) database template to add a new database.
In this tutorial, you will learn how to limit a user’s permission to view only the records that are related to the organization they are working for. We will do this by adding a role with a parameter and a condition.
In this tutorial, we will use the example of a linking records and permissions to reporting partner organizations, but you can apply the same logic to any reference field, such as province, or region, or sector.
Add a Partner Form
Before beginning, we need a form which contains the list of the partners that a user can be assigned to.
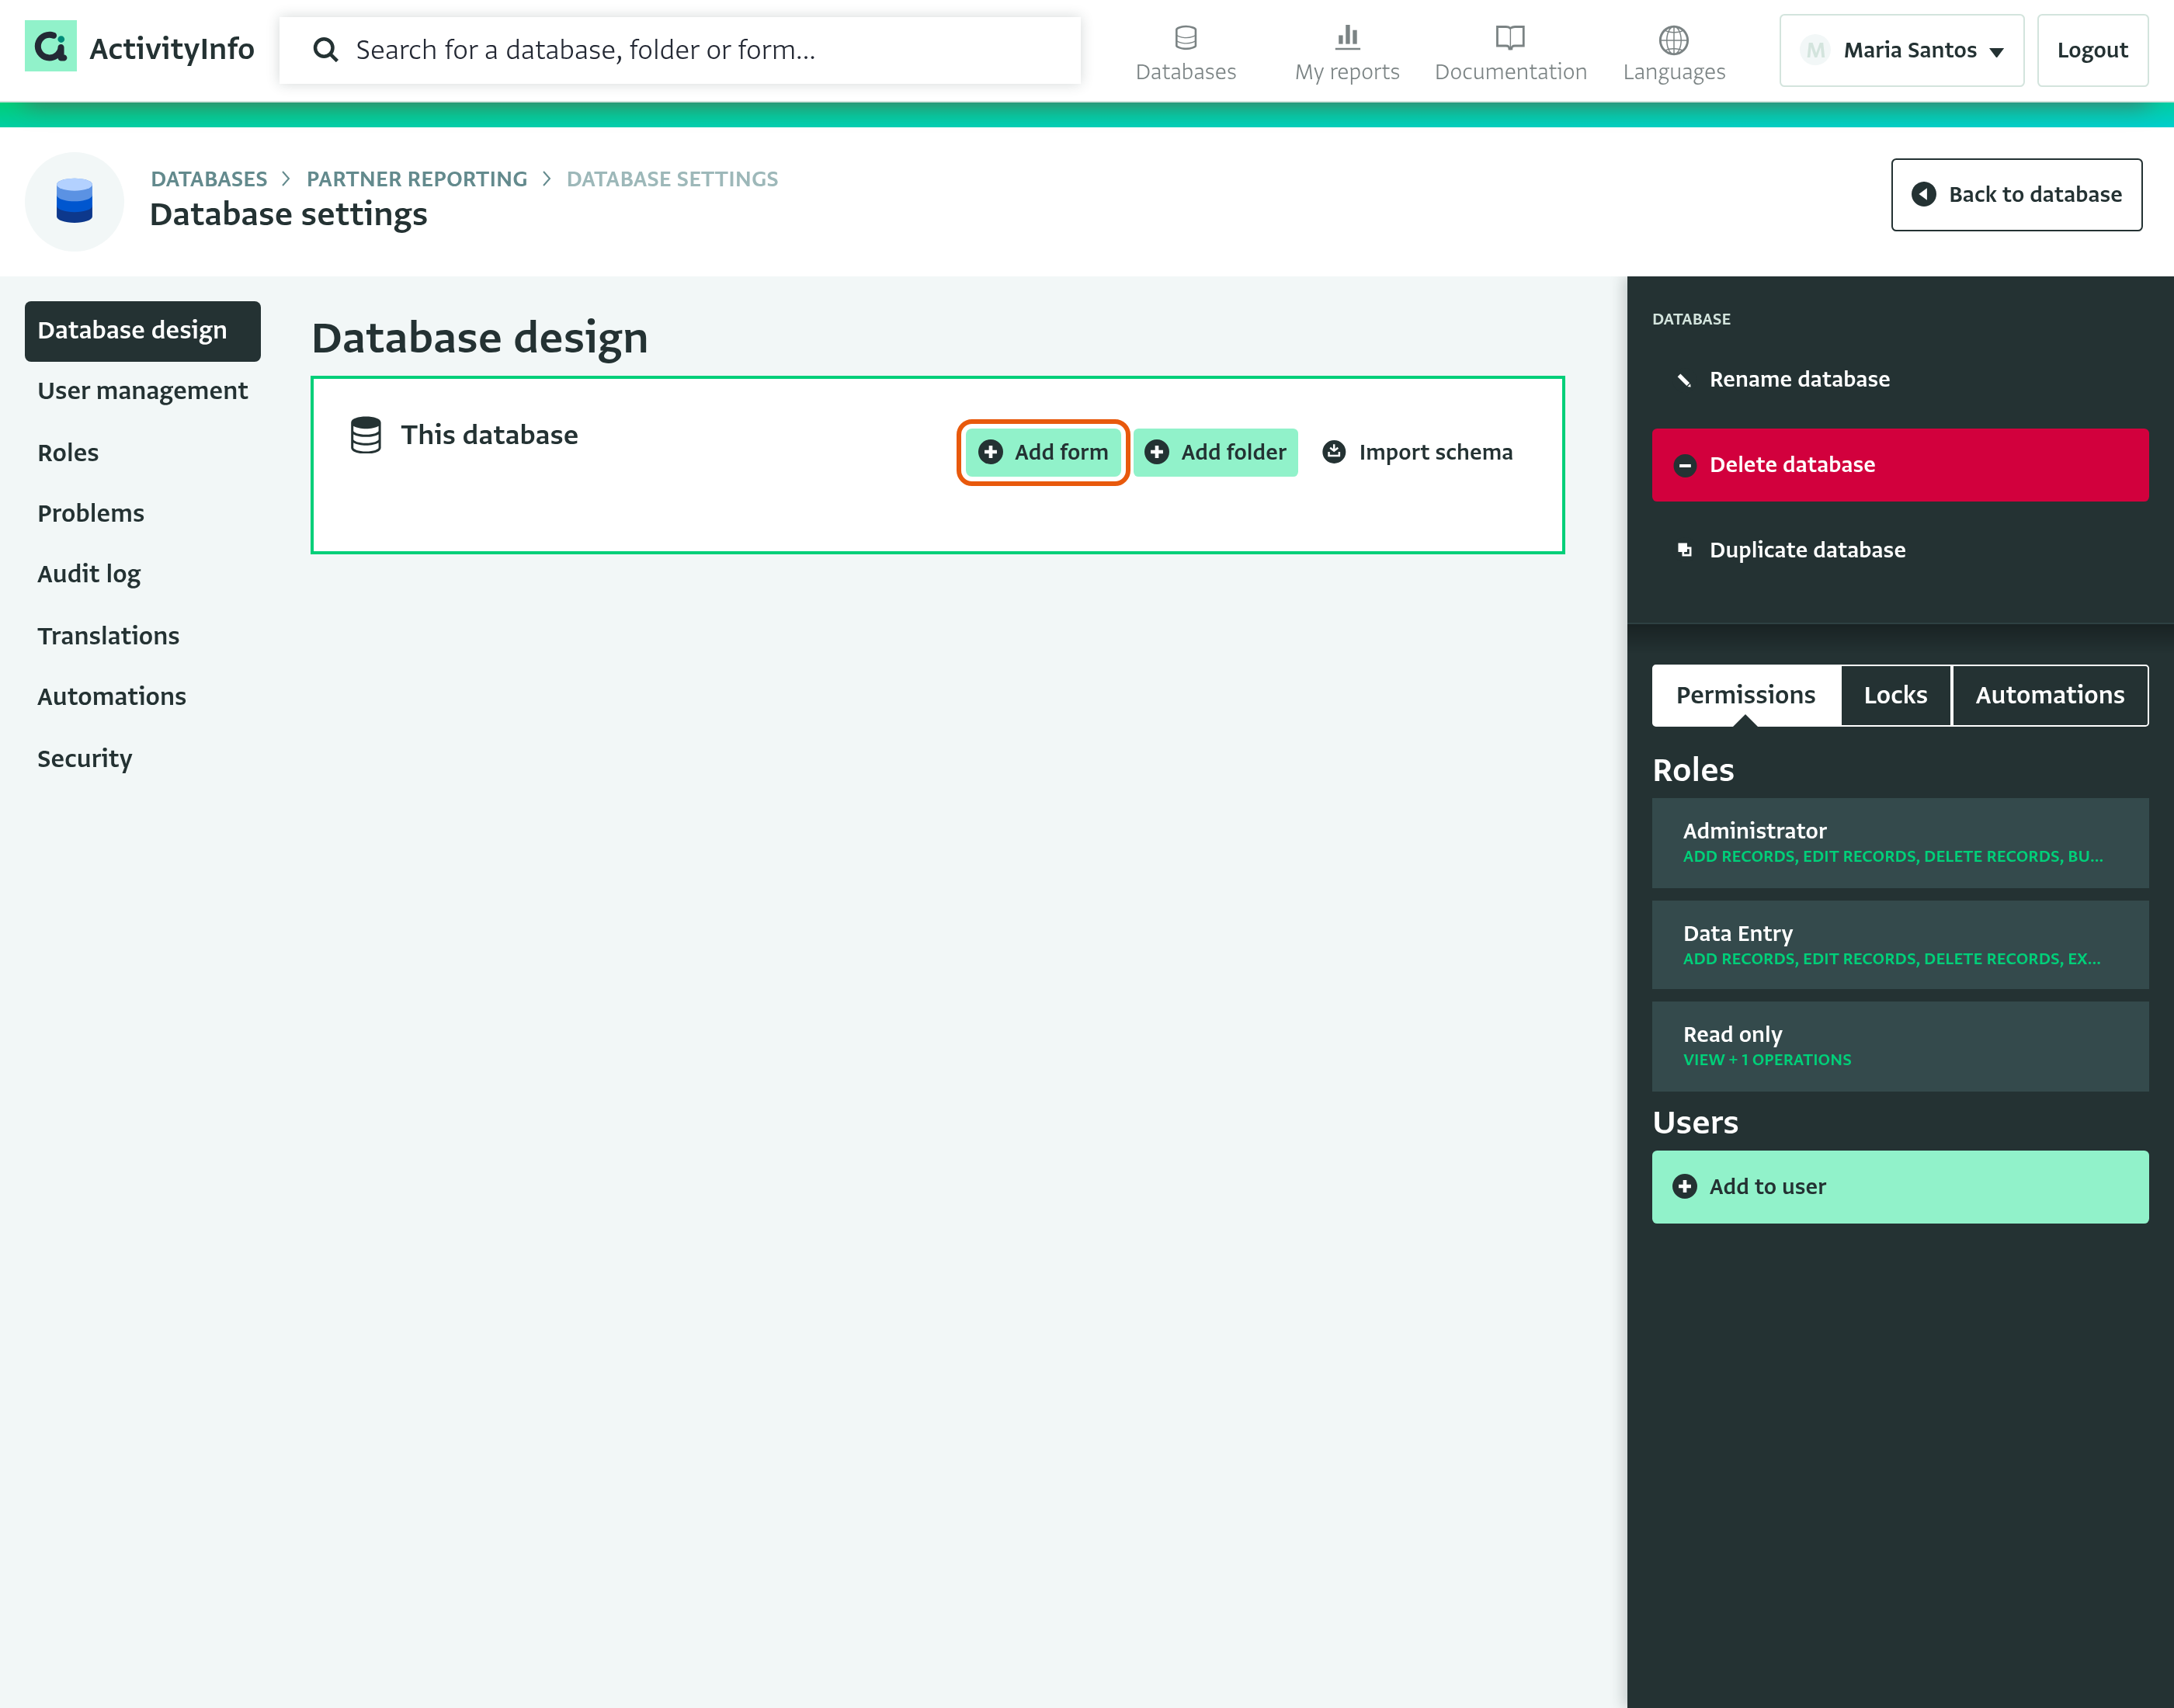
- Go to Database Settings, and then to the “Database design” section. Click “Add form”.
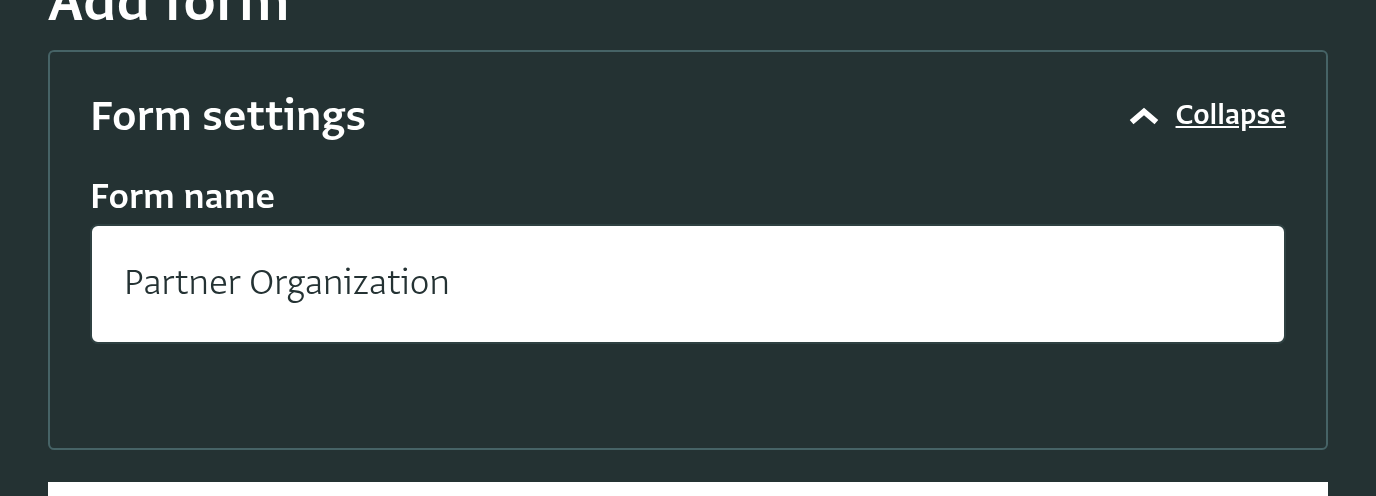
- In the following screen, enter the form name “Partner Organization”.
- Add a single Text field called "Name". Make this field Required and a Key field.
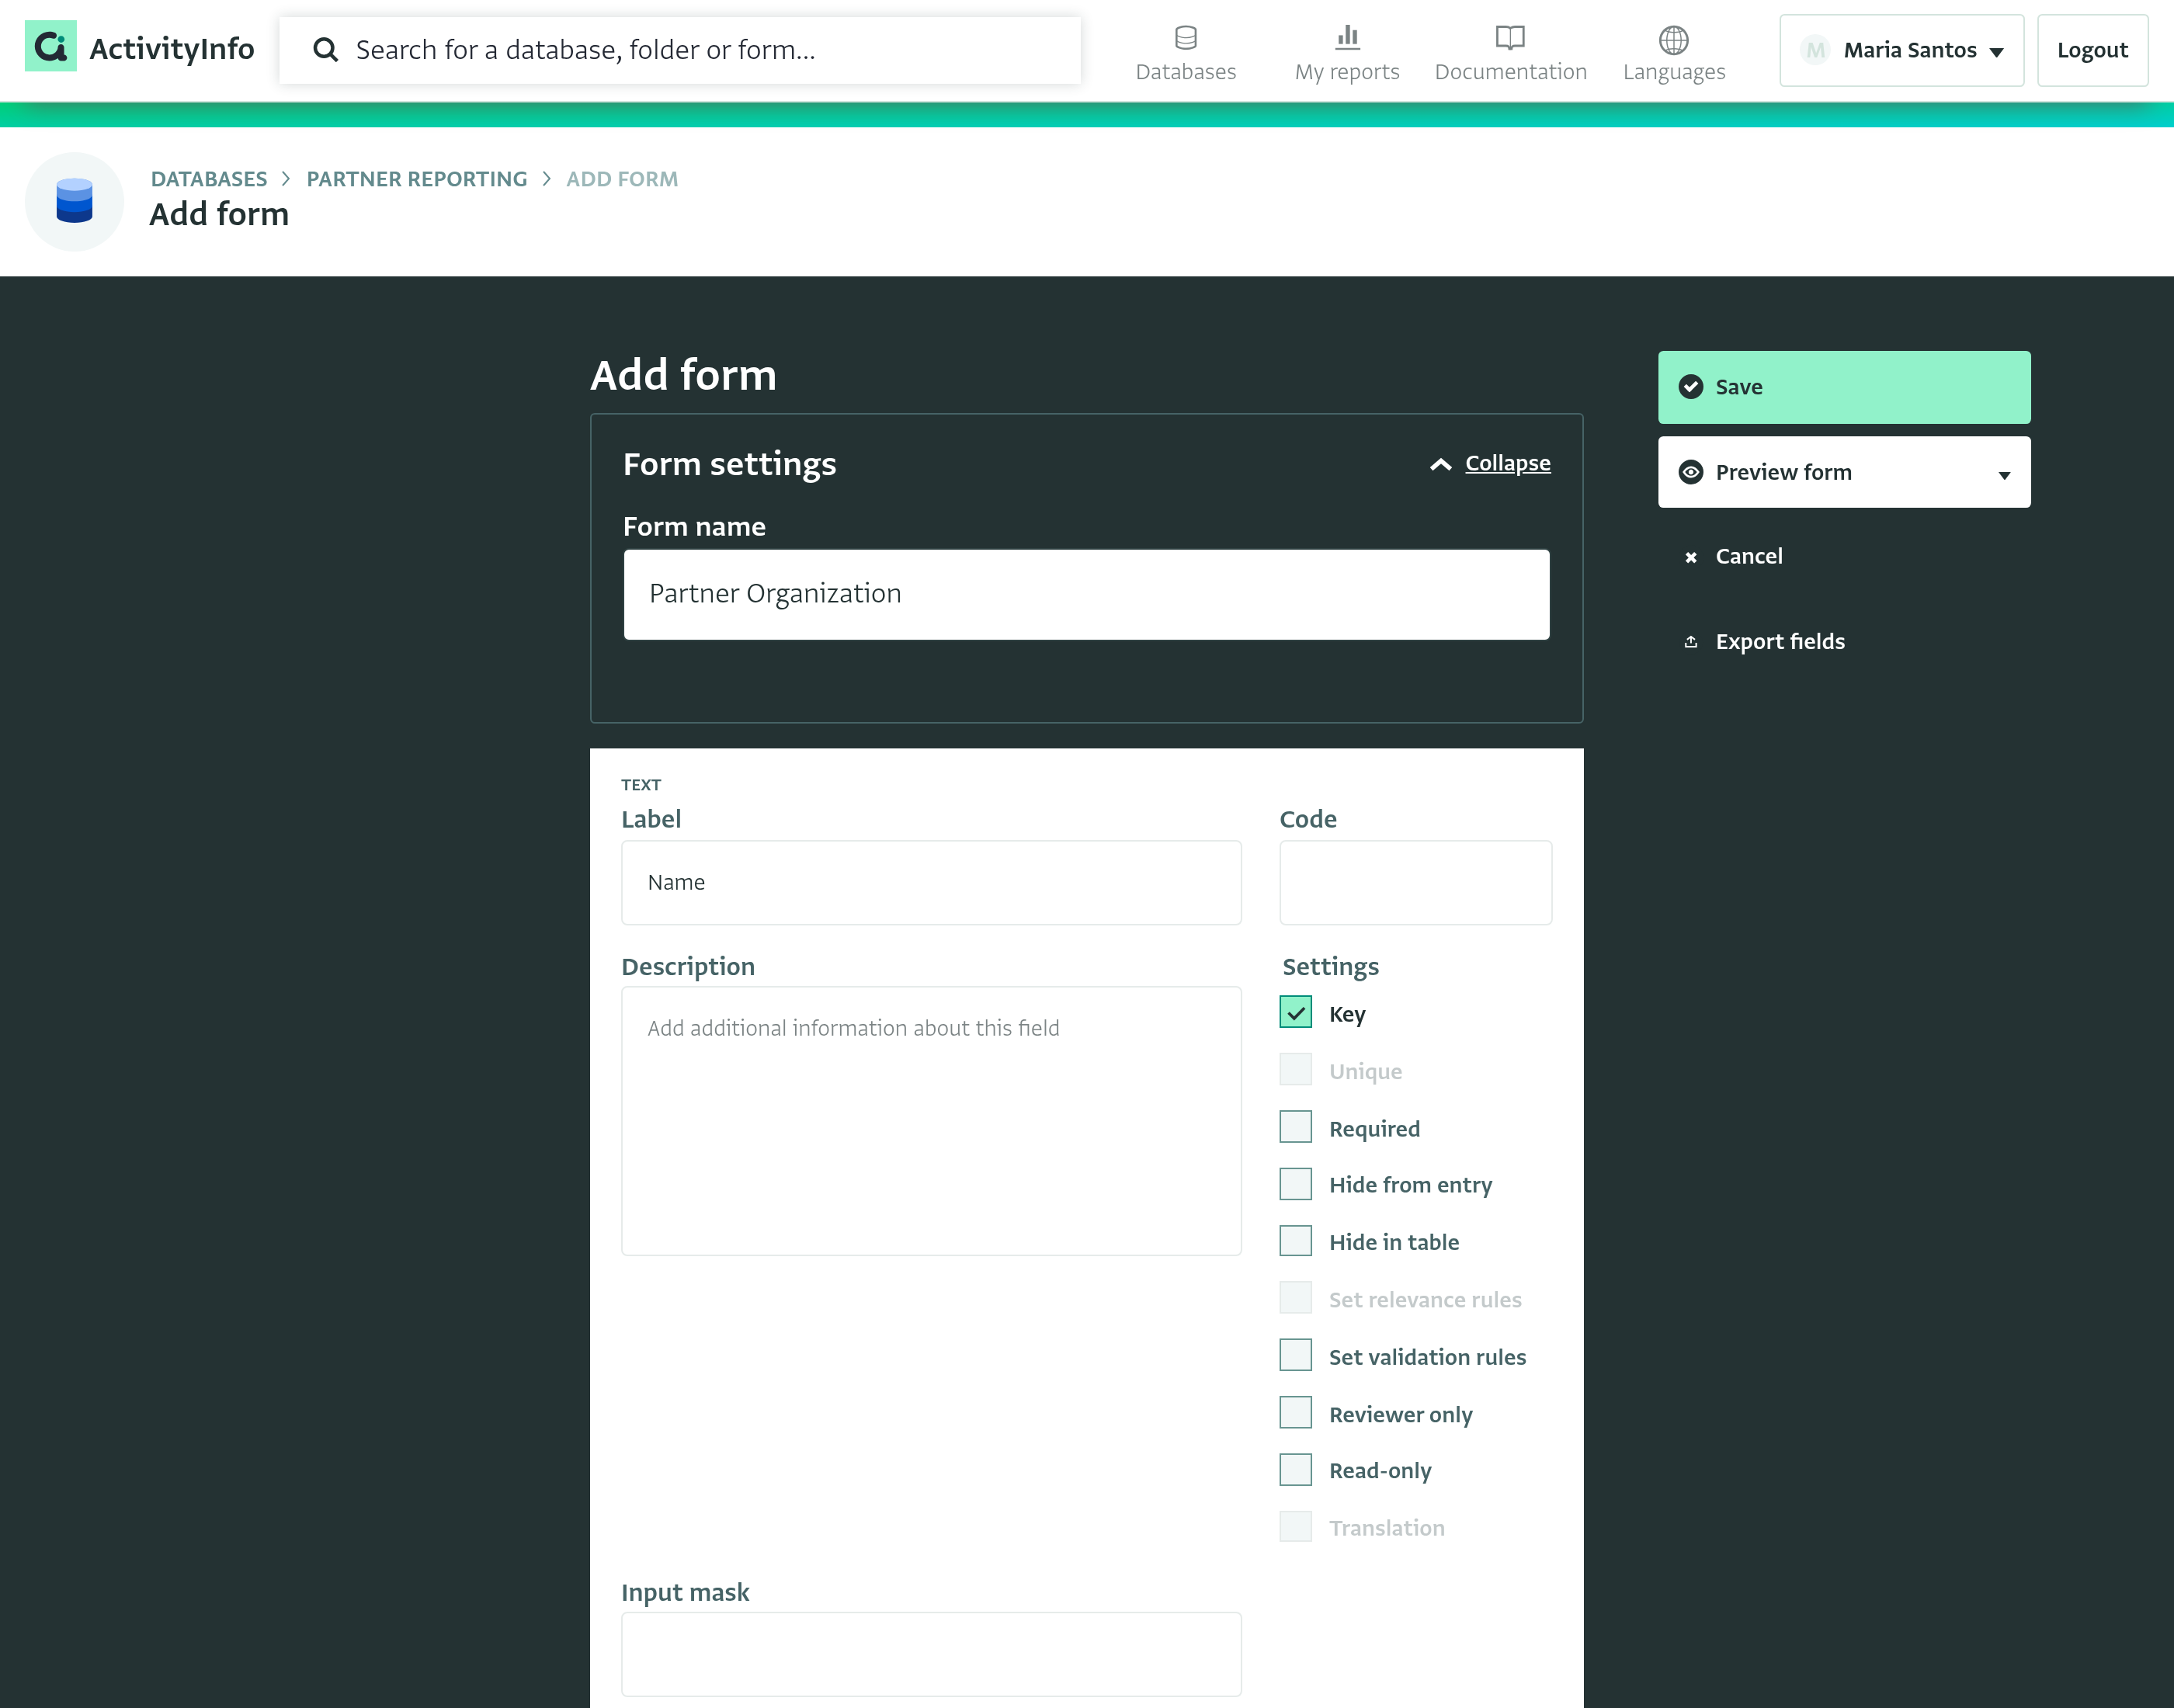
- Save the form.
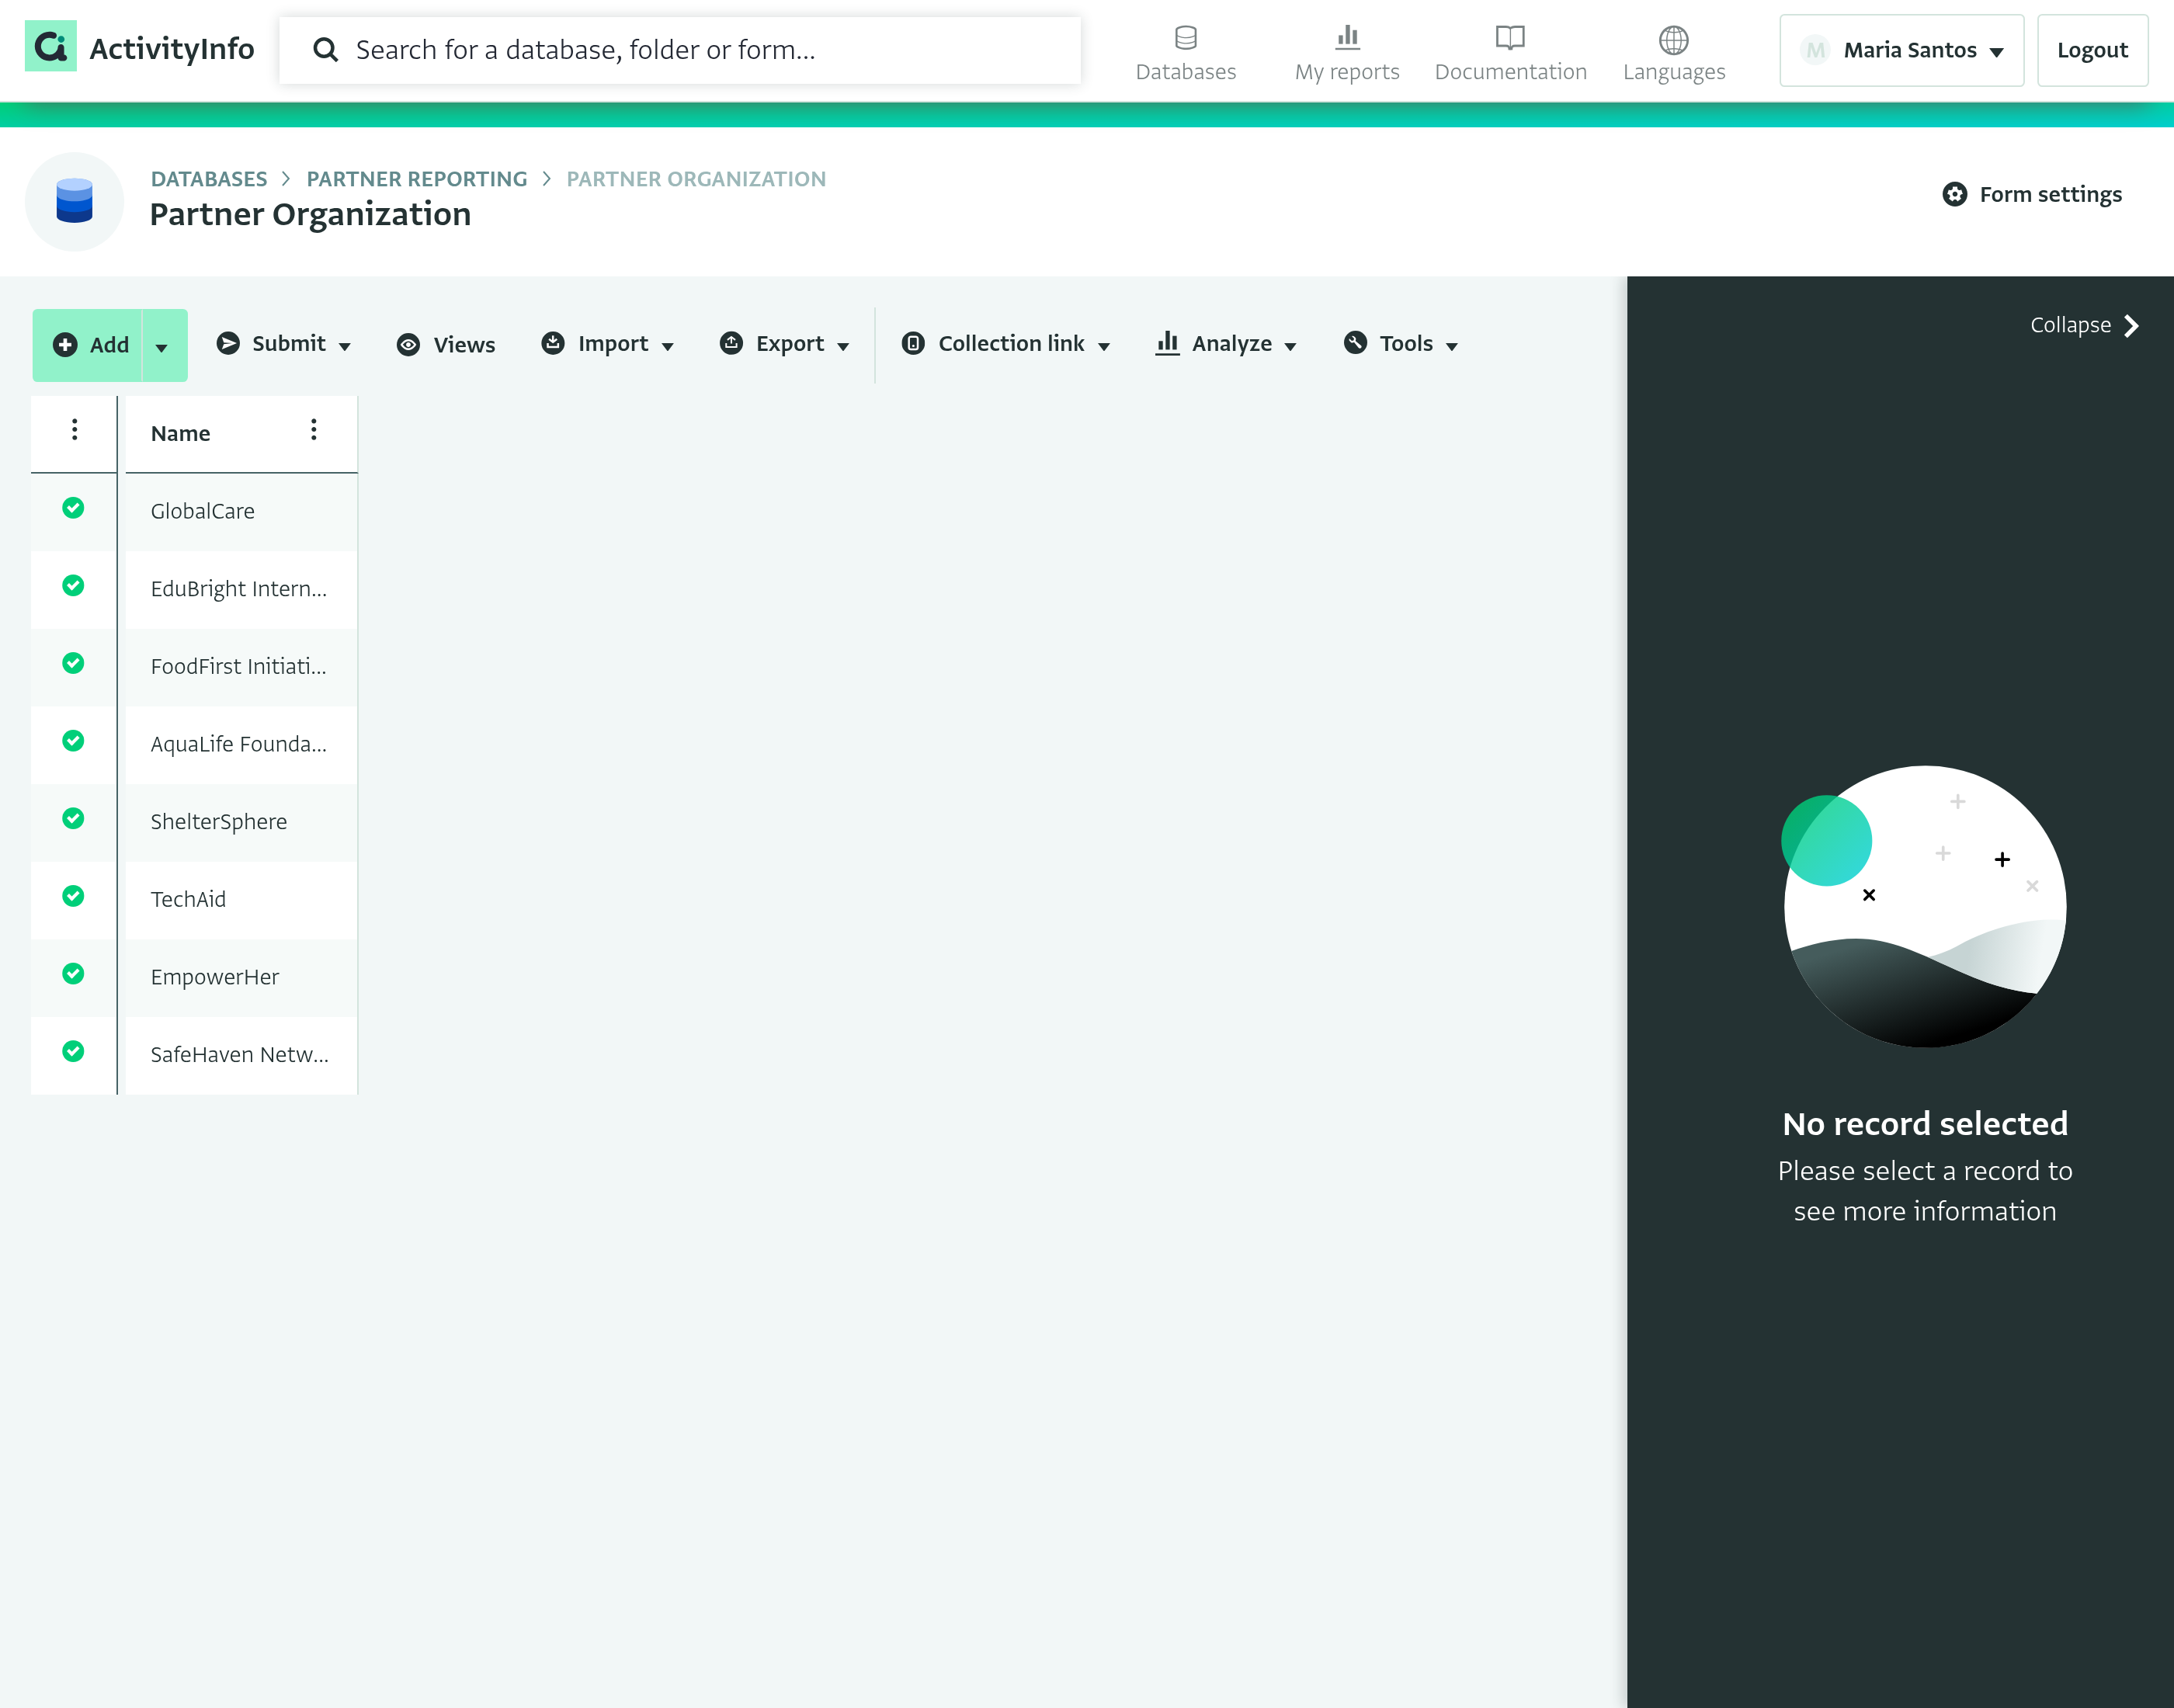
- Now you should see the table view of this form.
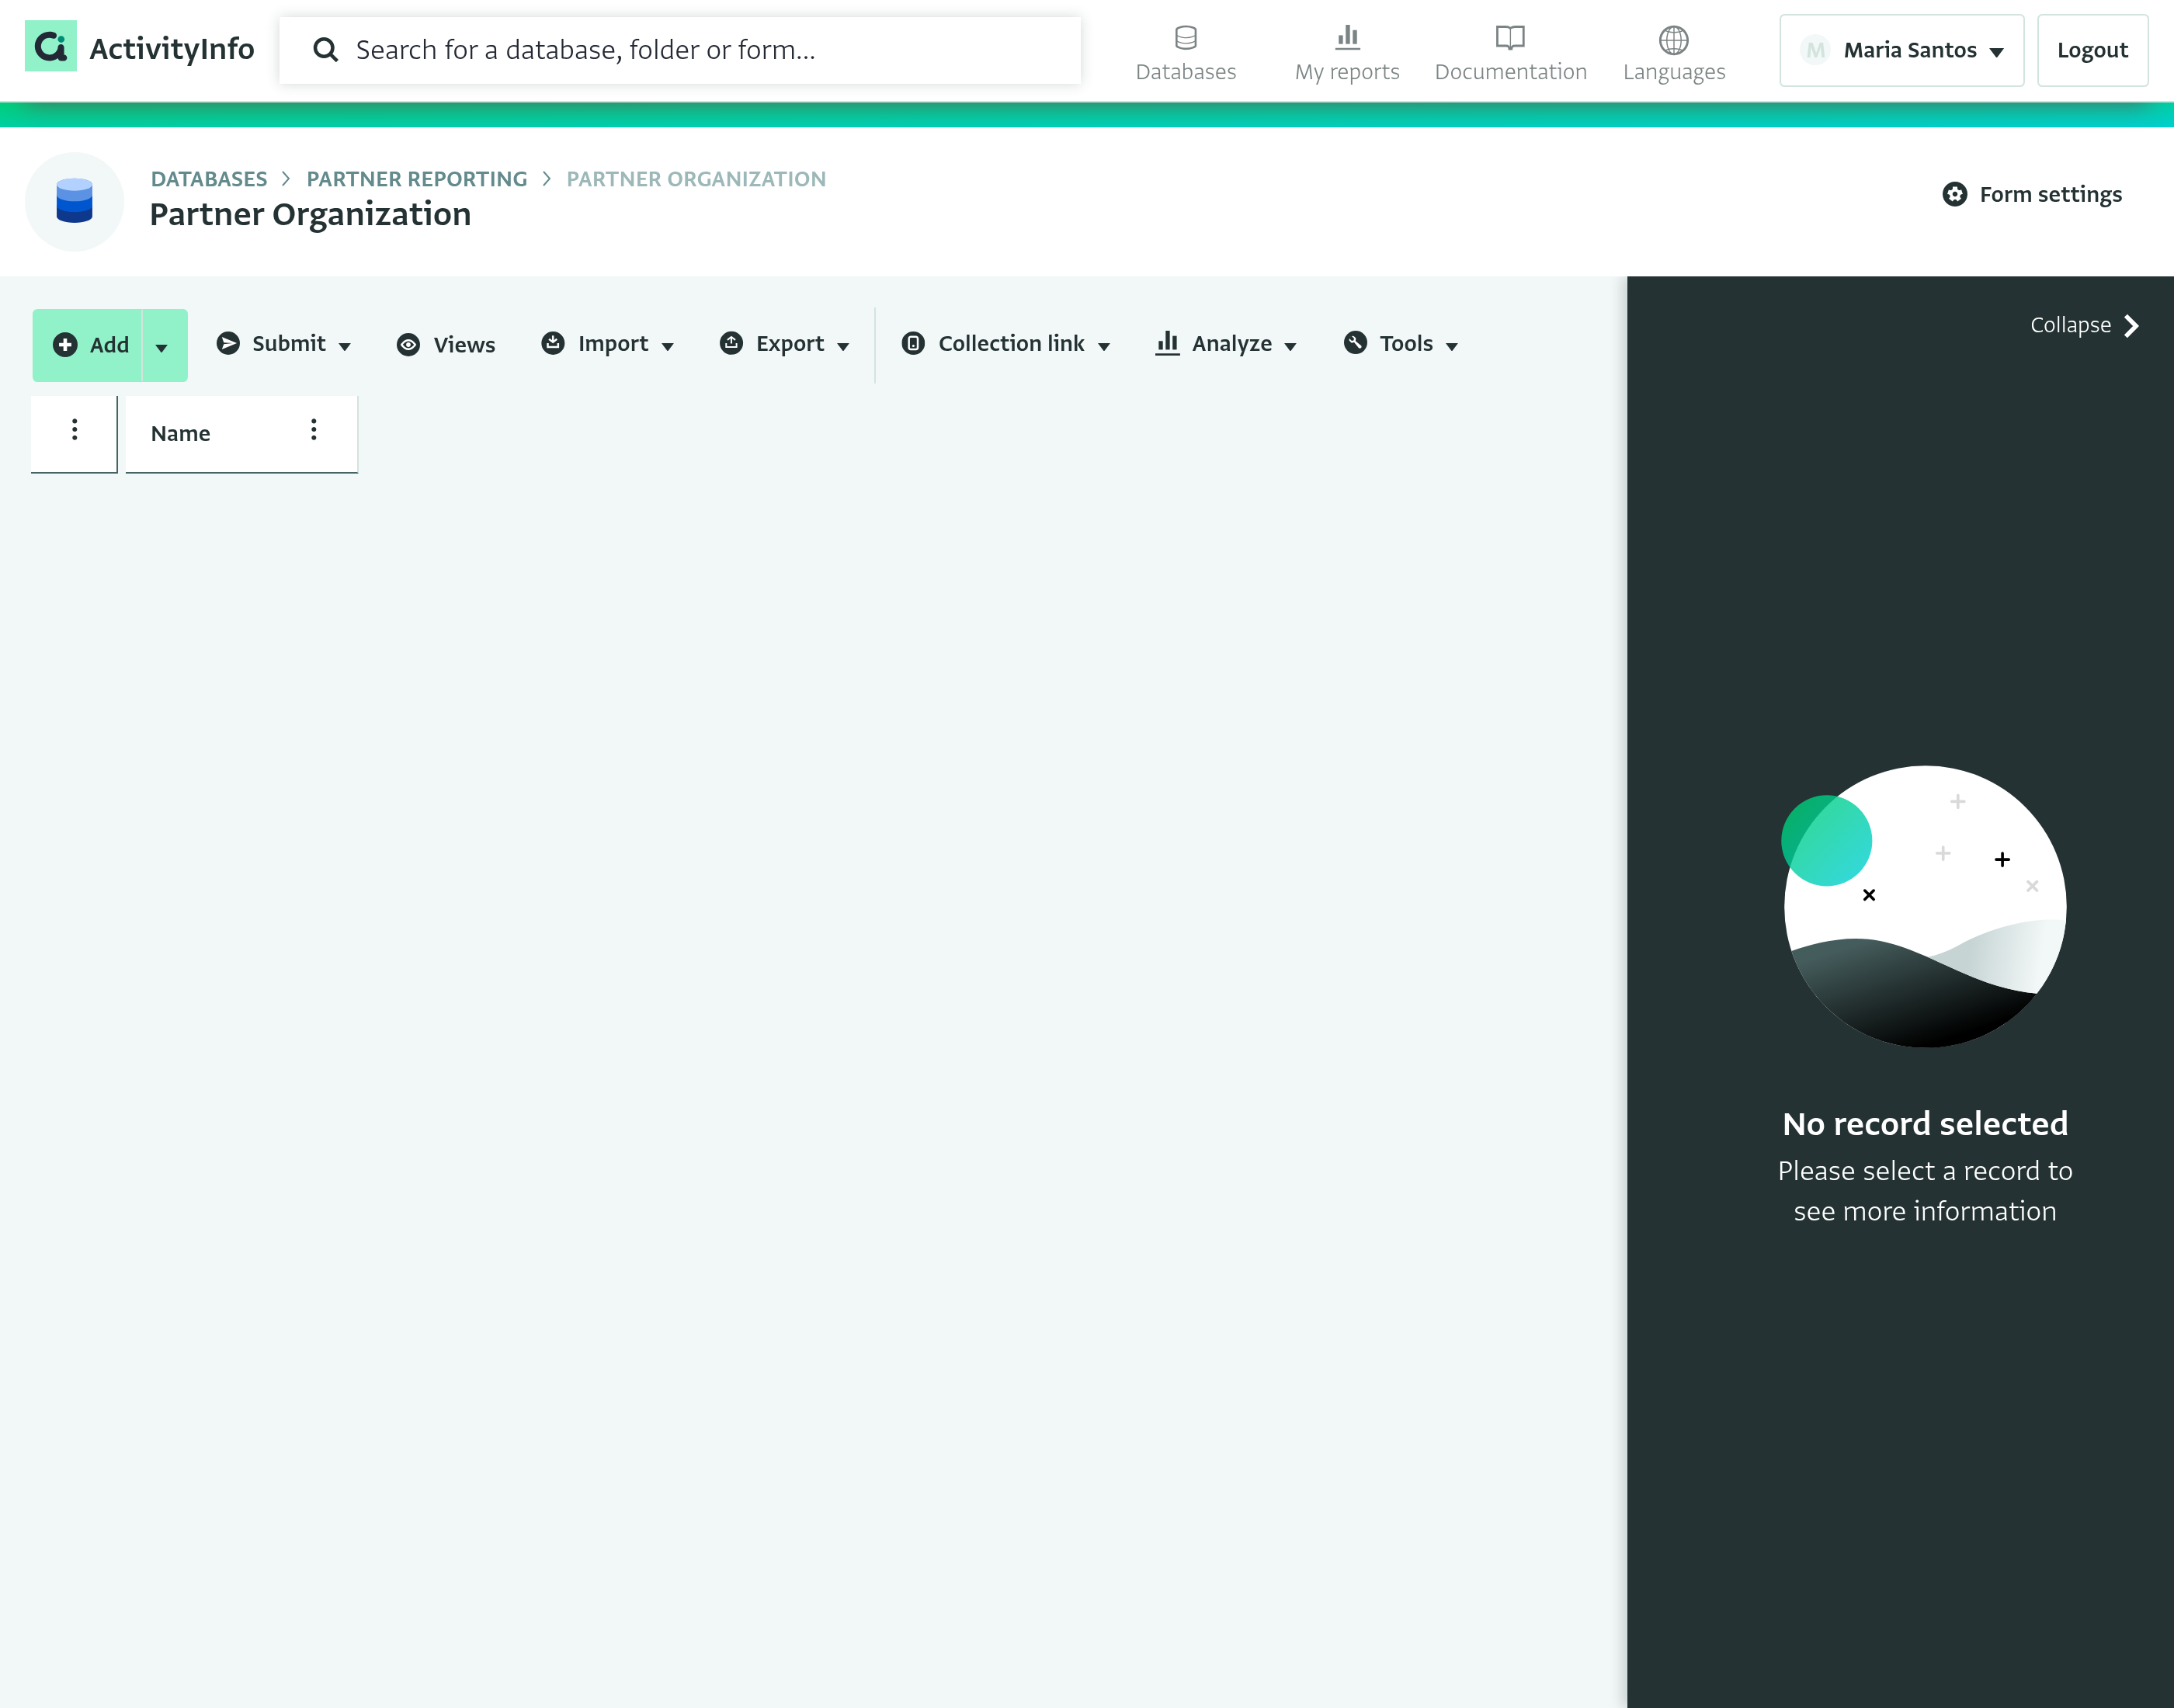
- Click "Add Record" to add the first Partner. In this example, we are using the name "GlobalCare" and then Save.
- Click Add Record to add each Partner, with the names “EduBright International”,”FoodFirst Initiative”, “AquaLife Foundation” , “ShelterSphere” , “TechAid”, “EmpowerHer”, and “SafeHaven Network” and after adding these partner names as records, Save.
- Return to the Database Settings.
Add a form for monthly progress reports
To apply conditional permission on forms, it is important that each form has a reference to your Partner Form. This helps establish the relationship between each record and the partner to whom it belongs.
Go to Database Settings, and then to the “Database design” section. Click “Add form”.
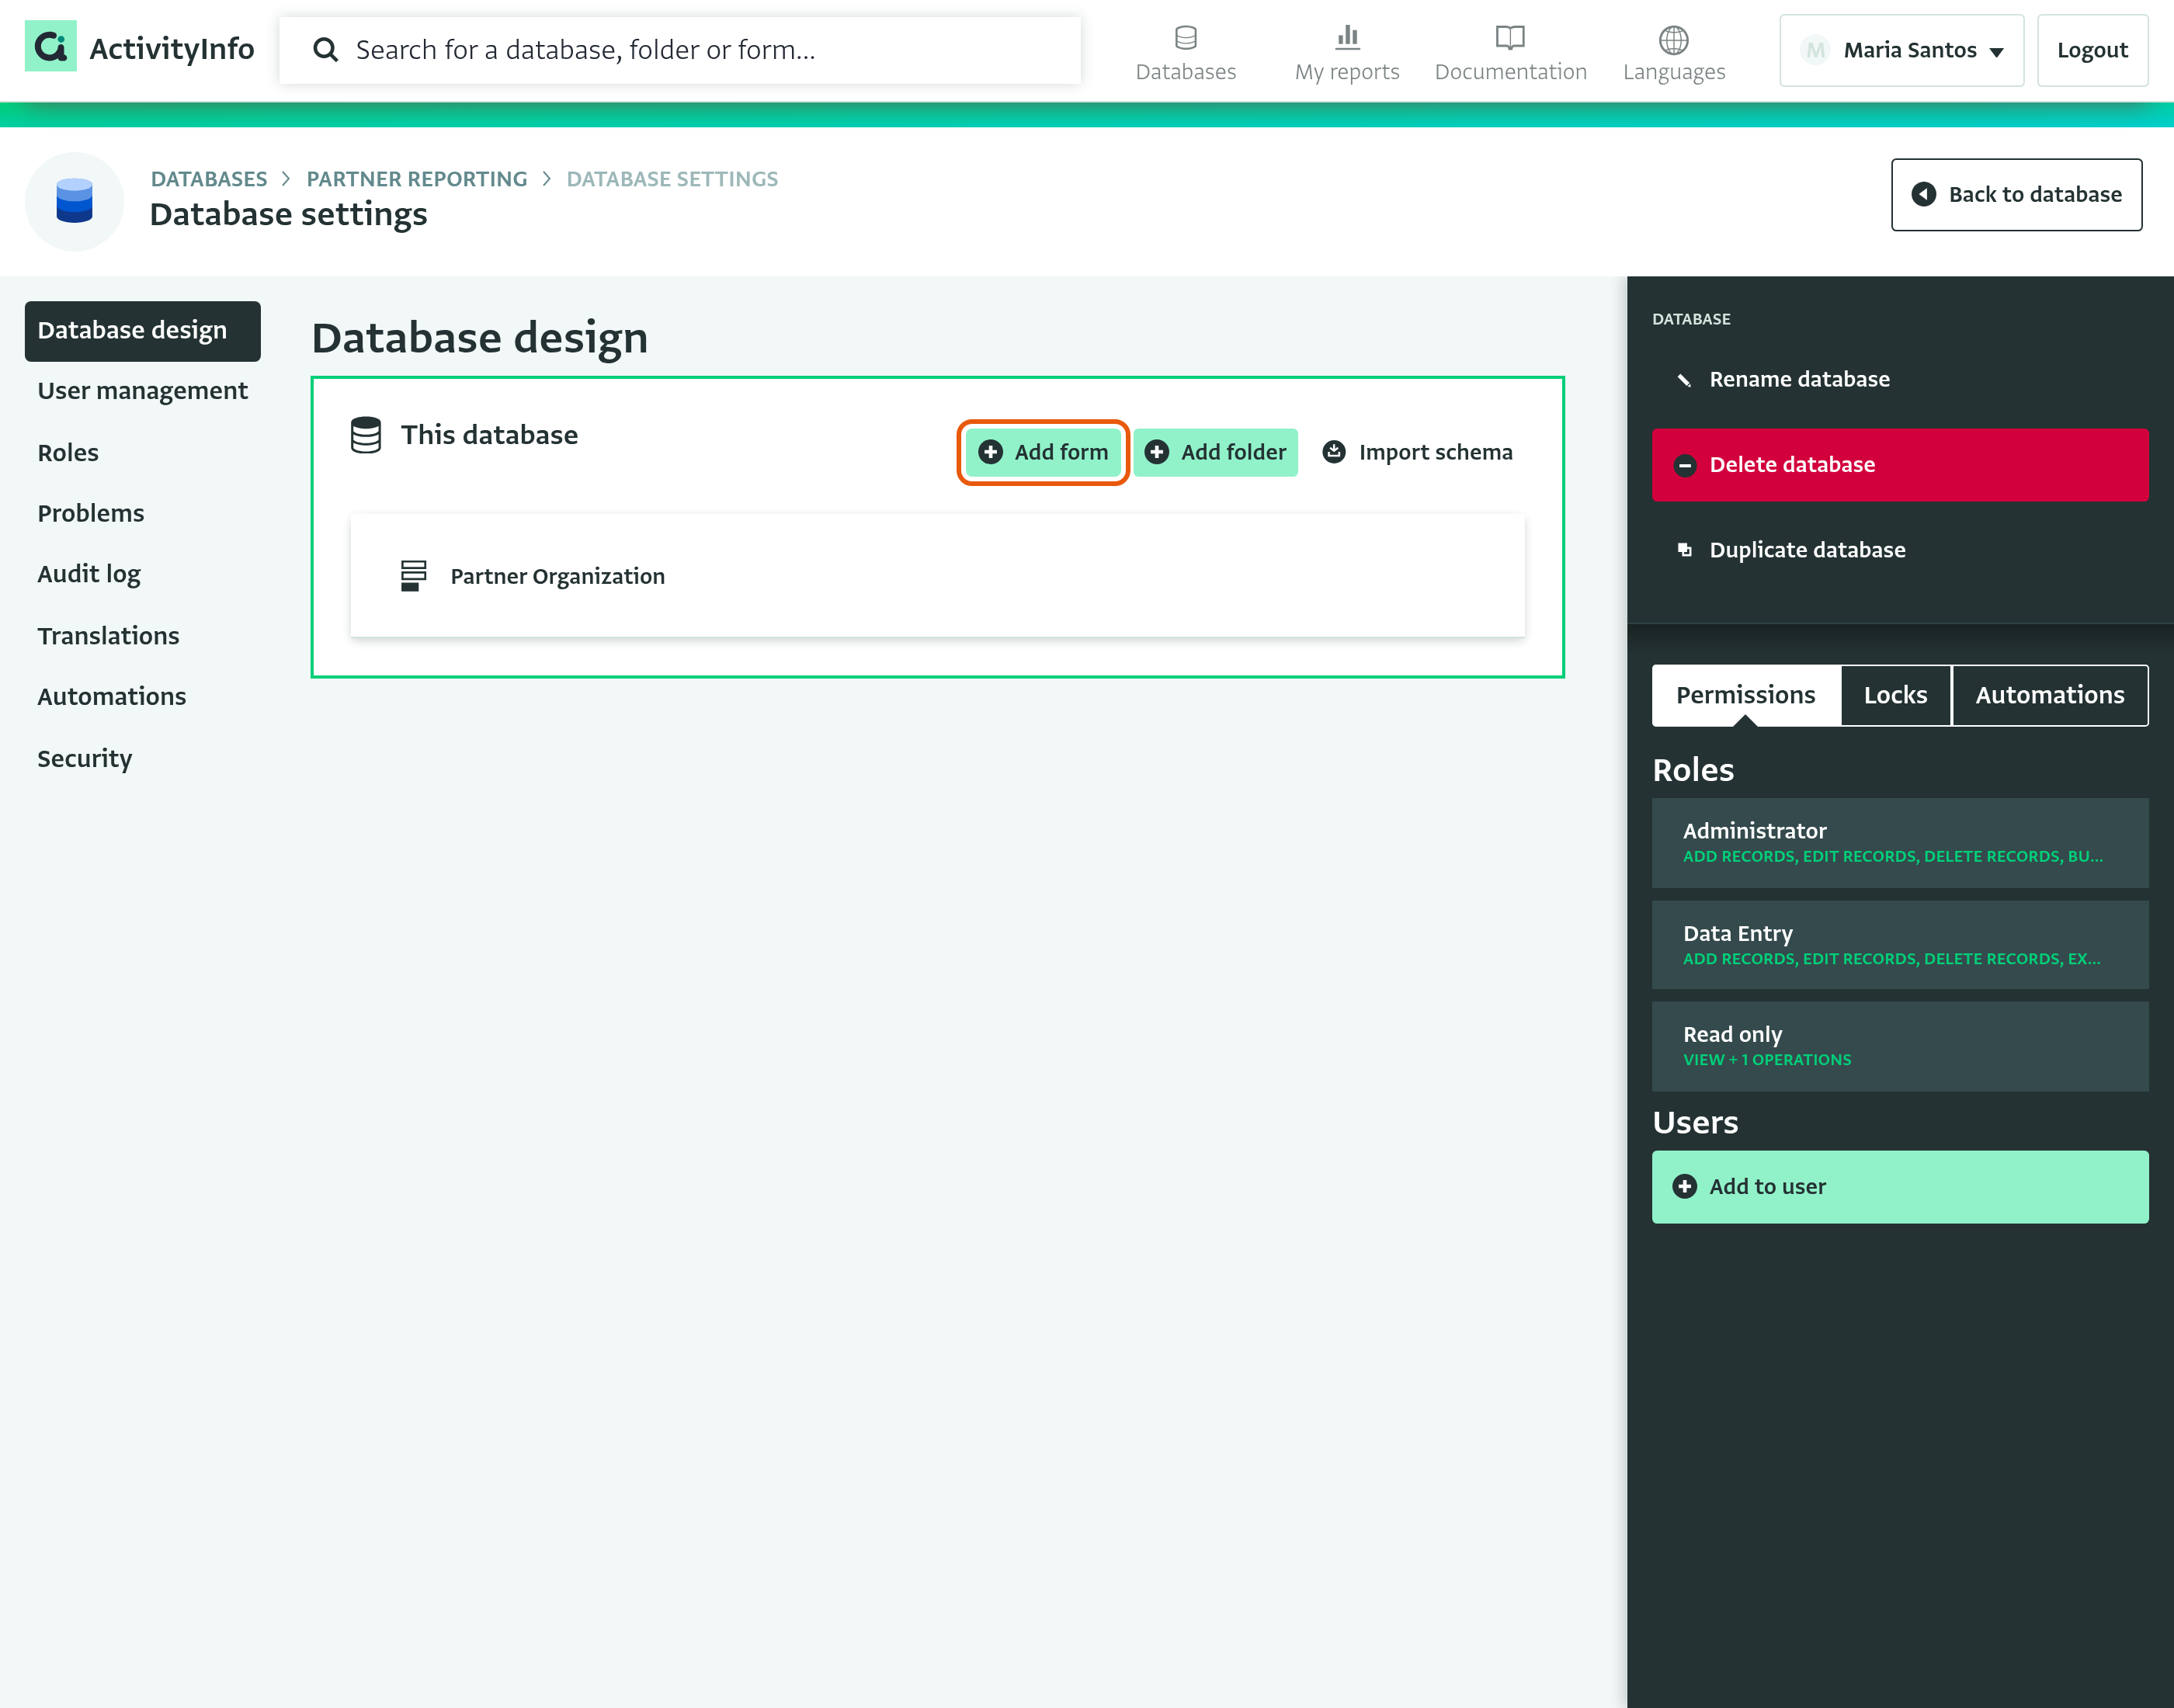
- In the following screen, enter the form name “Progress report”.
- Add a Month field called “Month”, make it required and click “Done”.
- Add a Reference field. Select the Partner Organization form and click “Continue”. Name the field “Partner” and make it required.
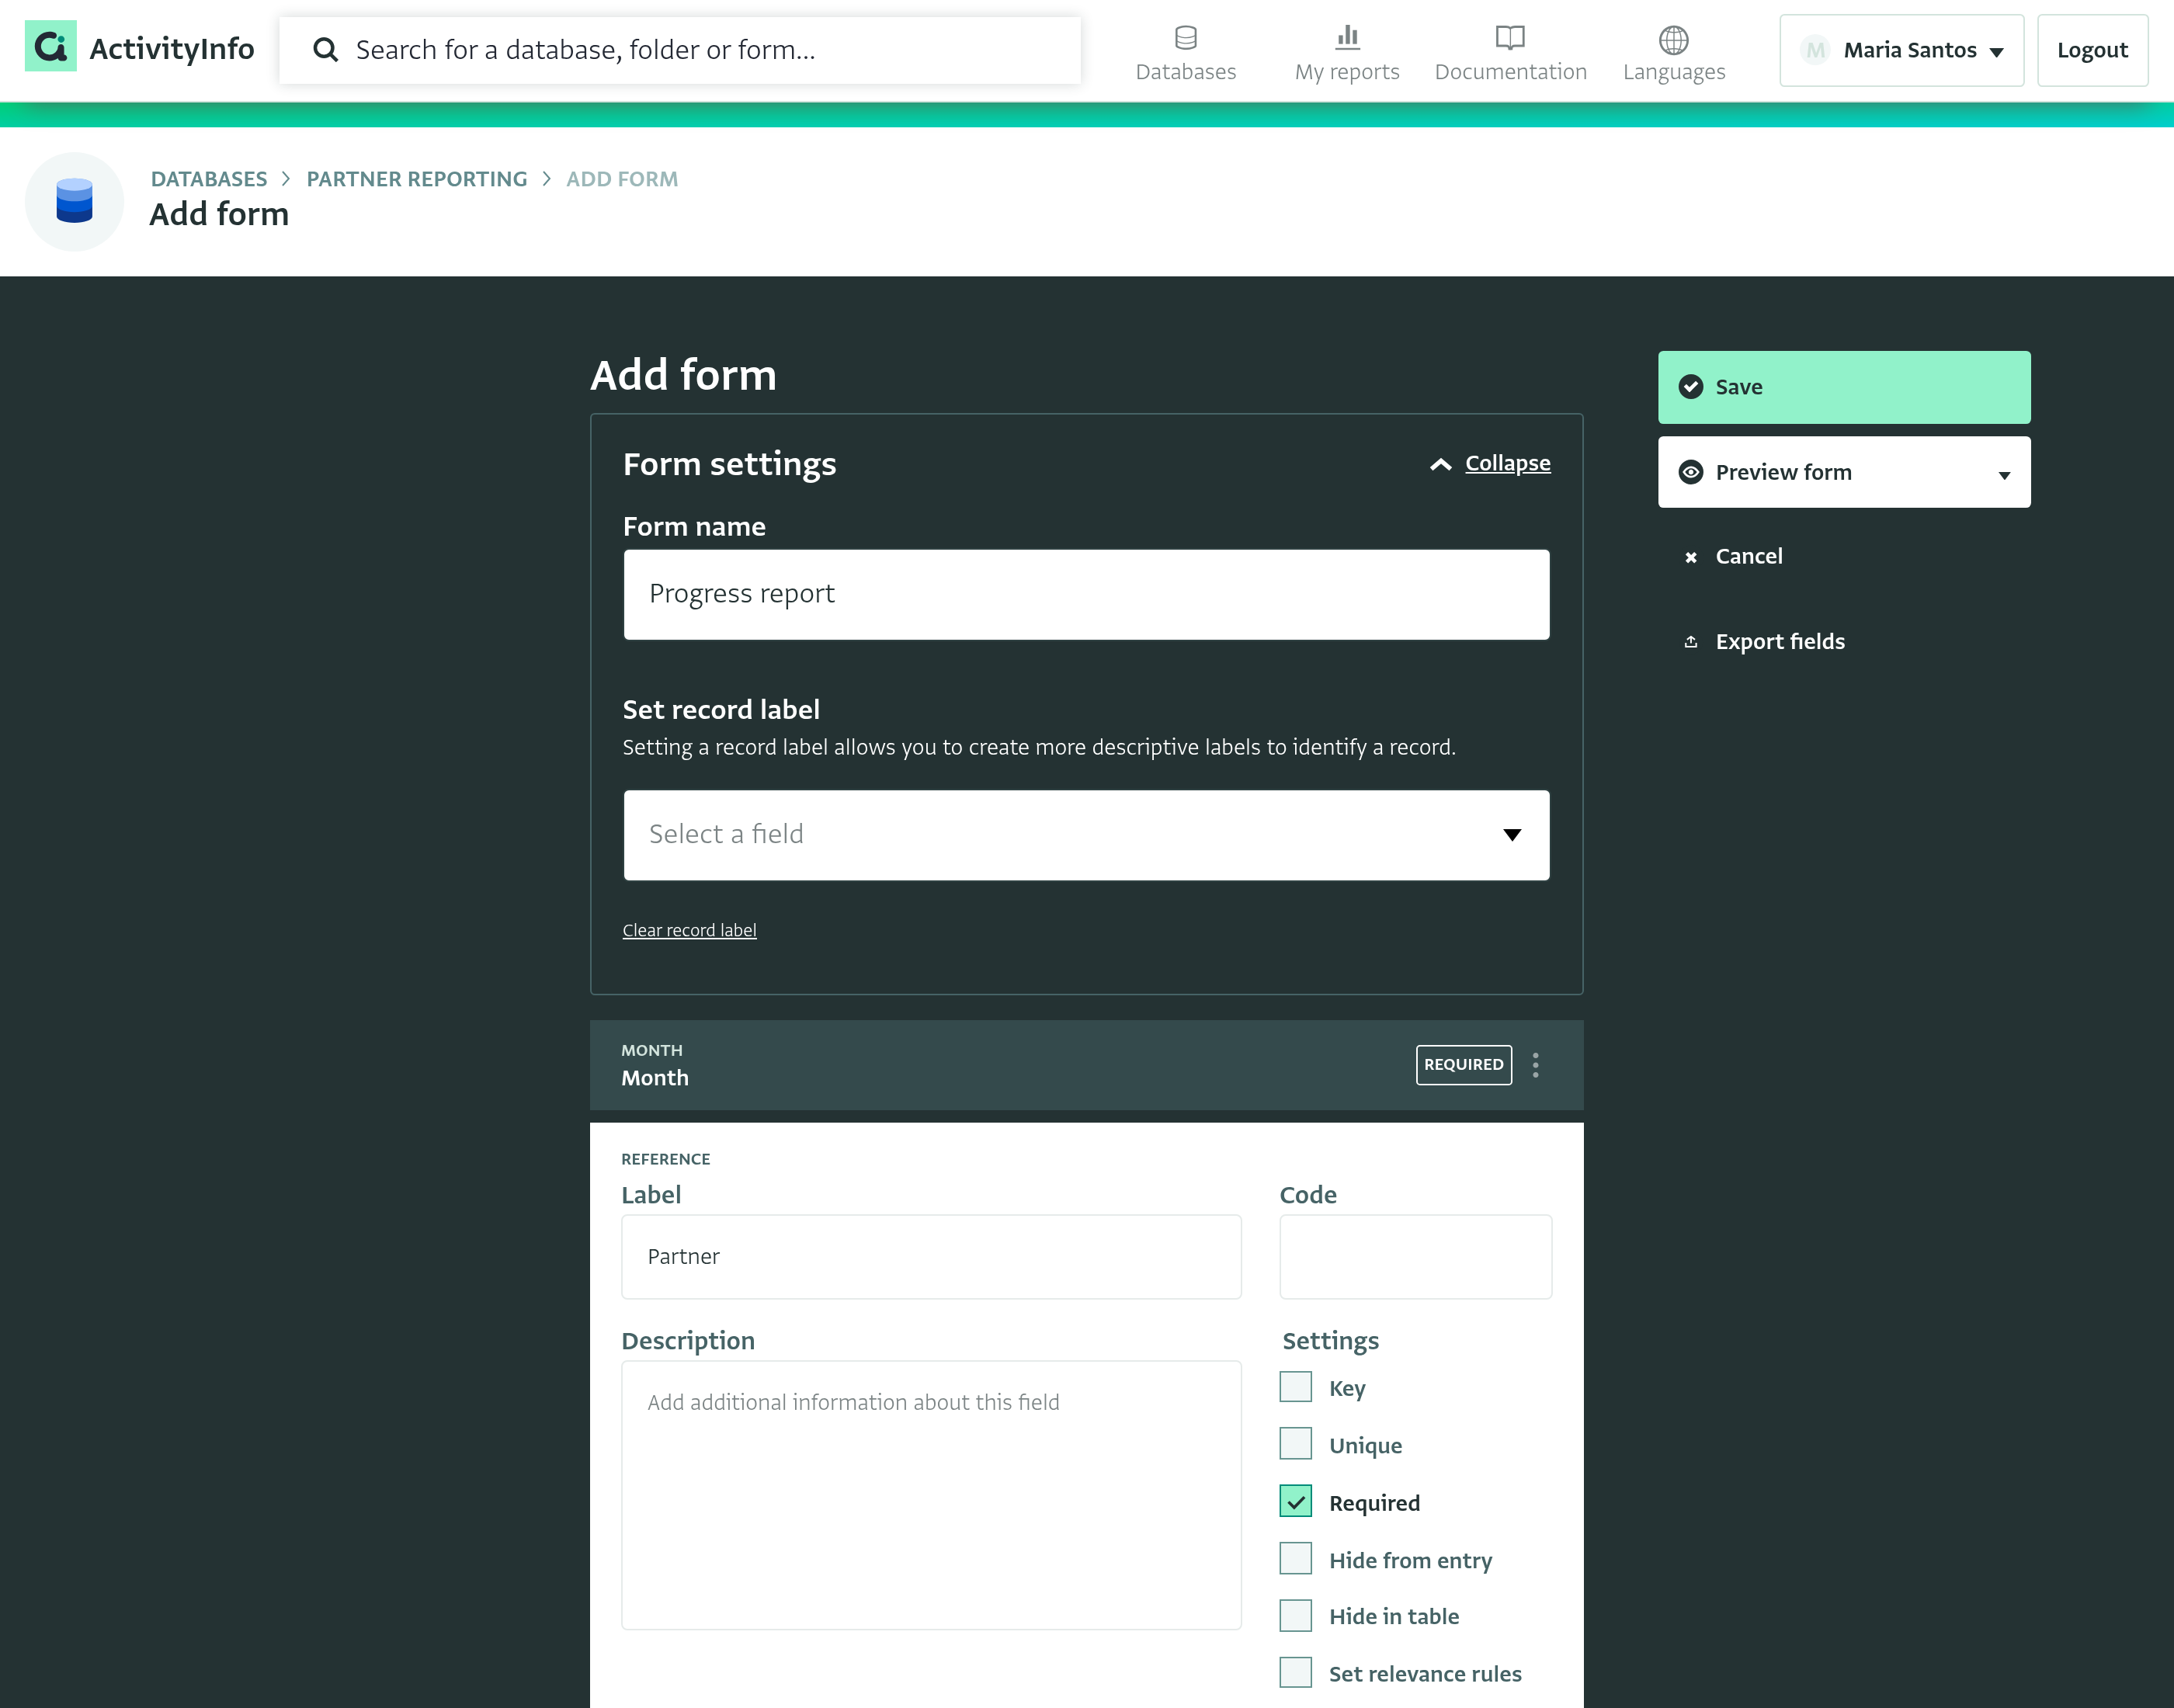
- Add a Quantity field called “Number of beneficiaries” and make it required.
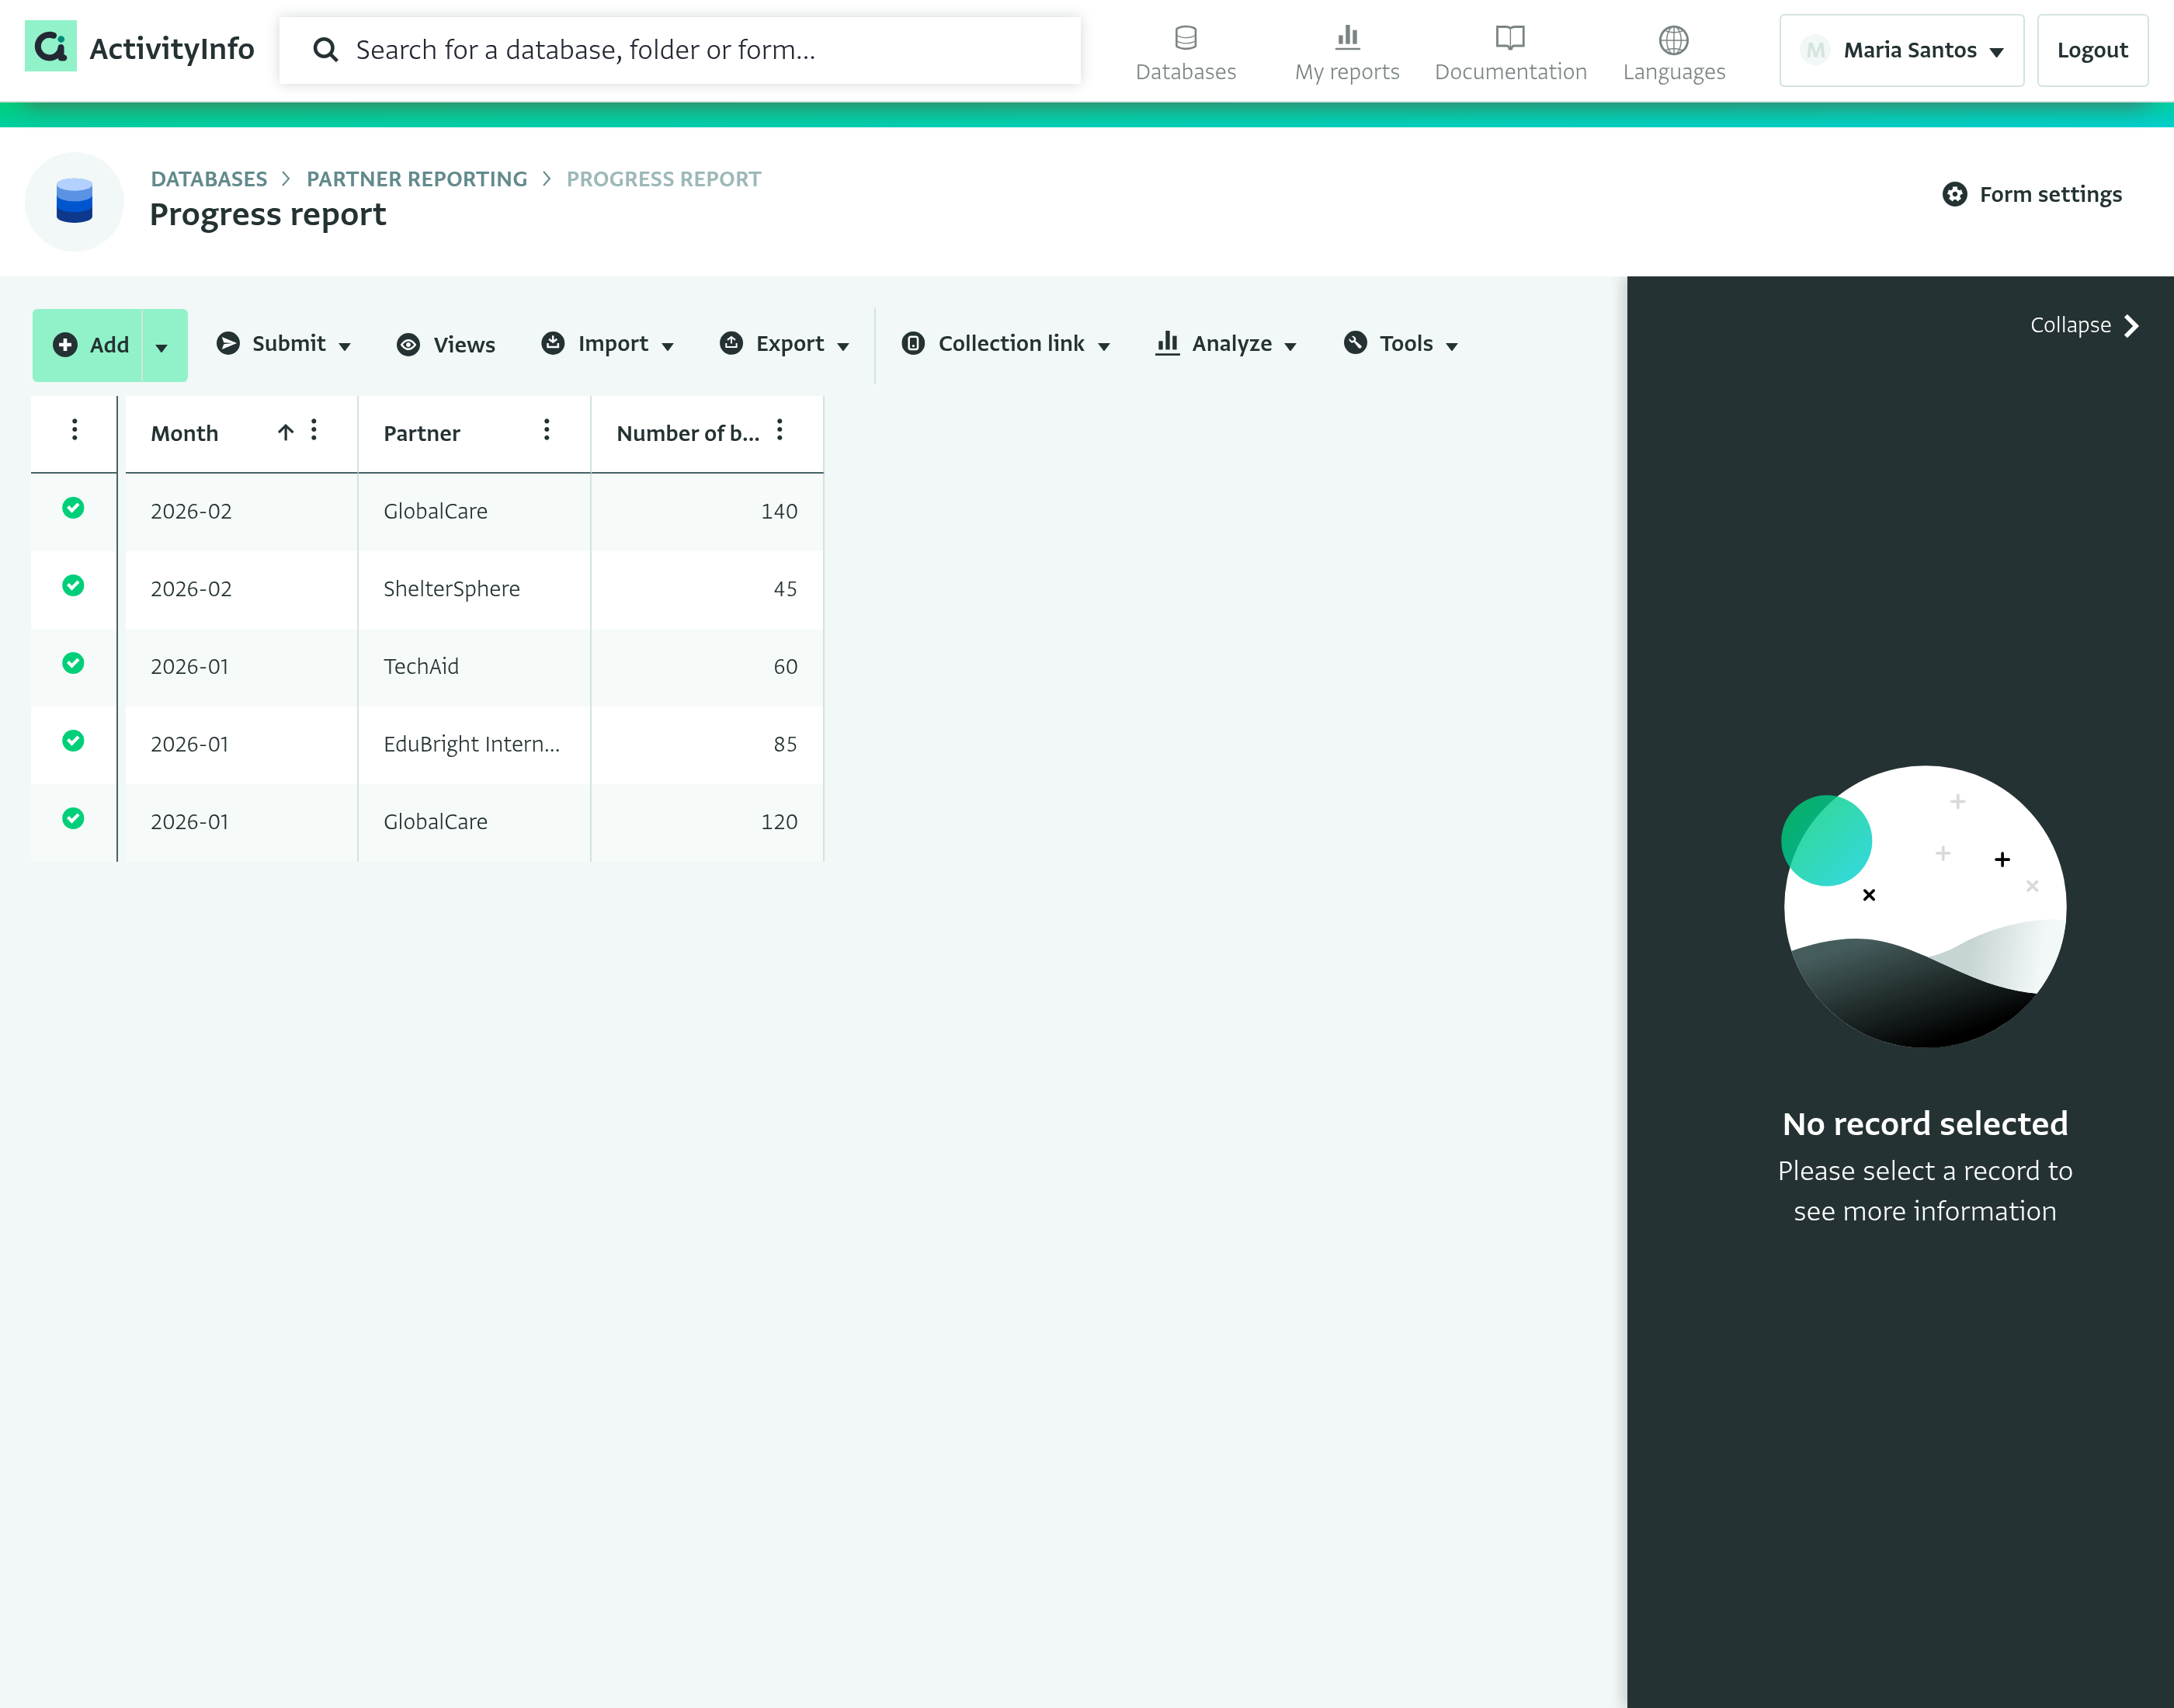
- Save the form.
- You can add a few records for all the partners; "GlobalCare" “EduBright International”,”FoodFirst Initiative”, “AquaLife Foundation” , “ShelterSphere” , “TechAid”, “EmpowerHer”, and “SafeHaven Network”
Add a Role
Now we are ready to add a role that restricts users to seeing and adding only records that are related to the partner to which they have been assigned.
- To set up roles in your database, follow these steps:
- Go to your database settings. Find and click on "Roles."
- Click "Add role" .
- Type in the role name, such as "Reporting Partner," and click ok .You'll see the new role in a list.
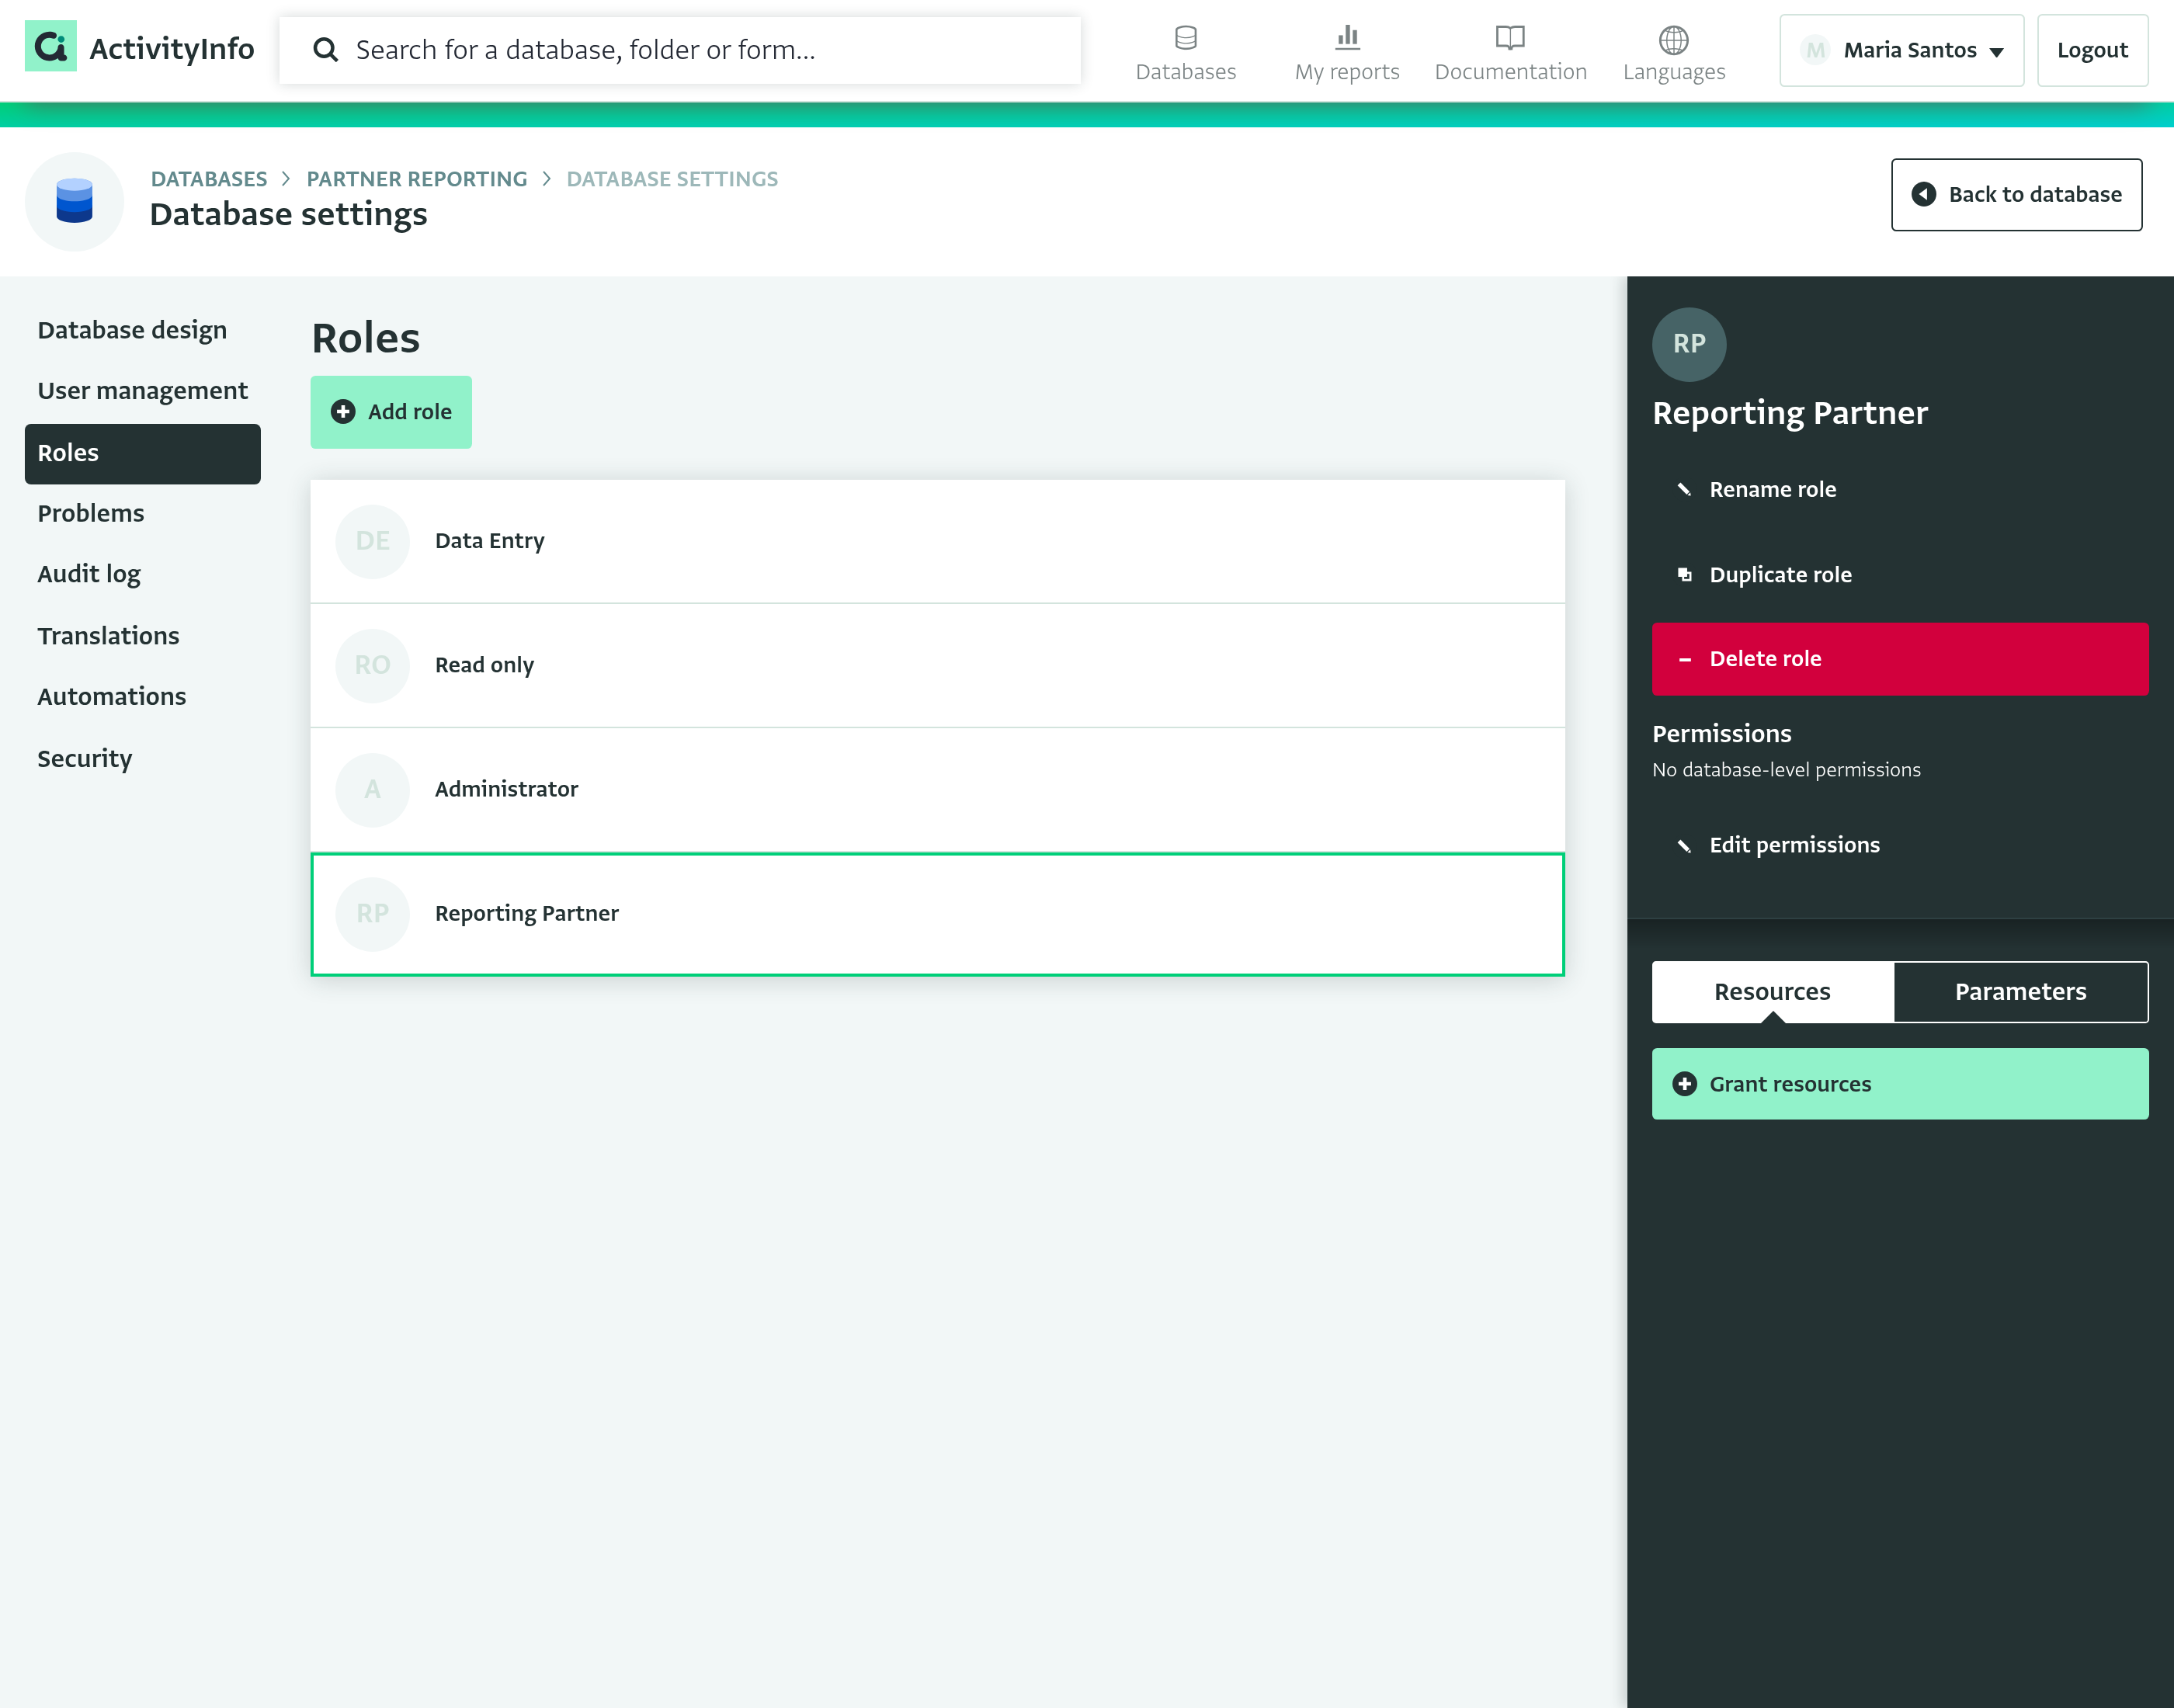
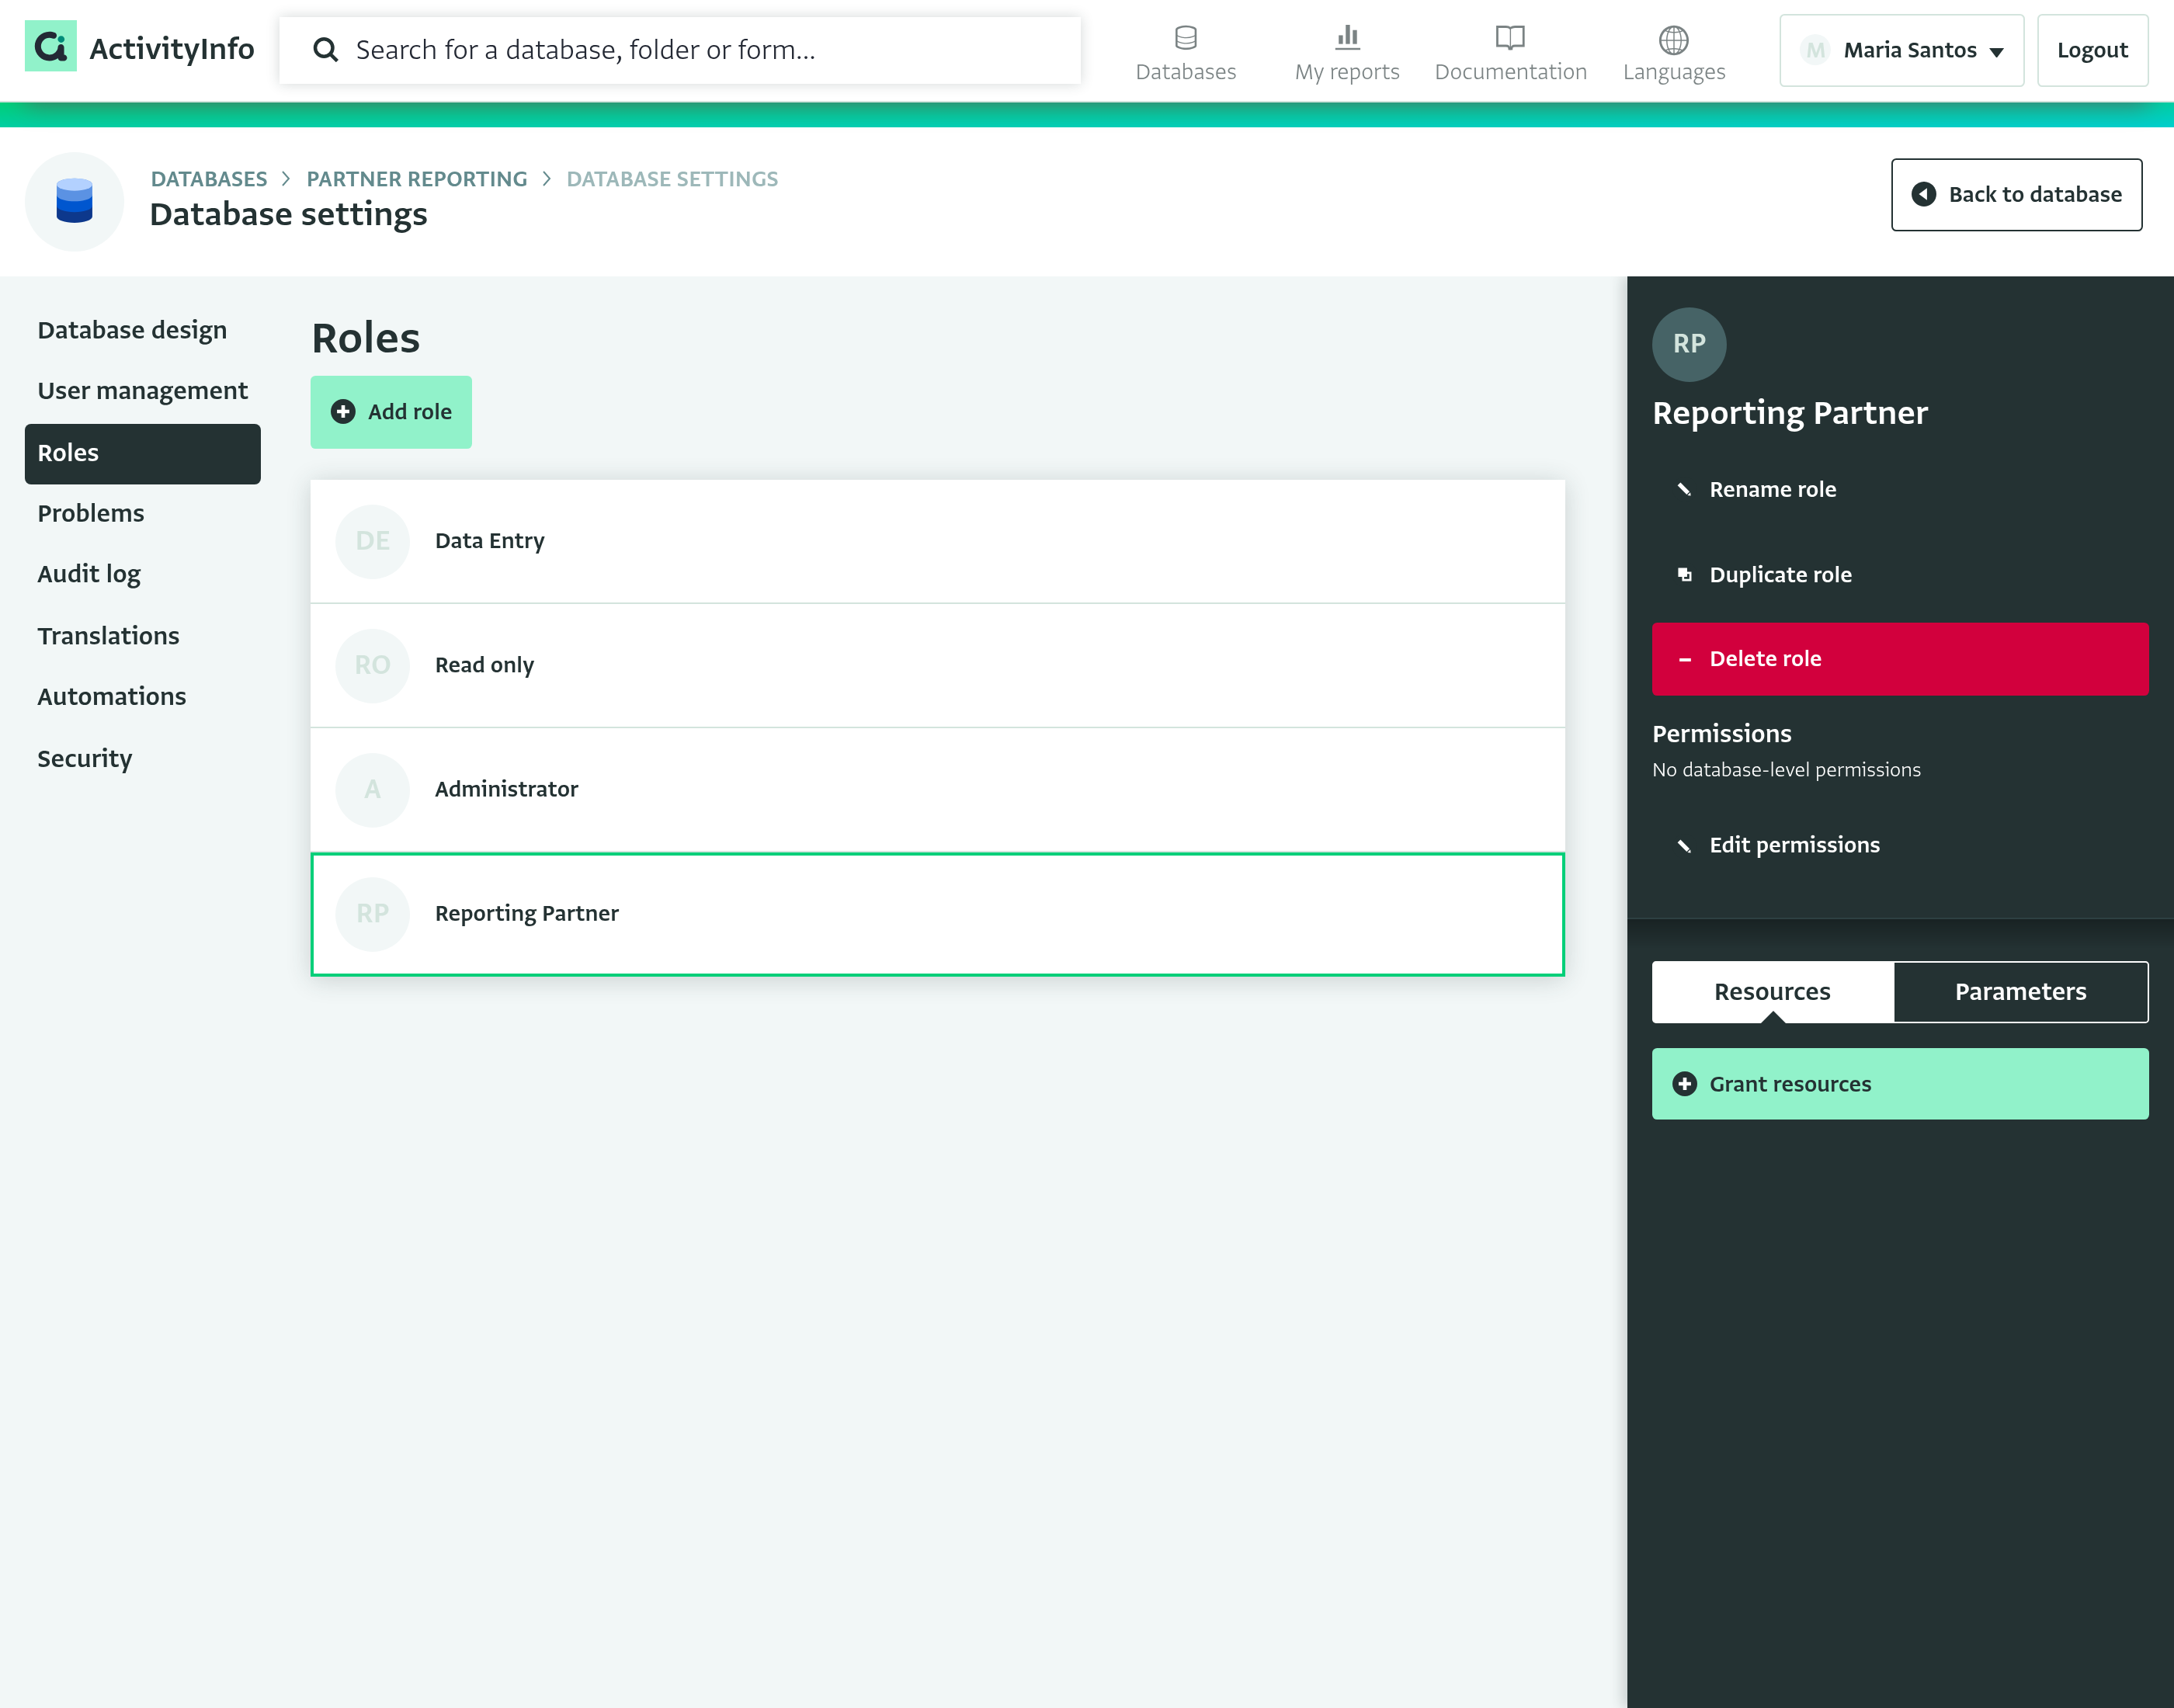
- Click on the new role. The role will be displayed in the side panel.
Add a Role Parameter
- Switch to the “Parameters” tab and click “Add parameter”.
- Fill in the Parameter ID as “partner” and the Parameter label “Partner”. Under “Possible values”, select the Partner Organization form you previously added that includes the list of partners.
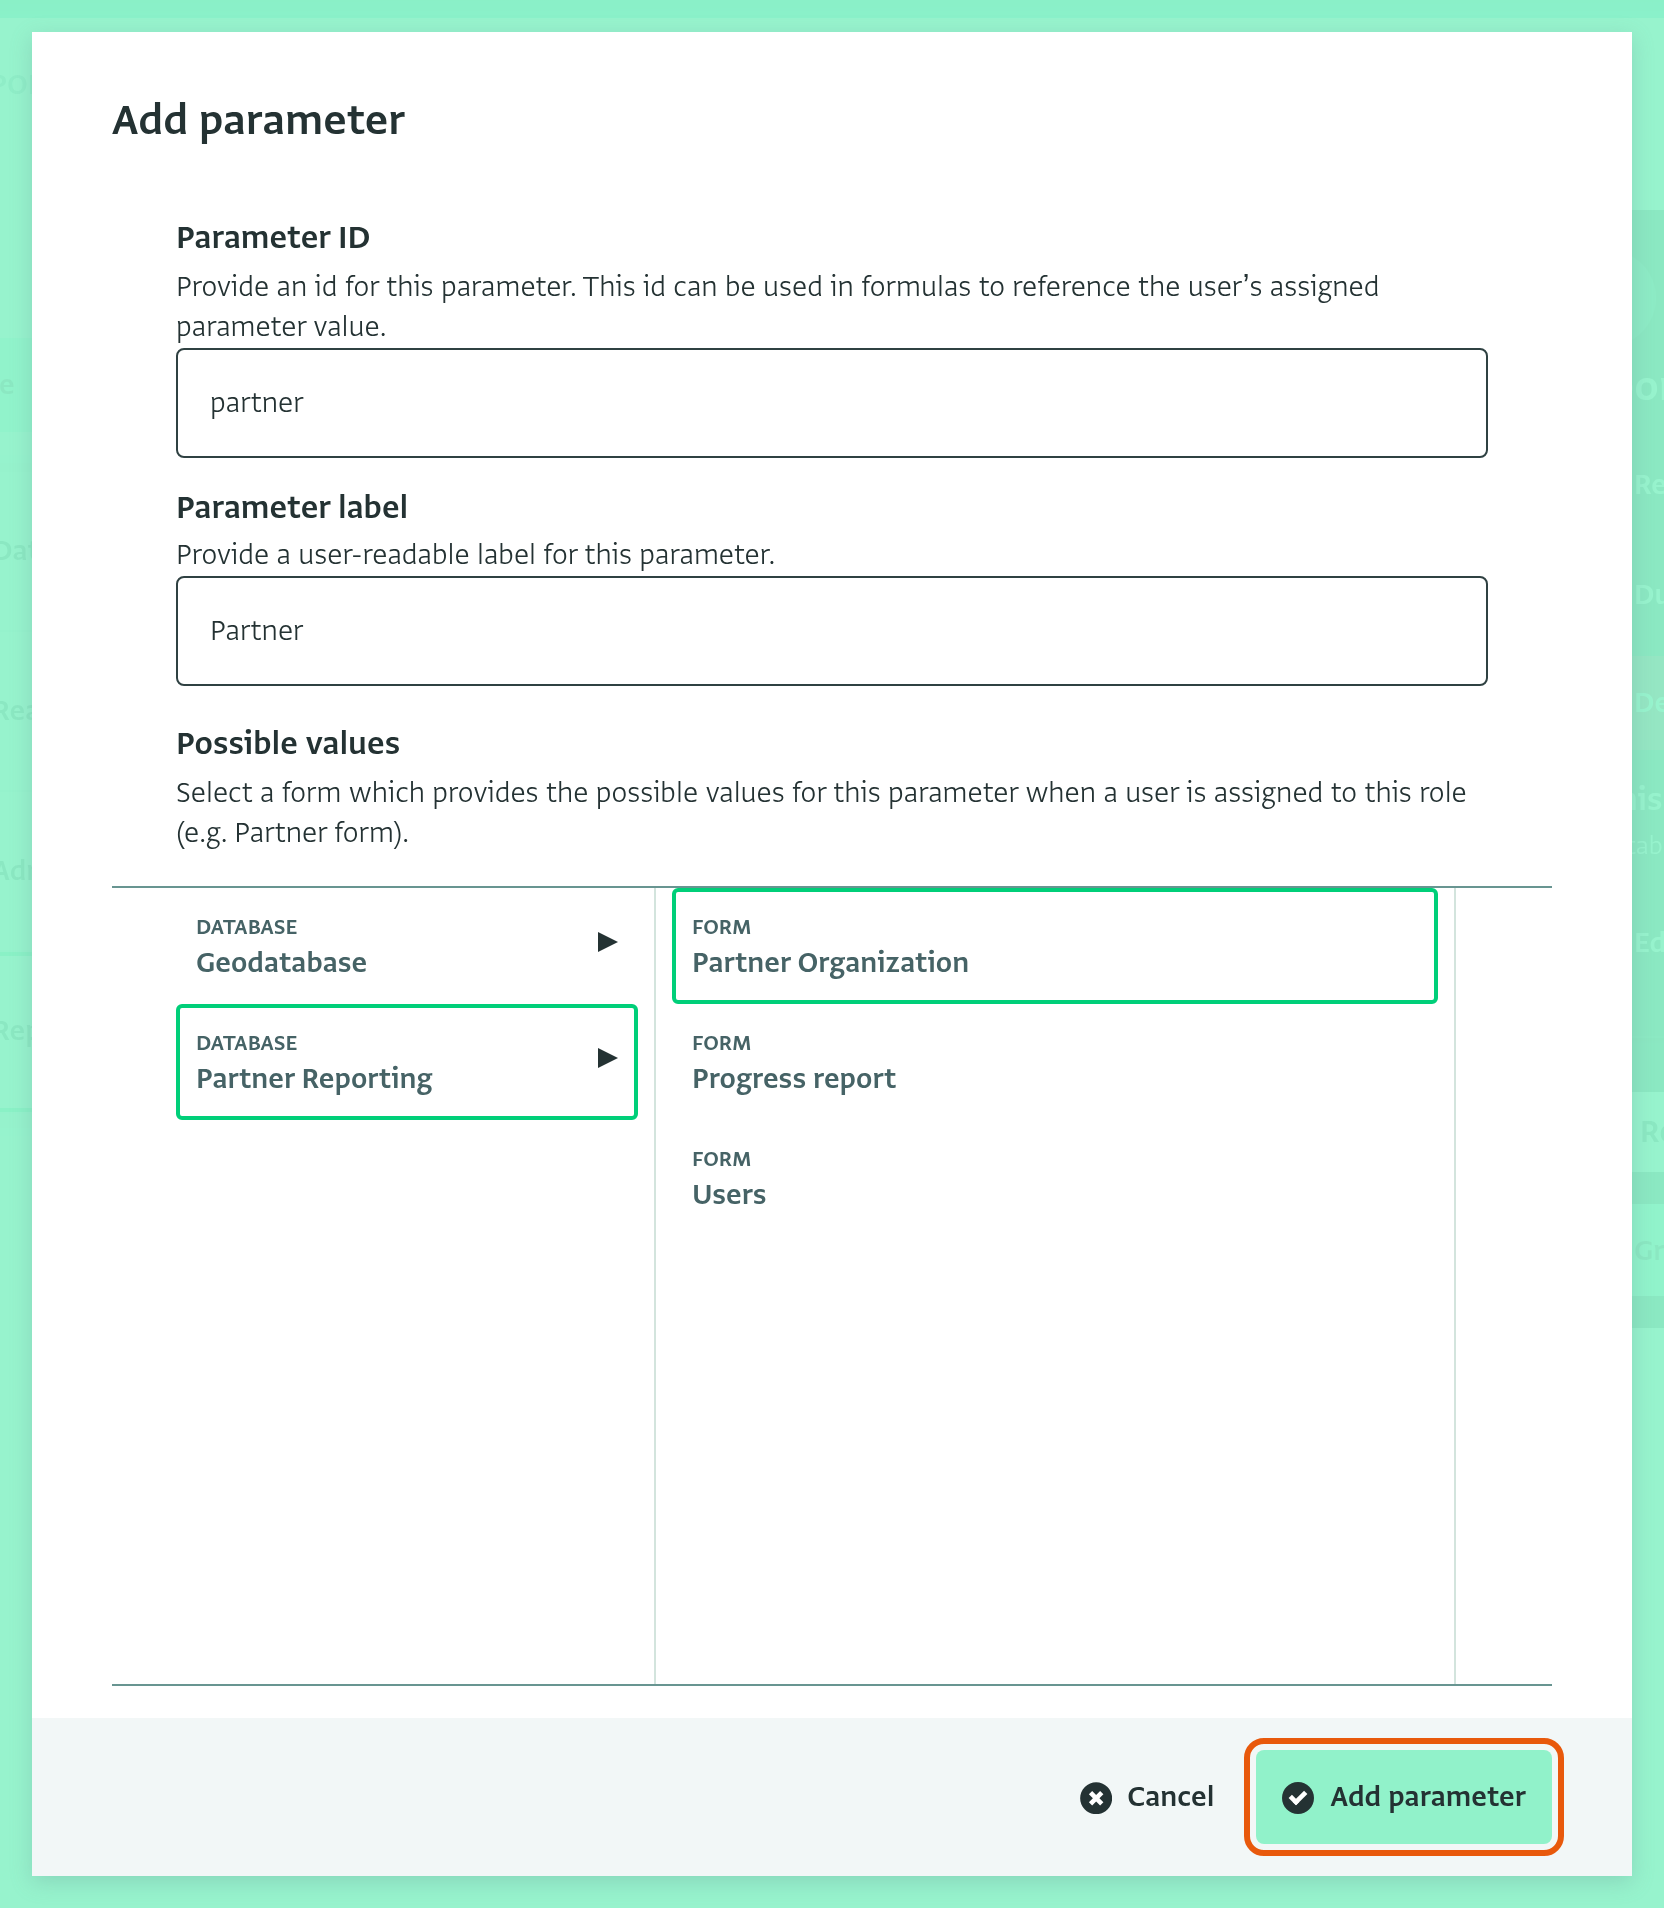
- Click “Add parameter”.
- The parameter should appear in the list of parameters.
Add conditions to the permissions
Adding a parameter alone does not have any effect on permissions. In the next step, we will use the parameter as part of a condition to limit the permissions associated with the role.
We will now assign a set of permitted operations to this role for the "partner organization" and "progress report" forms, which, for our current use, make up the whole database.
Switch back to the “Resources” tab.
Click “Grant resources”.
Select your database from the first column and click “Select resource”. The dialog to edit the permissions opens on the “Permitted operations” section.
Check the following permissions:
View all records
Display in the list of forms
Add any record
Edit all records
Delete any record
Then, in the left pane of the dialog, click “Record & field level permissions”.
Click “Add record-level condition”.
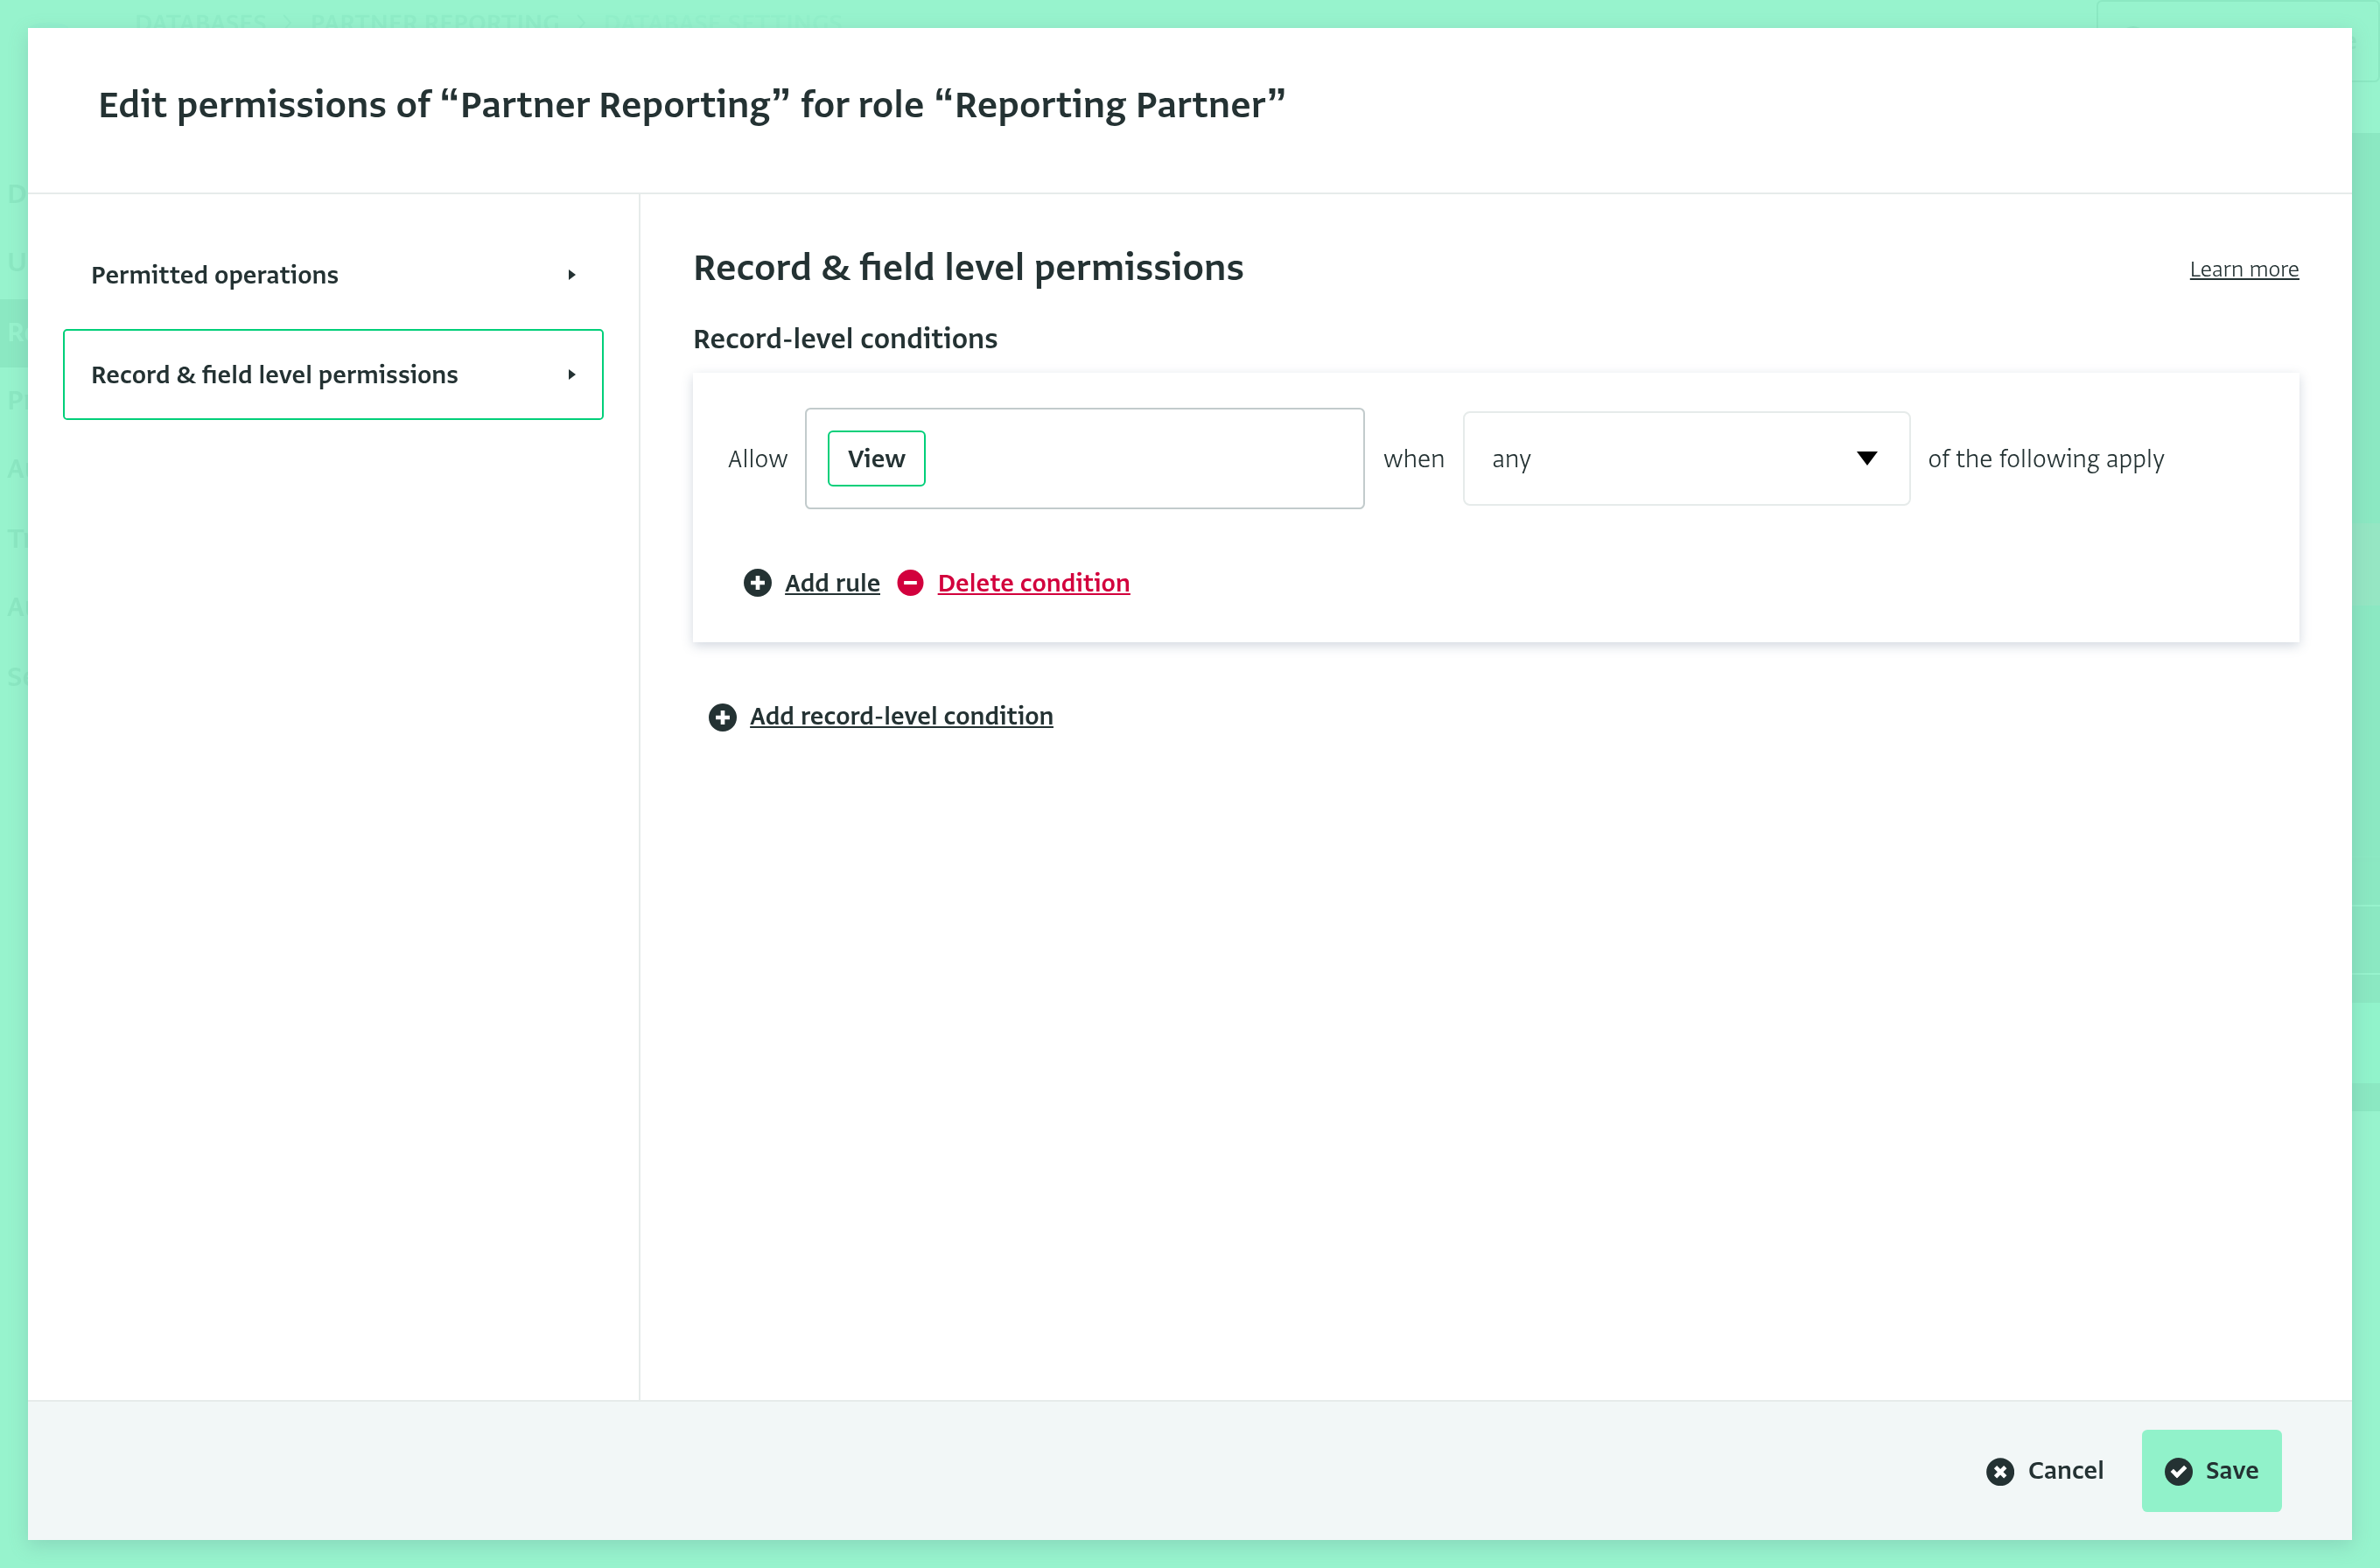
- Click “Add rule”, and from the first list in the rule, select “Record is related to parameter”.
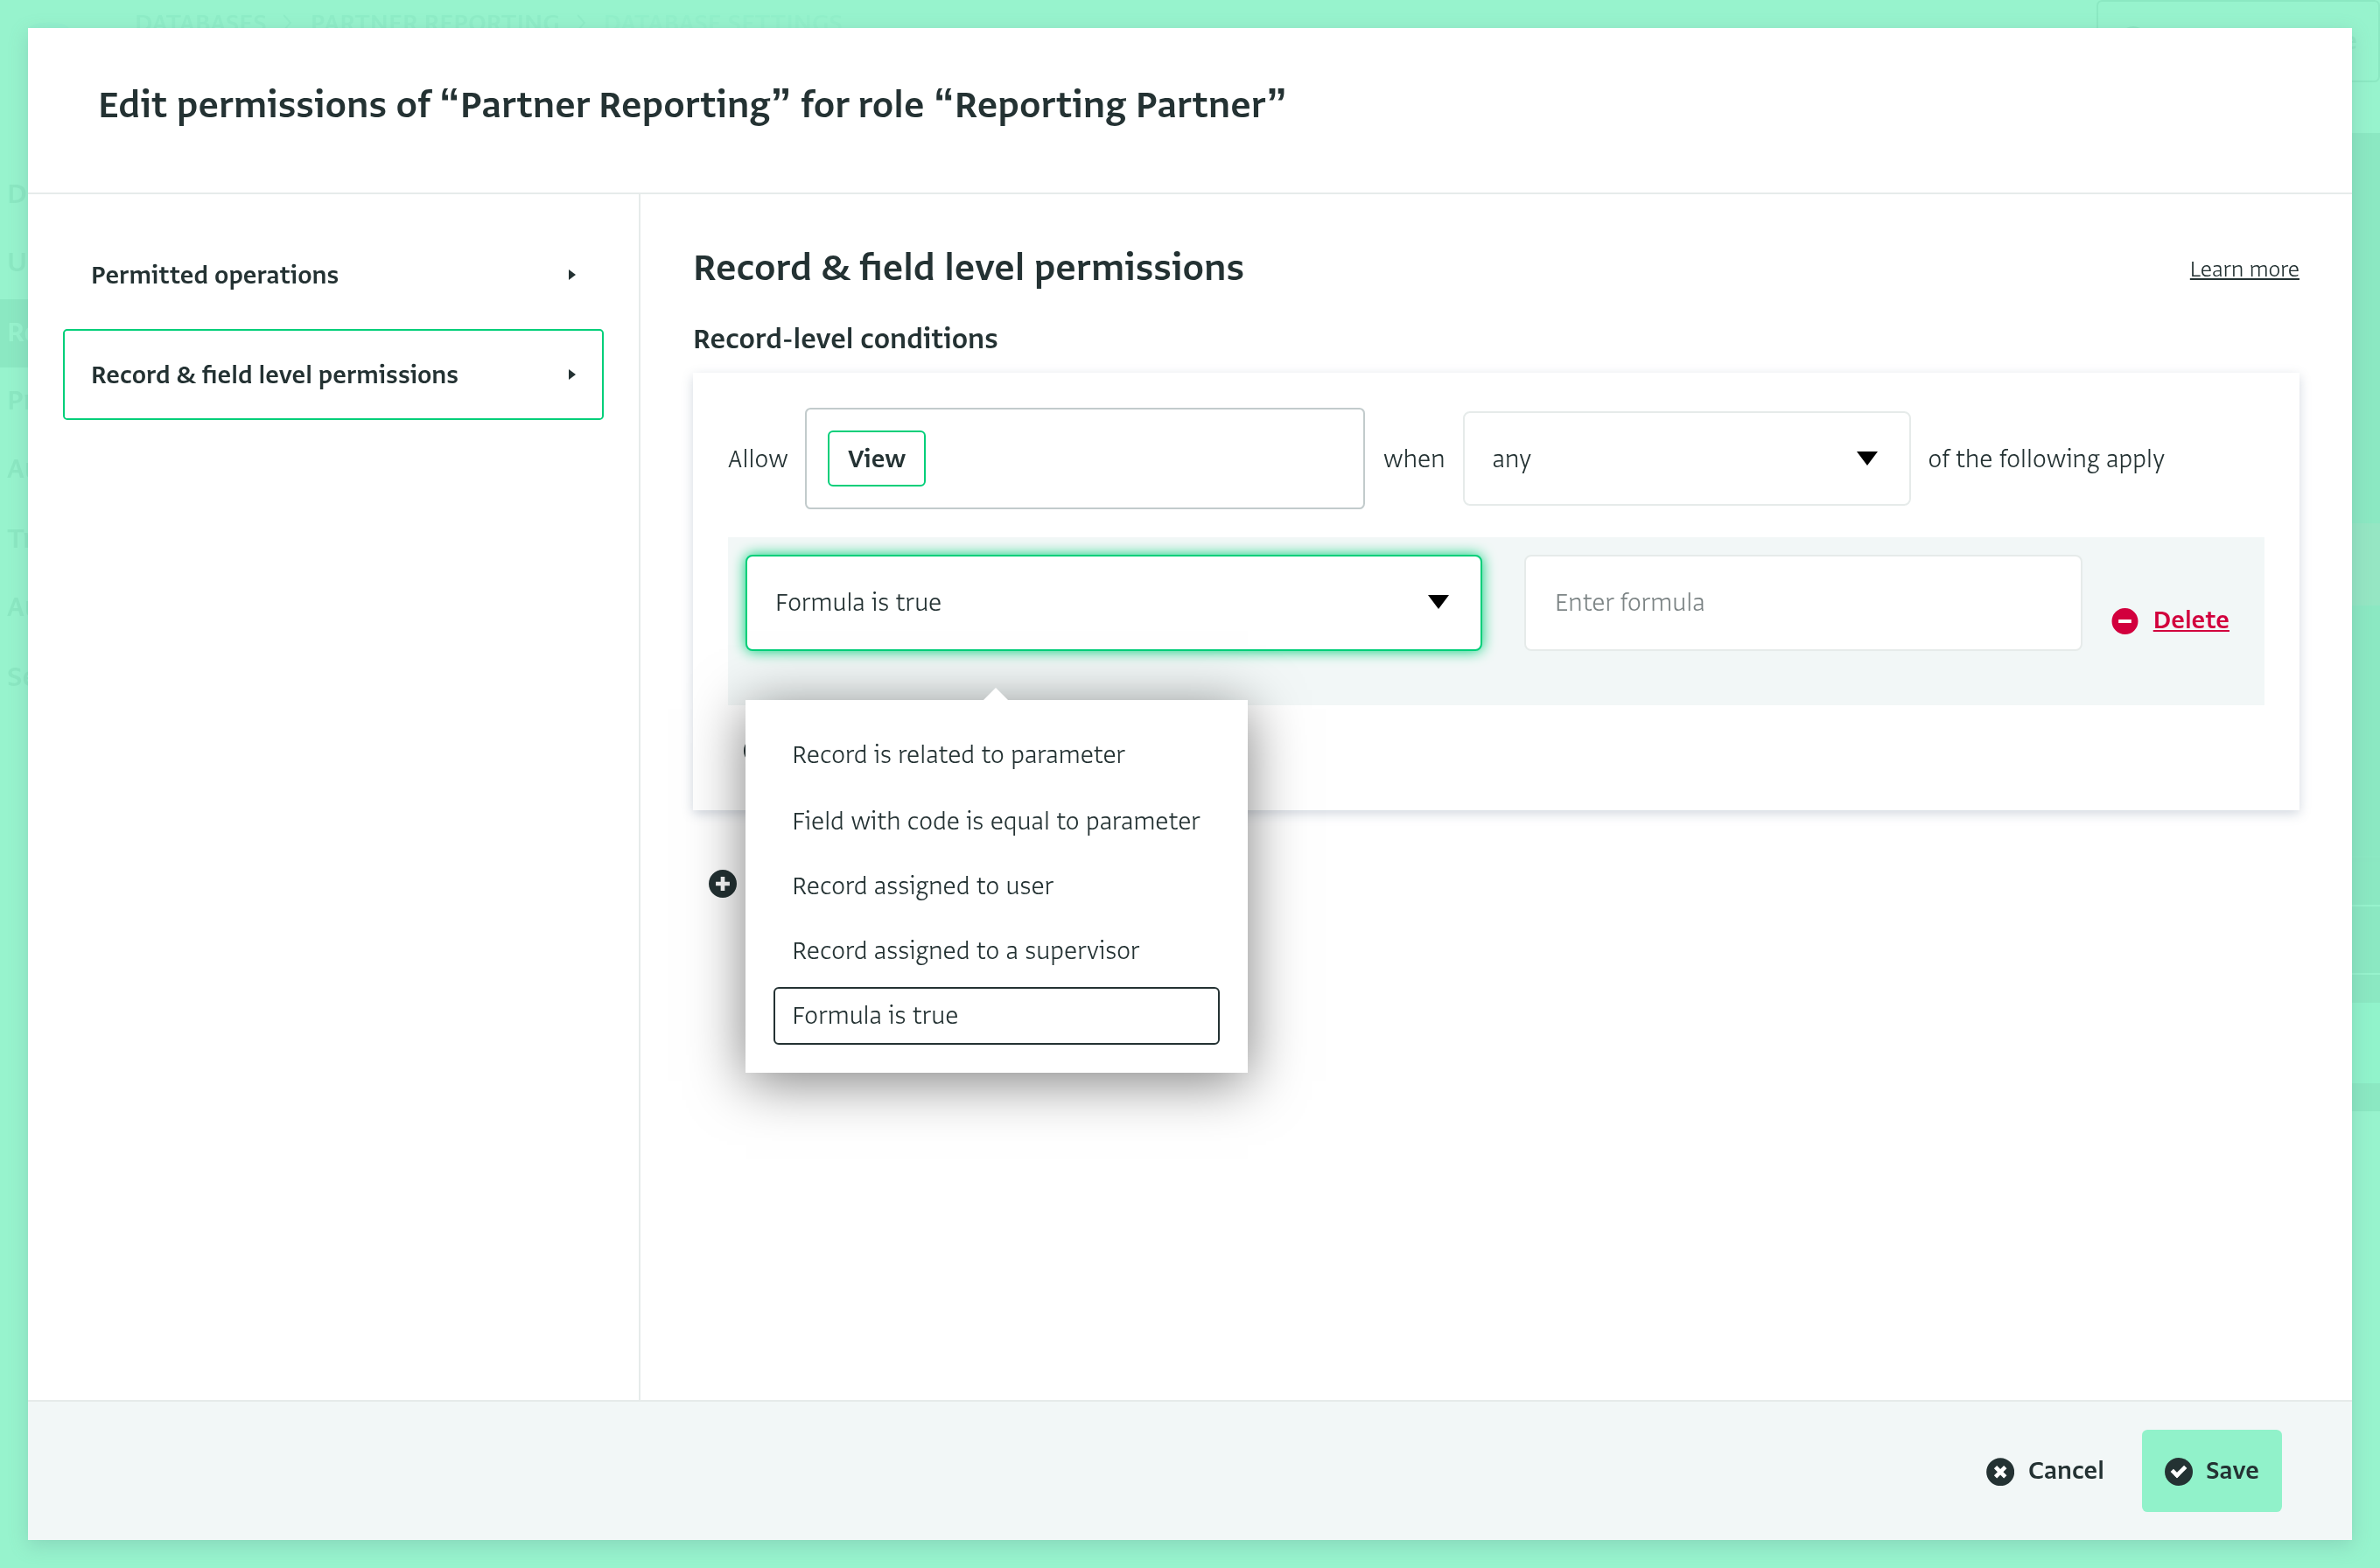
- From the second list in the rule, select the “Partner” parameter that you just added.
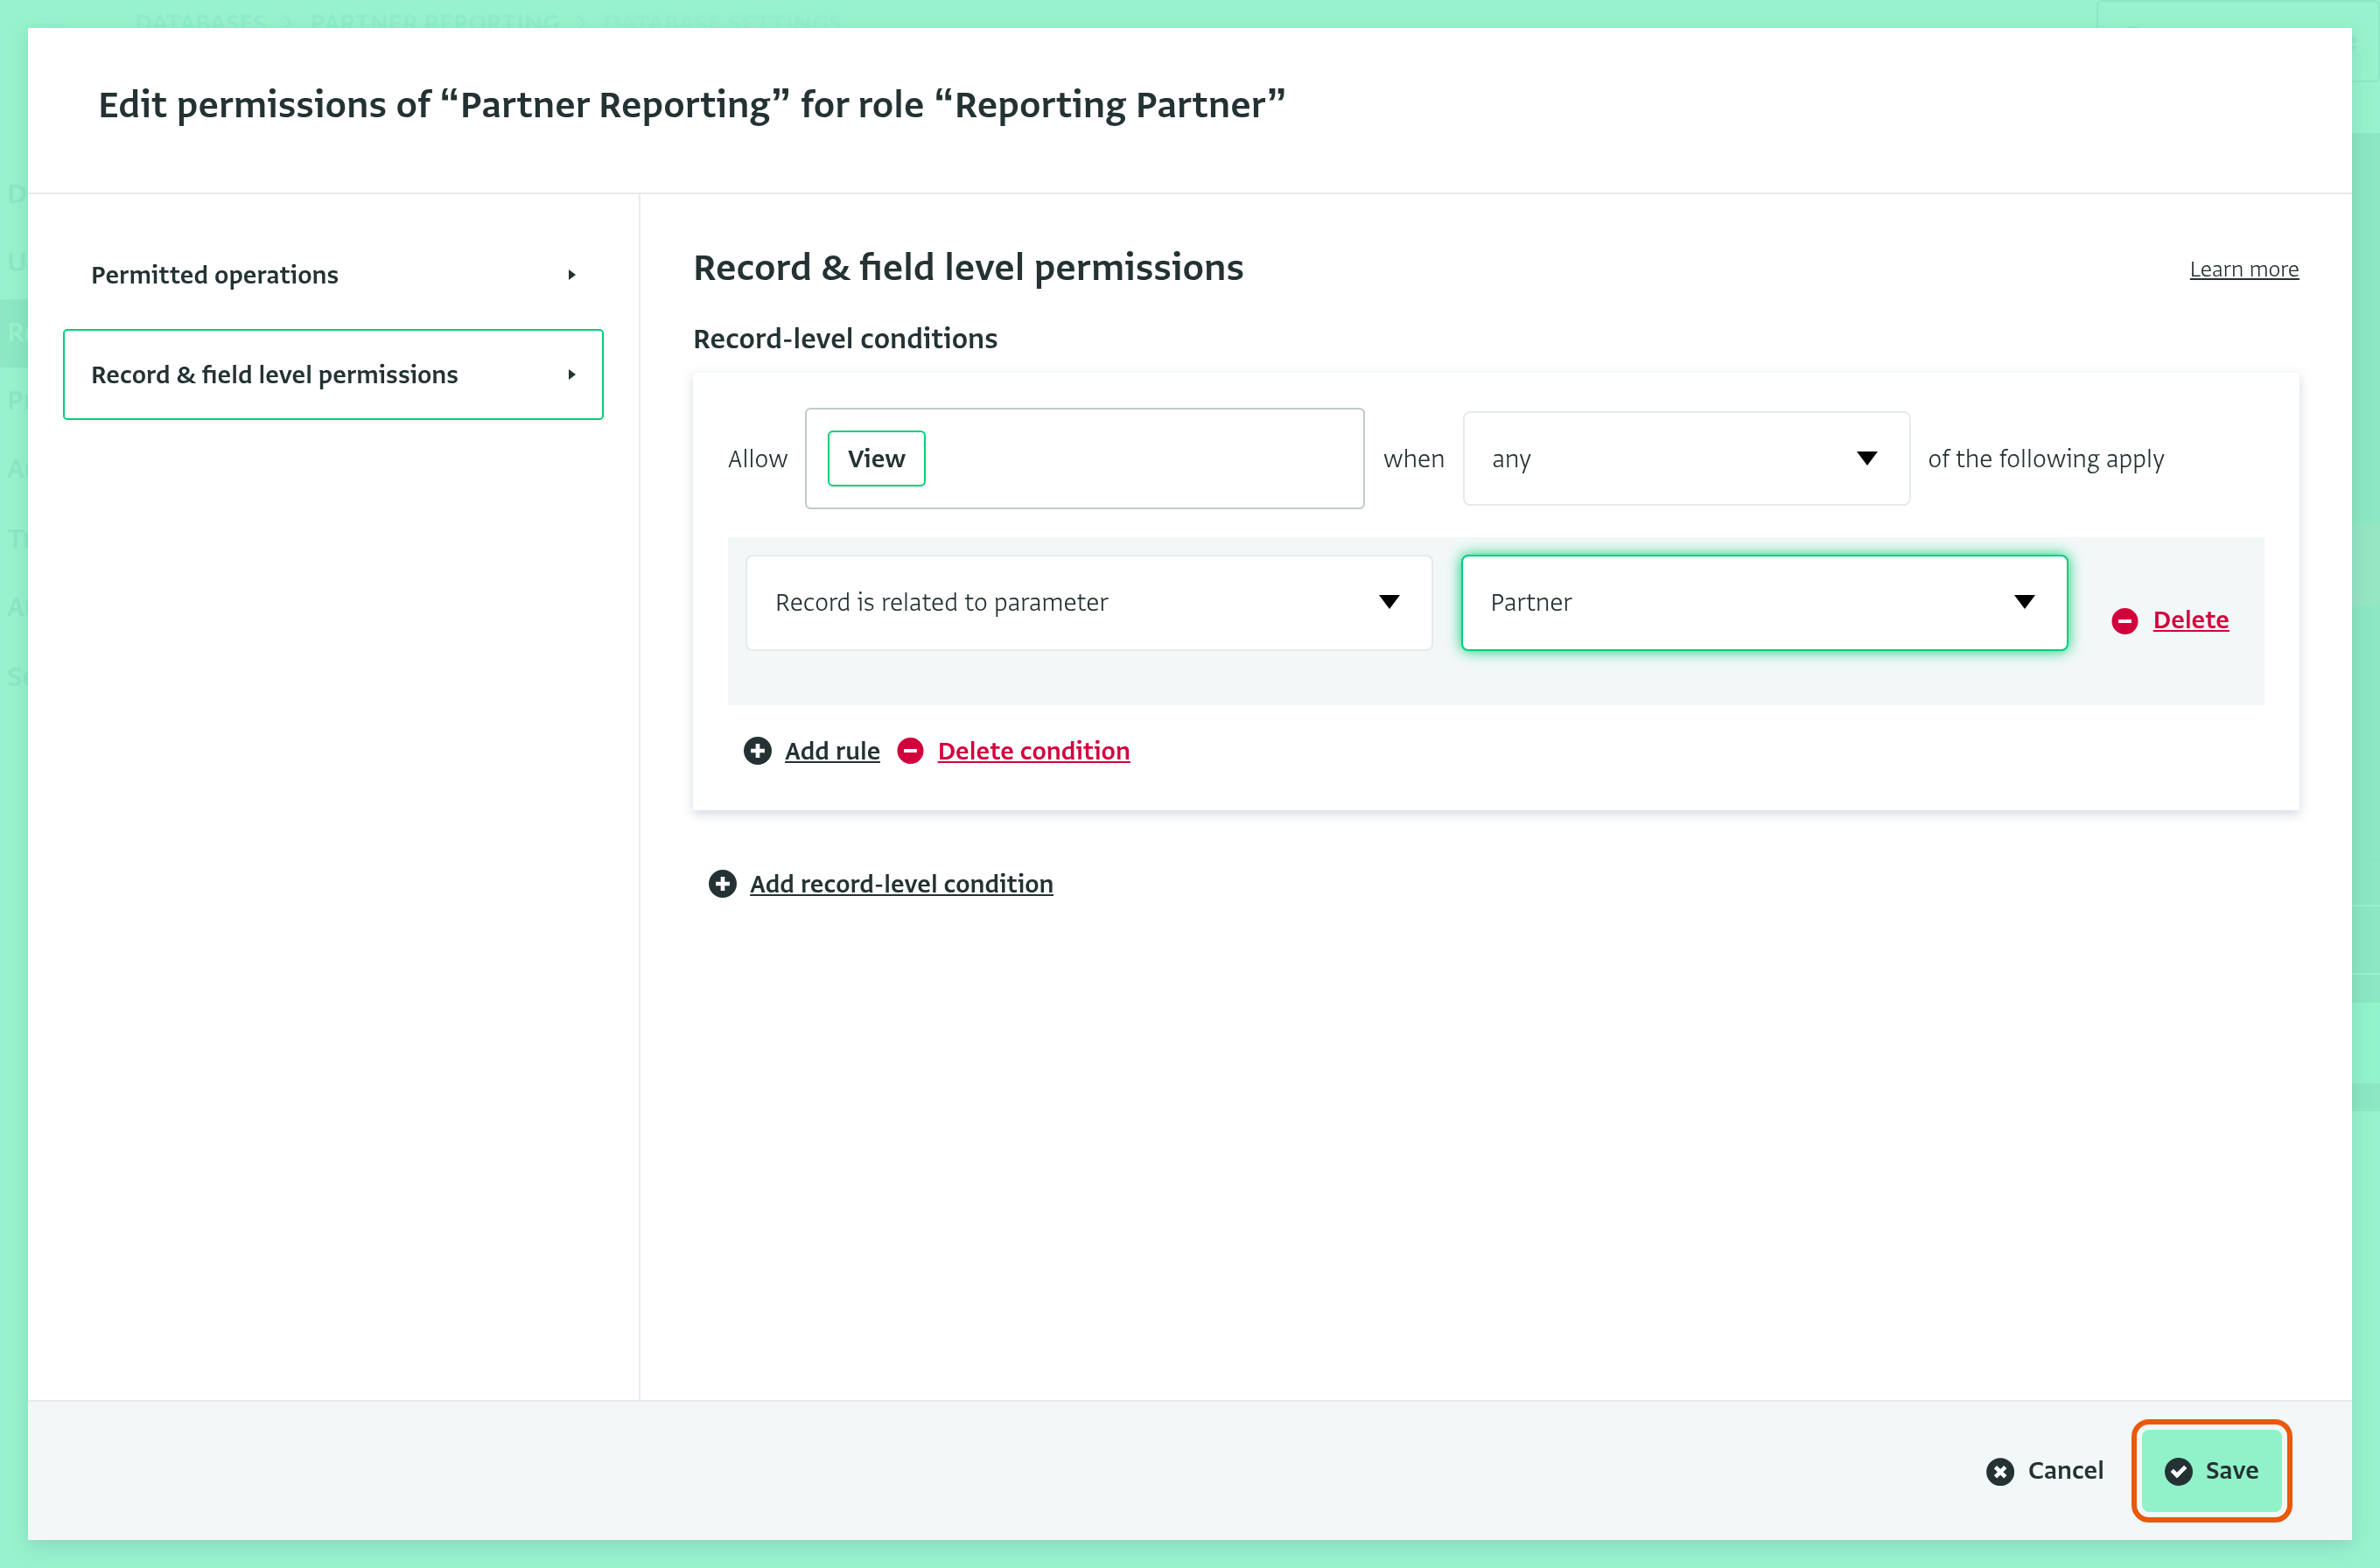
- Then click “Save” to add the new grant.
Now you have added a role, which allows the users assigned to this role to only view, add, edit or delete records that are associated with their partner.
Add a user to the new Role
Let’s see how this looks for a partner that you might invite to contribute progress to the database. For this part of the tutorial, you can invite yourself using an alternate email, such as your personal email address, so that you can see how this looks for a reporting partner.
- To use this parameter for a user, go to the “User management” section in the Database Settings, and then click “Add user”
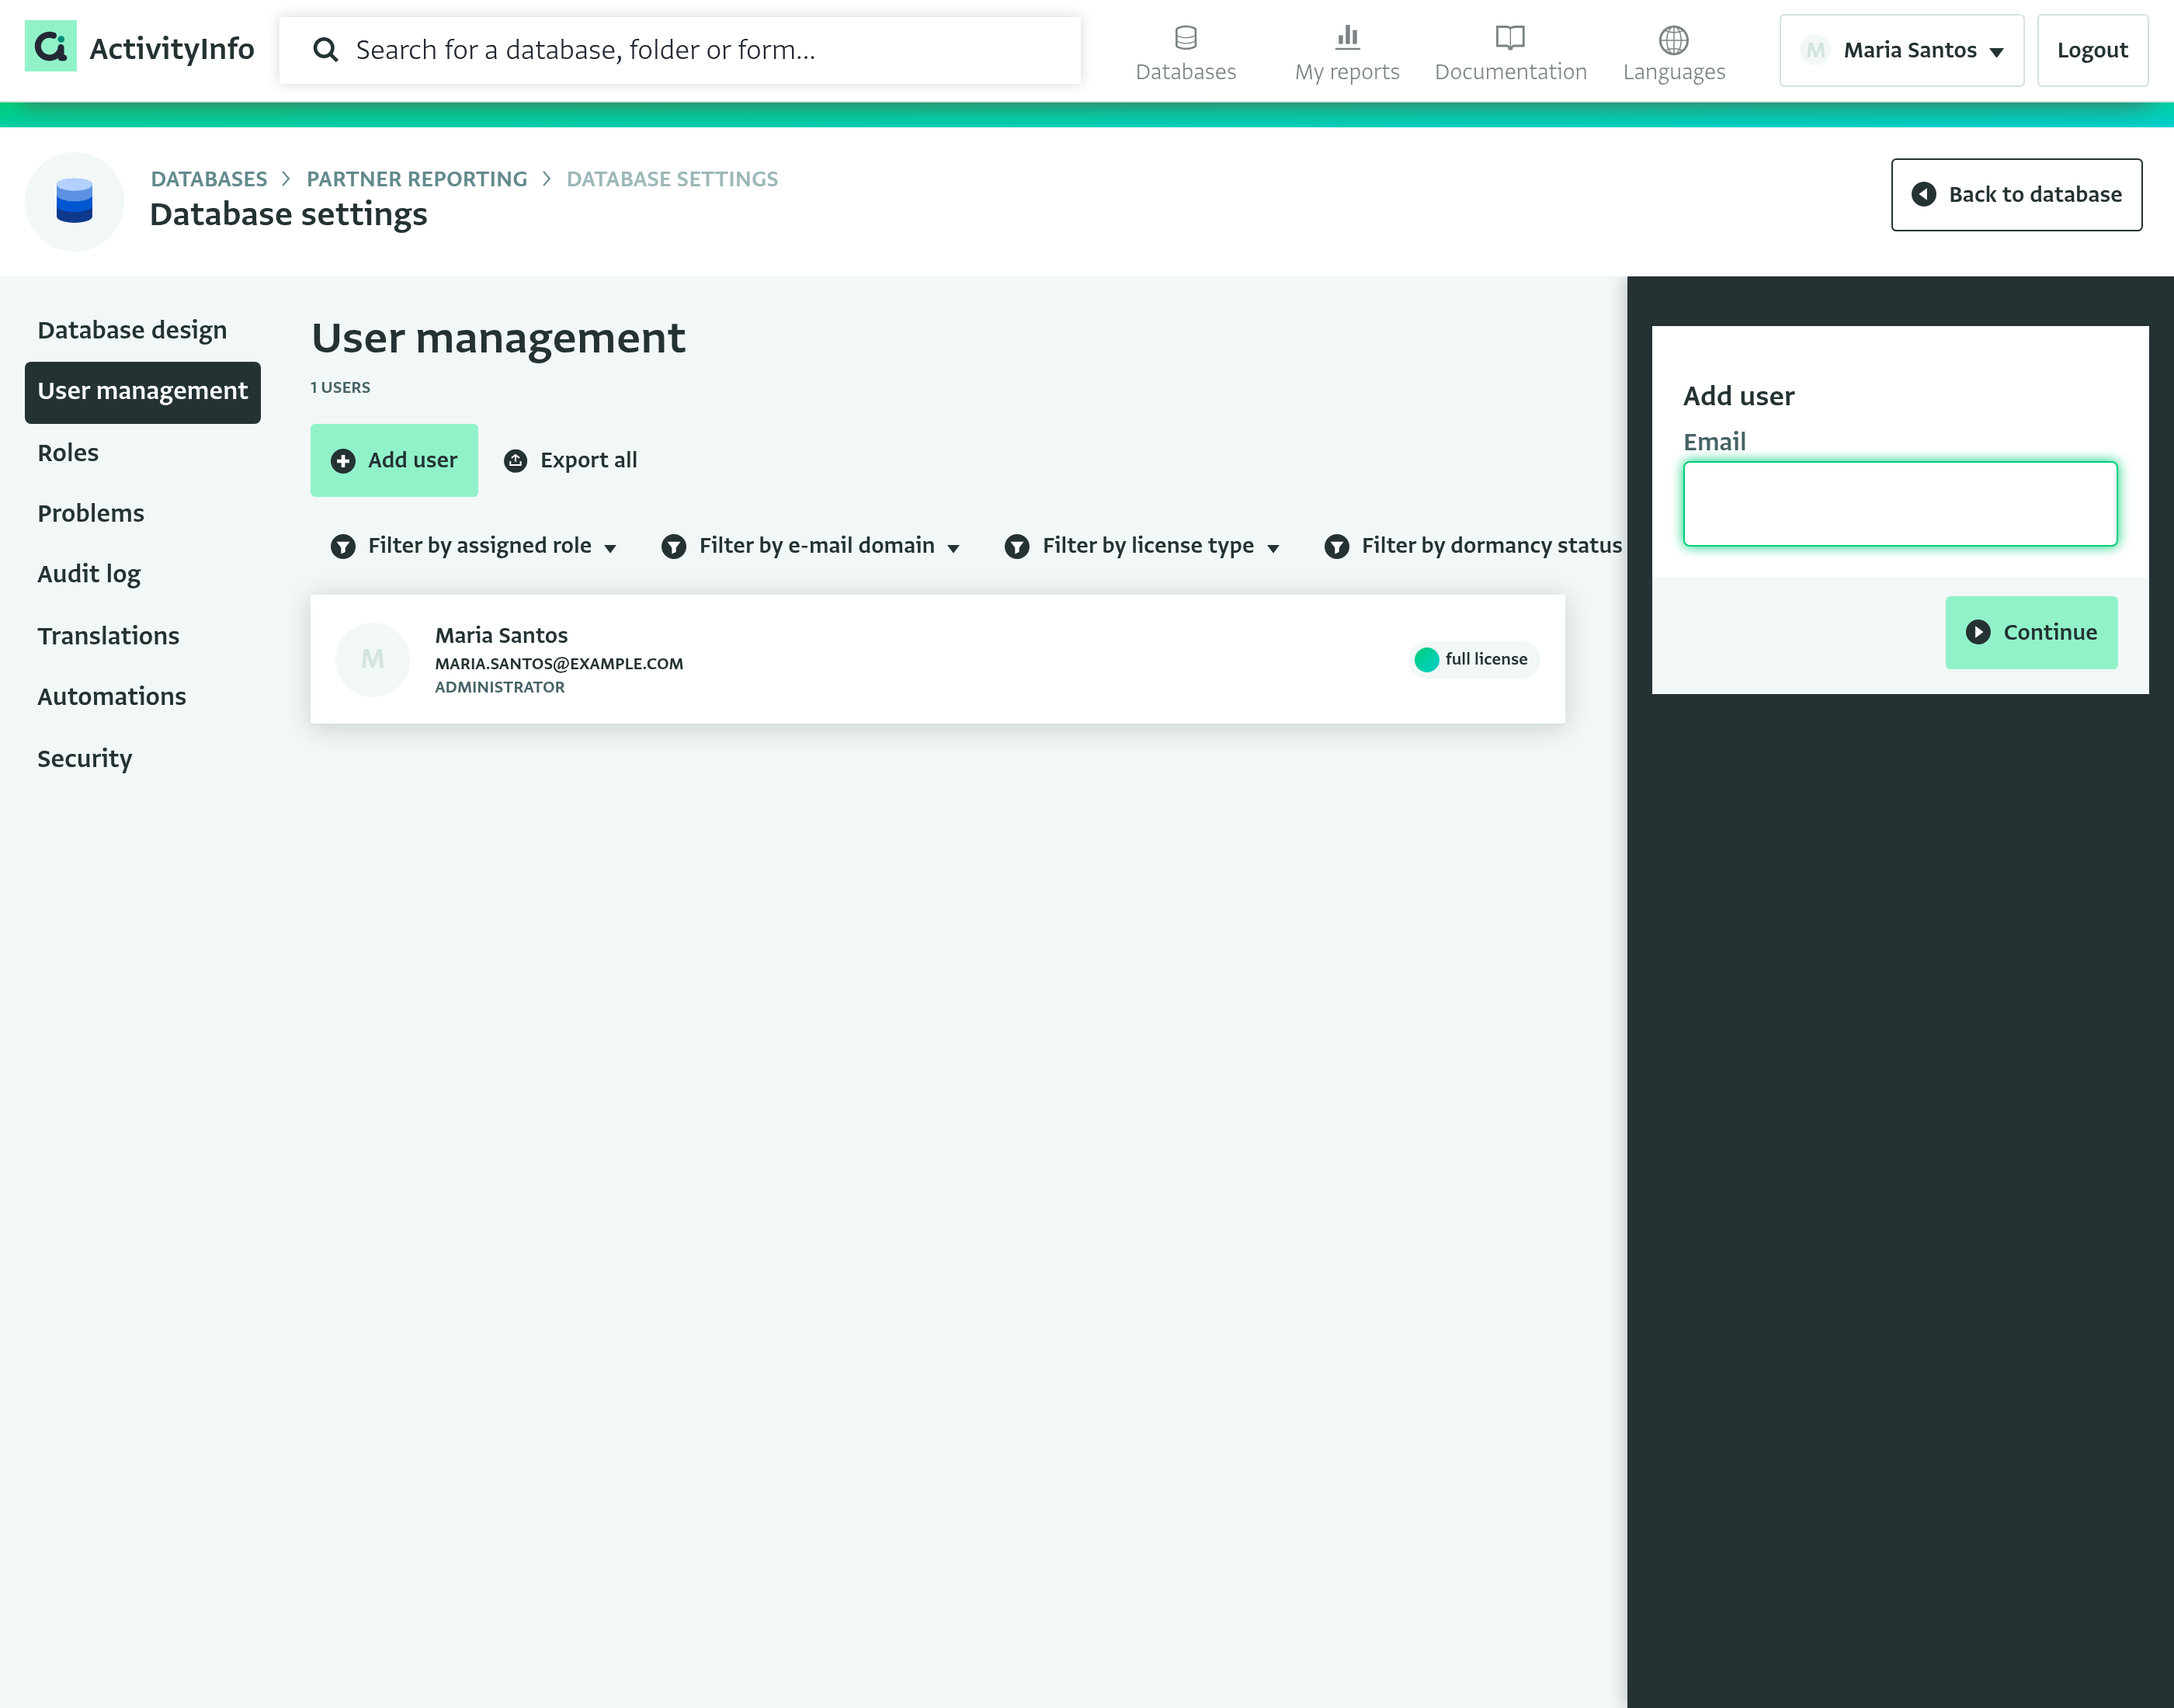
- Enter the user's "Email" and click "Continue".
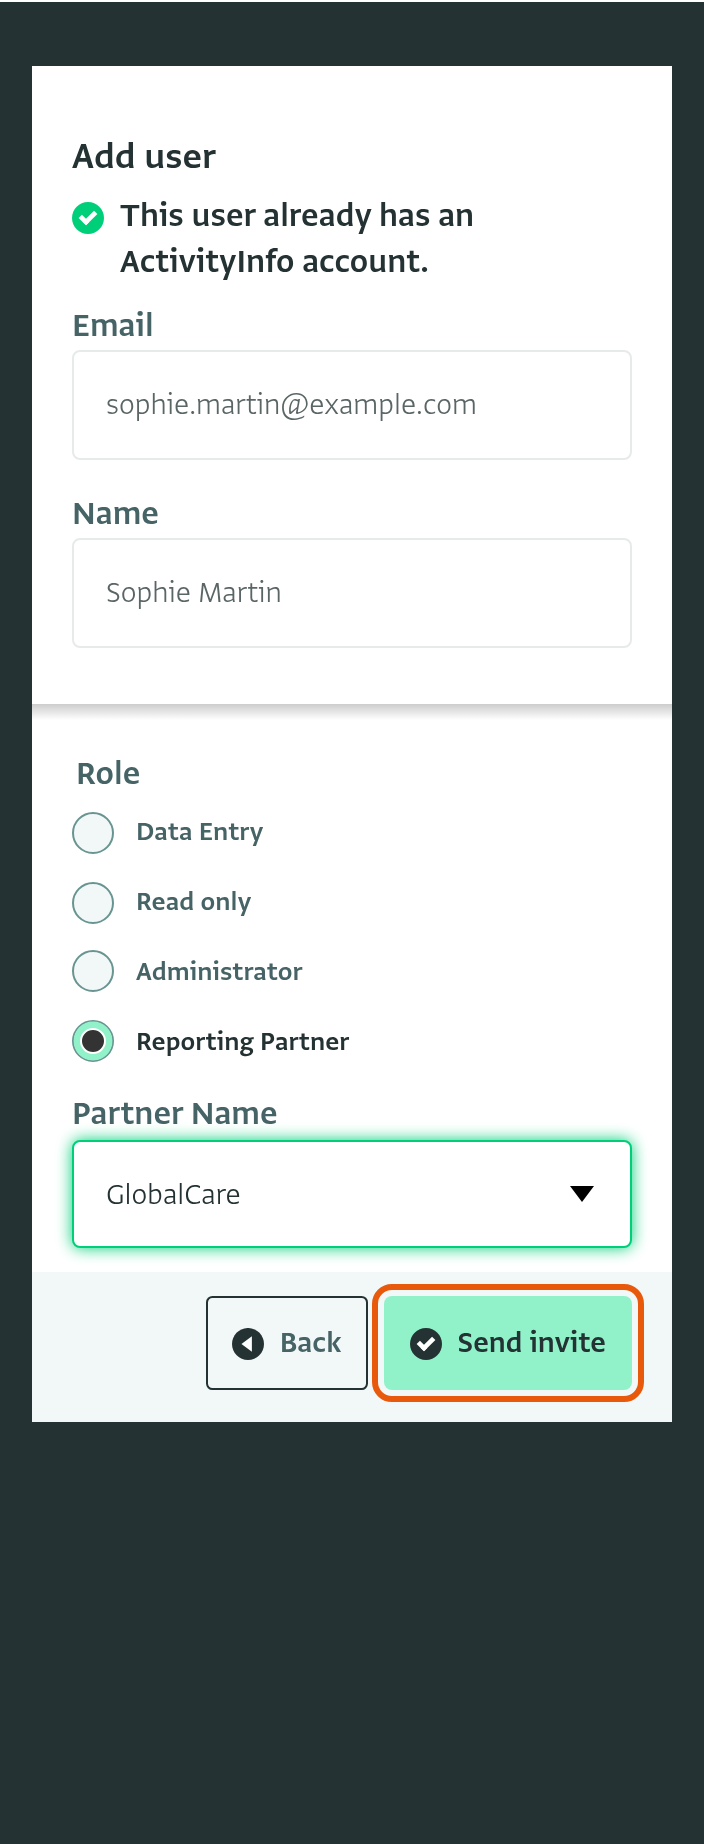
- Enter the user's "Name". If the user already has an ActivityInfo account, the name is filled in.
- Select the "Reporting Partner" role.
- Select the partner of the user in the list that appears for the parameter, for example "GlobalCare".
- Click "Send invite" to invite them.
Testing the role
- Log out of ActivityInfo.
- Using the alternate email address that you invite, log into the application.
- Go to the database
- Go to the Progress report form.
- You should see only the records belonging to partner “GlobalCare”. Assuming you set the parameter value for this user to “EduBright International”,”FoodFirst Initiative”, “AquaLife Foundation” or any other partner name, they would only see the records belonging to these partners.
- When you click “Add record”, the partner “Globalcare” should be prefilled, and you should not be able to select the other partners.