If your organization uses Google Workspace to manage identity, you can configure ActivityInfo to use Google as an Identity Provider for specific domains.
You can also use this integration to allow external partners using Gmail accounts to sign in through their Google account.
To enable the integration, you must first obtain a Client ID and Secret from the Google Cloud Console. The following sections will guide you through this process.
Create or select a Google Cloud Project
The Client ID you need is associated with a Google Cloud Project.
If your organization does not already have a Google Cloud project, you can get started at no cost at cloud.google.com.
Set up the OAuth consent screen
Before you can create a Client ID, you must configure the OAuth consent screen, which will provide information about you, the organization hosting ActivityInfo, and provide the information your end users will need to decide whether to consent sharing their identity with your installation of ActivityInfo.
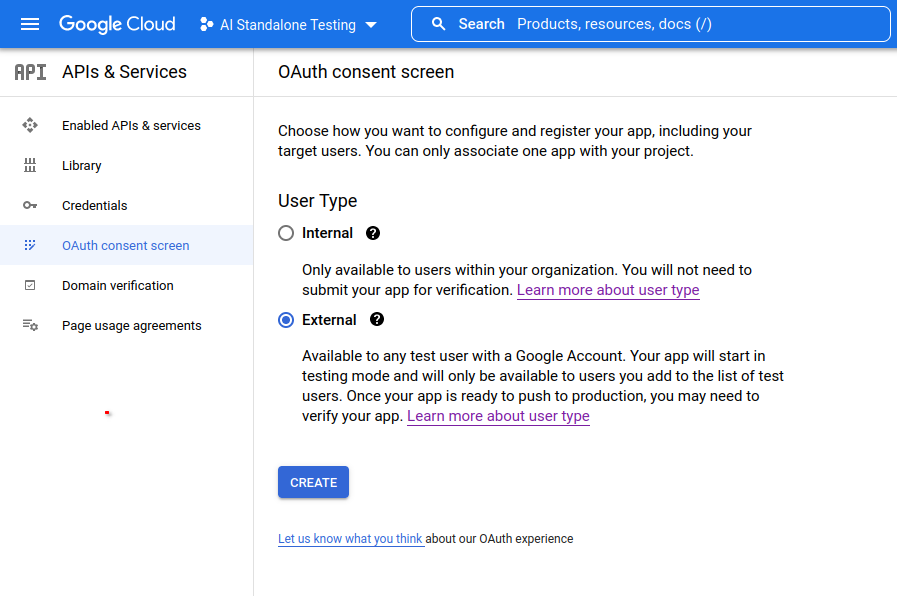
Navigate to the OAuth consent screen in the APIs & Services section of the console.
In most cases, we recommend choosing "External"
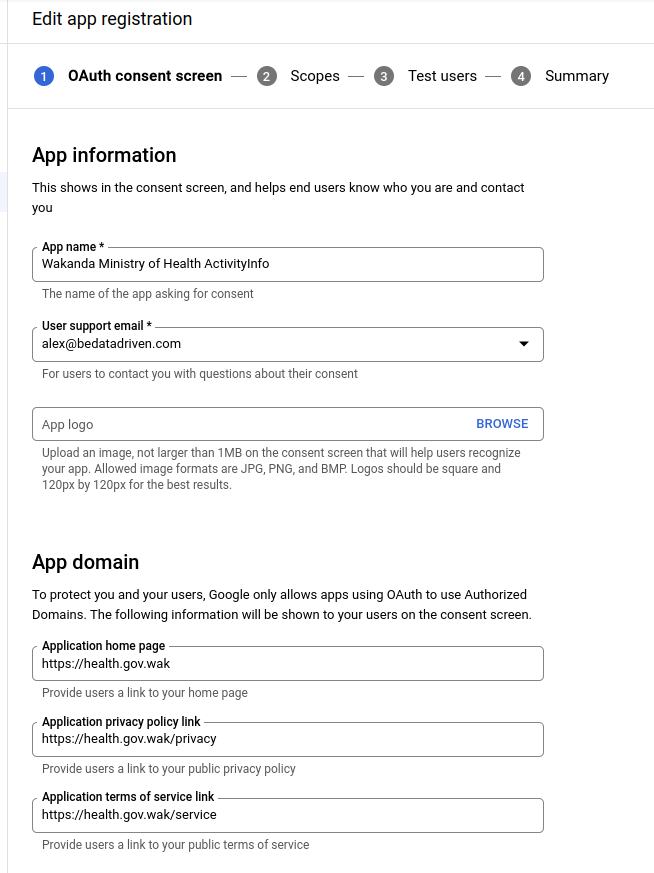
In the next screen, fill out the required fields that describe your organization. In the "App name" field, you should mention ActivityInfo, but distinguish it with your organization so that is not confused with the version hosted by BeDataDriven B.V. at www.activityinfo.org. You might use, for example, "Wakanda Ministry of Health ActivityInfo."
Likewise, in the "App domain" section, you should provide links to your organization's privacy policy and terms and services so that your end users understand what information you collect about them.
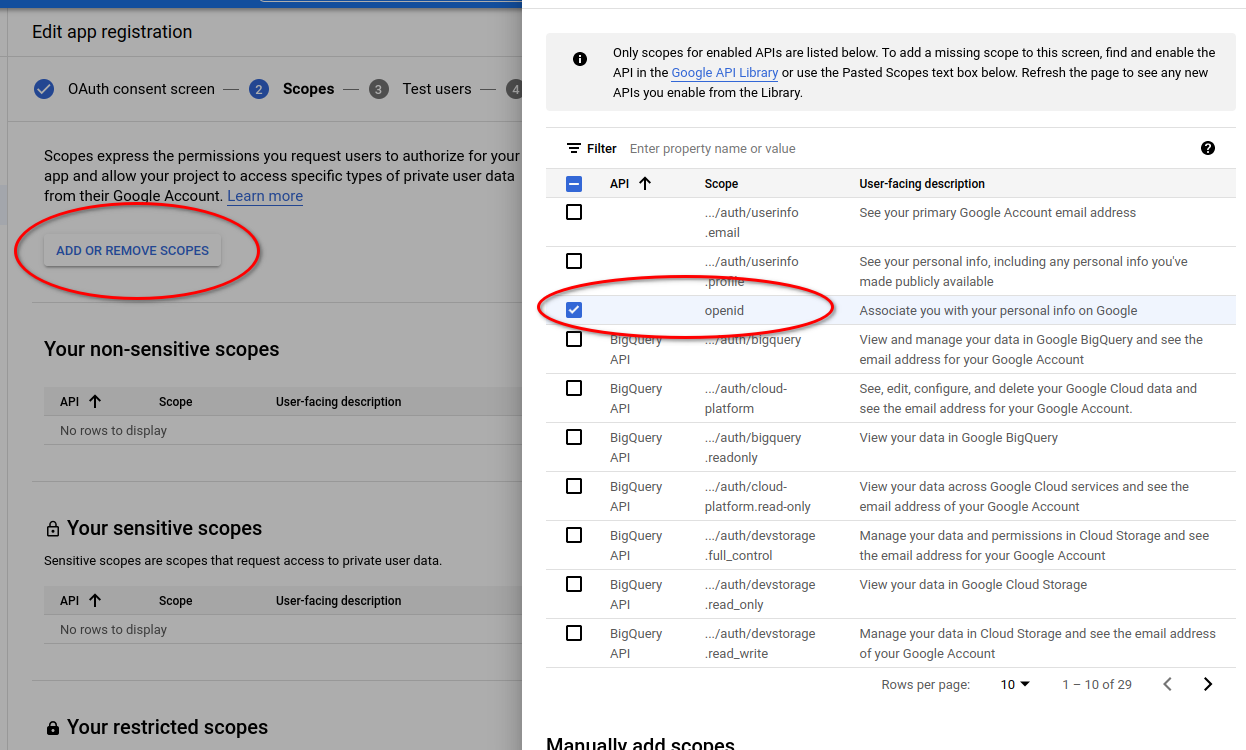
In the next screen you need to add the "openid" scope as this is required by ActivityInfo for logging in.
Obtaining a Client ID
Now that your consent screen is set up, you can create a Client ID for use with ActivityInfo.
Navigate to the Credentials page in the APIs & Services section of the Google Cloud Console.
Click "Create credentials" and choose "OAuth client ID".
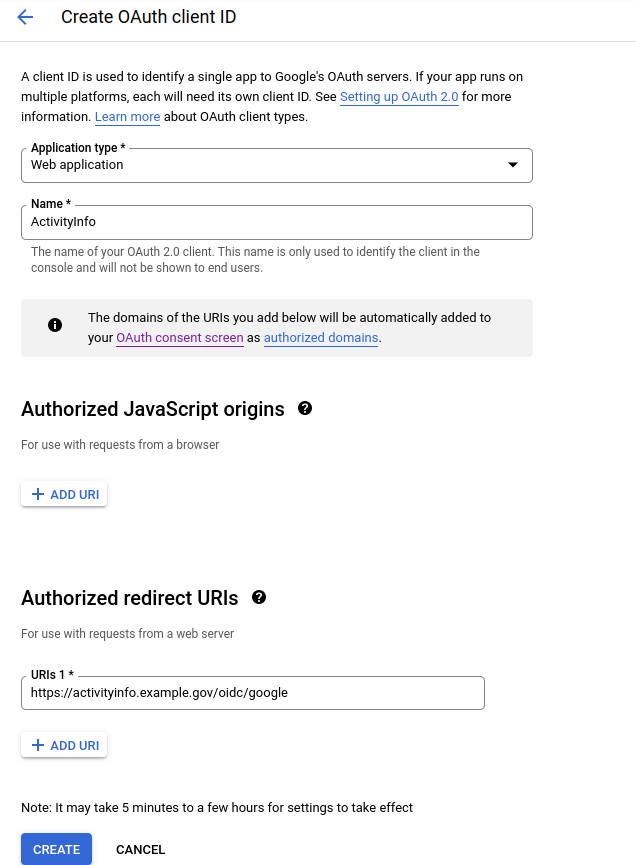
For Application Type, choose "Web application" and enter the name "ActivityInfo".
In the "Authorized redirect URIs", add the URI "https://activityinfo.example.gov/oidc/google", replacing "activityinfo.example.gov" with your domain name.
Once you complete this step, the Client ID and Client Secret will be displayed.
Configuring ActivityInfo
Now you are ready to set up ActivityInfo. Navigate to the Server Setting section, and to the Single-Sign On section.
From the "Add provider" button, select "Add Google" and then fill in the Client ID and Client Secret you recieved in the previous step.
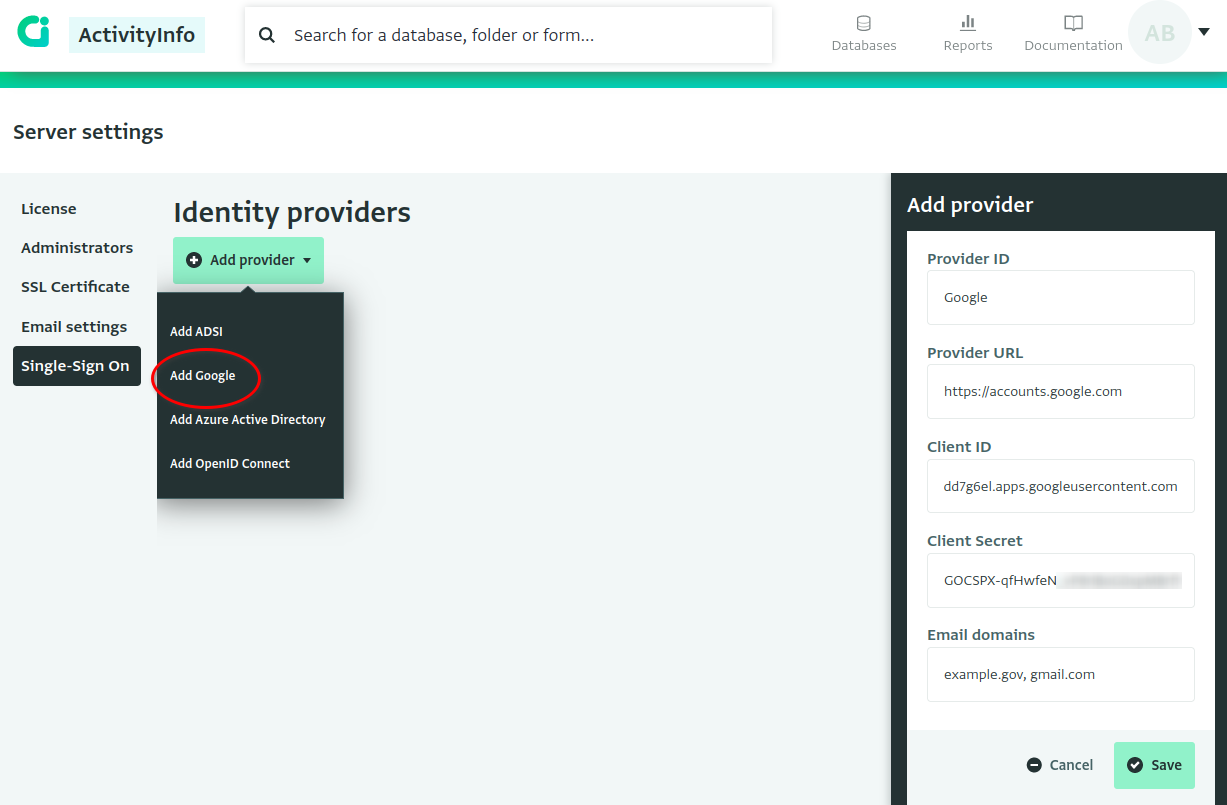
In the Email Domains field, enter the email domains which should be directed to Google for authentication. For example, if you enter "example.gov, gmail.com", then both bob@example.gov and mo@gmail.com will be required to authenticate through Google.