This guide will help you issue an SSL certificate for your ActivityInfo server via Active Directory Certificate Services (AD CS). This guide assumes the following:
- You have installed Active Directory Certificate Services on your Domain Controller
- You are logged into your Domain Controller
- You have created a Certificate Authority (CA) that is trusted by all computers on your domain
For more information on AD CS, please see the following resources from Microsoft:
You will need to complete the following steps:
- Configure a template
- Assign a template to a CA
- Request and enroll a new SSL certificate for ActivityInfo
- Export the SSL certificate to a .PFX file
- Import the .PFX file to ActivityInfo
Configure a template
- In the Certificate Templates snap-in, right-click the Web Server template and select Duplicate.
- On the Security tab, click Add.
- Click Object Types, check Computers, and then click Ok.
- Enter "Domain Controller".
- Click Check Names and then lick OK.
- With Domain Controllers selected, check read, enroll, and auto-enroll permissions.
- On the Request Handling tab, check the Allow private key to be exported box.
- On the General tab, update the template display name to SSL Certificate Template or similar.
- Click OK to save the new template.
Assign a template to a CA
- Under Certification Authority (Local), expand the node with the CA name.
- Click to select the Certificate Templates container (under the CA name, not the Certificate Templates snap-in).
- Right click the container and select New, and then Certificate Template to Issue.
- Select SSL Certificate Template and click OK.
Request and enroll a new SSL certificate for ActivityInfo
- Open the MMC window and add the Certificates snap-in for the local Computer account.
- Right-click the Personal node and choose All Tasks -> Request New Certificate.
- Click Next twice to get to the Request certificates page. Your can see the template you created in the previous step.
- Click the More information is required... link.
- Under Subject name, under Type, select Common name.
- Enter your ActivityInfo host name, for example "activityinfo.example.gov" and then click Add.
- Under Alternative name, under Type, select DNS.
- Using the same process, add a subject alternative name of type DNS for your ActivityInfo host name, for example, “activityinfo.example.gov” (the same name you added above).
- Click the Private Key tab.
- Under Key options, ensure the Make private key exportable option is checked and click OK.
- Back on the Request Certificates wizard page, ensure the checkbox for the template is checked and click Enroll.
- You can now see the certificate you requested and enrolled in the Personal store in the Certificates snap-in.
Export the SSL certificate to a .PFX file
- In the Certificates snap-in for the Local Machine, click the Personal store.
- Double-click the SSL certificate you used for your federation service.
- On the Details tab, click Copy to file and then click Next in the wizard.
- Ensure .pfx is selected, Include all certificates in the certification path if possible and Export all extended properties are checked and then click Next.
- Select Password, enter a password, and then click Next.
- Select a file location and name, click Next, and then click Finish.
Import the .PFX file to ActivityInfo
- Open the ActivityInfo Server and navigate to Server Settings.
- Click the "SSL Certificate" section.
- Click "Import certificate"

- Then browse for the .PFX file you exported along with the password from the previous step.
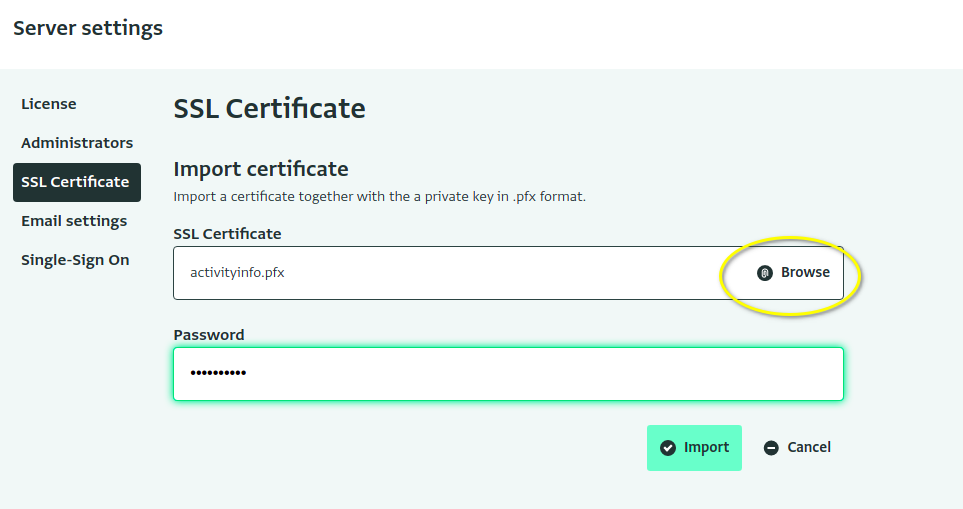
- Click import.