Language: English
ActivityInfo's mobile app is a great tool for collecting geo-located information, whether for needs assessments, facility surveys, damage reports, or many other kinds of relevant data.
While ActivityInfo makes it easy to visualize this data using its built-in mapping reports, there may come a time when you need to connect this data to a fully-featured GIS solution, like QGIS, a free and open source Geographic Information System.
In this tutorial, we'll look how you can add an ActivityInfo form as a layer in QGIS. To do this, we'll use ActivityInfo's GeoJSON API.
For this tutorial, we'll use the IDP Response template. You can create your own copy to work with.
Finding the GeoJSON link
The easiest way to get the GeoJSON is to use ActivityInfo's user interface. Navigate to the form you'd like to include as a layer in QGIS. The form must have a Geographic Point field, or a reference to another form that does.
In the screenshot below, you can see the "Map" button is visible in the toolbar, which means that this form has, or is related to, a geographic location.
From the Export menu, select "Export via the API", and then select "Query all field as GeoJSON".
This will display a URL that you can copy to the clipboard.
Selecting the geometry
The GeoJSON format only supports one point per feature. Your form may have more than one Geographic Point field, or reference more than one form that has a geographic location. By default, the export menu will show the URL for the first Geographic Point field. You can change this by switching to the map view of the form, and then select the geography source:
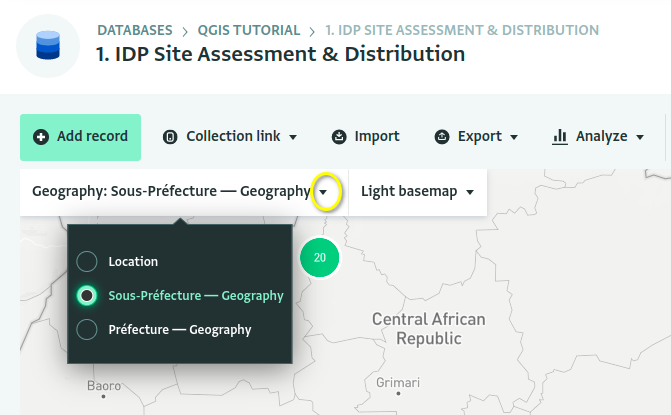
The GeoJSON link in the Export menu will reflect your selection.
Adding the layer to QGIS
You can download QGIS from their website. QGIS is available for Windows, macOS and Linux.
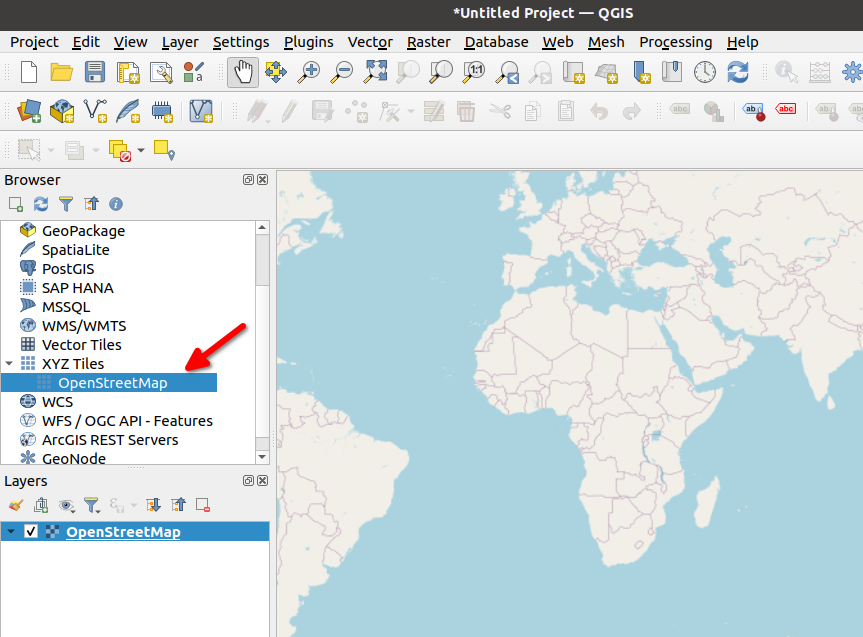
Start a new project in QGIS. Let's first add Open Street Map as a background layer to our map. You can find the Open Street Map layer under the "XYZ Tiles" group in the Browser. Double-click on it to add it as a layer.
Now let's add our ActivityInfo form. From the Layer menu, select "Add Layer", and then "Add Vector Layer".
In the dialog box:
- Select "Protocol" as the "Source Type"
- Select "GeoJSON" as the "Type"
- Paste the link you copied from ActivityInfo into the URI text box.
If your form is not public, you must provide credentials that will allow QGIS to connect to ActivityInfo. Add a personal API token and then paste it into the "Password" text box in the "Basic" tab of the "Authentication section".
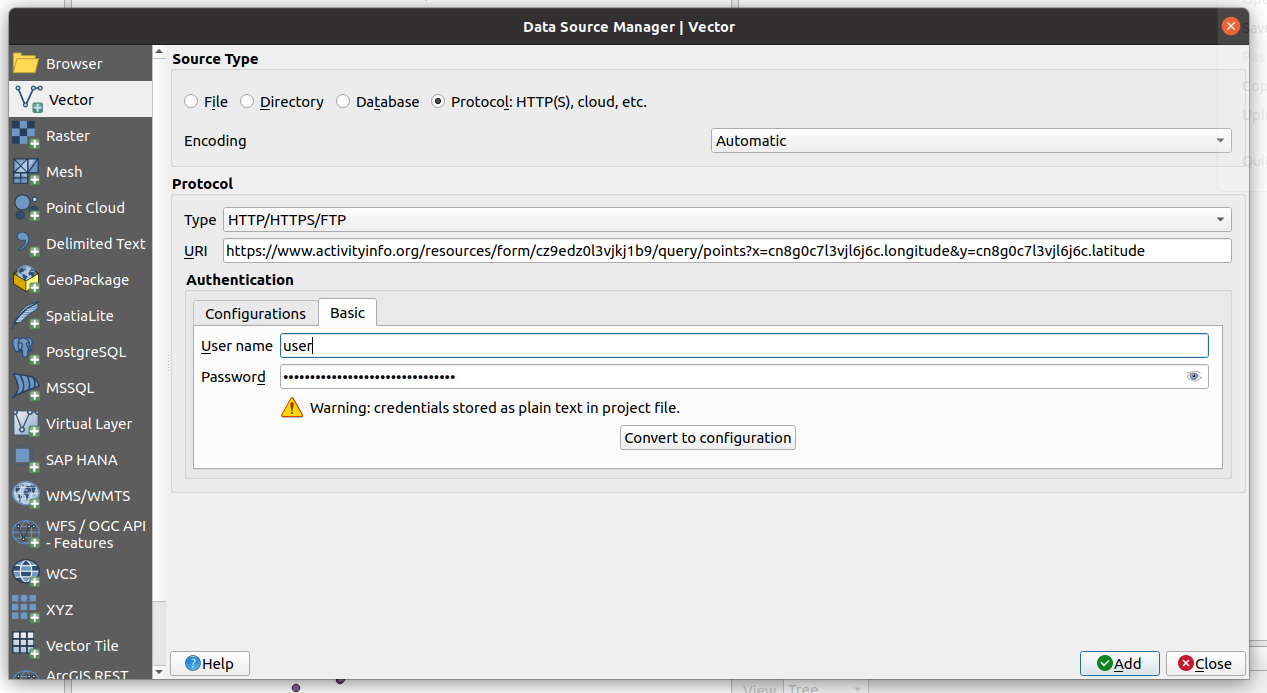
Note: this will store your API token in plaintext in the QGIS project file, which is not recommended. Read more in the QGIS Manual about how to securely manage credentials.
You can use the following URL from a public form to test the connection, without needing to provide authentication:
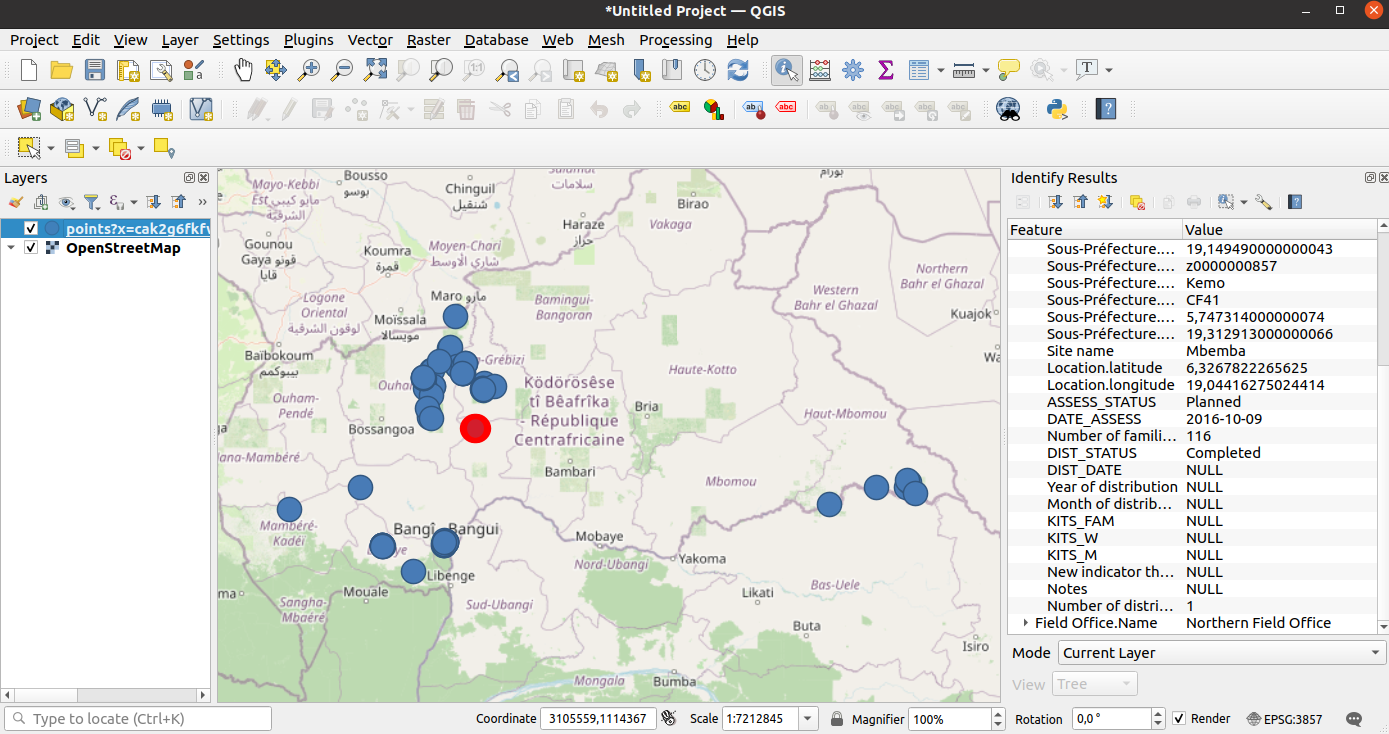
If you've followed the instructions above, you should now see your ActivityInfo form as a layer in QGIS! The GeoJSON feed includes all the fields from your form, so you can view details in QGIS, or style the layers using attributes from your form.