Creating an inventory of qualitative content in an ActivityInfo database
You can use ActivityInfo for your programme monitoring and data collection activities, especially when dealing with quantitative data that needs to be stored, analyzed and shared quickly and easily. But did you know that you can also use ActivityInfo to store and work with your qualitative data?
You can create a database, a folder or a form to collect and store various qualitative data such as user stories, transcripts, images, recordings, case studies or any other resource that has to do with your research and activities. You can also design your form in such a way that all your content is indexed and easily found based on the criteria you select.
So for example, you can collect images and transcripts along with the date, the name of the programme or any other information related to them. Then, using filters you can quickly find and access the resource you need based on one of these search criteria. In addition, you can invite your team so that everyone can access these files the moment they are added to the database.
In this guide, we will take a look at how you can create a form to host an indexable inventory for your qualitative content in ActivityInfo. The databases and forms are very flexible so you can create many different structures according to your needs. You can take inspiration from our guide and create your own structures too.
If you are interested in a more thorough walkthrough on building a complete data collection system for Monitoring and Evaluation activities, please consider taking the online, free self-paced course "Mastering the basics of information management with ActivityInfo".
Step one: Get an overview of all resources
Before designing a Form, you need to think about the types of qualitative data you need to handle. It is useful to create a list of the types of the materials you will be working with. In this list, add additional information related to each type of material which will make it easier to categorize it.
So in our example we have a list of various qualitative materials, such as:
Our material
- Transcripts of interviews
- User stories written by stakeholders
- Participant lists from workshops and other events
- Photographs from events
- Screenshots of online dissemination activities
For all of these, in our example, it is important to know the activity and programme to which each piece of content is related, the date that the material was collected and uploaded. At the same time, it is useful to distinguish among the various types of material so we will also create the following categories, which will help our indexing later:
Material Types
- Interview
- Dissemination
- User Story
- List
- Photographs
- Other
Other interesting information could be the location related to the resource and the activity. Working with these points, we end up with the following tables:
| My resources | Resource type |
|---|---|
| Transcripts of interviews from key beneficiaries and other participants | Interview |
| Intake interview transcript | Interview |
| User stories summaries from key stakeholders | Story |
| Case studies | Story |
| Participant lists from various offline and online activities | List |
| Photographs, images from events | Photograph |
| Screenshots of online dissemination activities | Dissemination |
| Other important information related to the material: | |
| Programme name | |
| Activity name | |
| Date of Activity | |
| Location of activity | |
| Date uploaded | |
| Keywords related to the material type (material category) | |
Step two: Design the form
Now that you have a good overview of your qualitative material, you can design a simple form to collect and store this information. The form will consist of various fields which will determine the kind of information you will collect. Examples of such fields are Text fields, Date fields, Select fields and Attachment fields. Then, by adding records to this form you can start creating the inventory of your resources.
For example, a record can consist of all the material related to a specific activity on a specific date. Alternatively, a record might gather all the resources available for a specific activity. The structure of this depends on the structure of the activities of your programme and what you want to achieve with the inventory.
The fields and the structure
To be able to add files such as images and documents to a form, you need to use Attachment fields. Regarding attachment fields please keep in mind that the maximum attachment size accepted is 10 MB. Also, the maximum number of attachments per field is 20 attachments. Finally, you cannot upload attachments to a database when you are offline.
So depending on the structure you have decided to follow, you can add one, two or many more attachment fields to the form.
In our example, we will collect all qualitative material related to a specific activity in separate records. This way, we will end up with a list of activities -where each record, will correspond to a different activity and will host all material related to it.
At the same time, we will collect key information related to the activity such as the programme to which it belongs (with a text or single select field), the municipality where the activity took place (with a reference field to link to the built-in geodatabase of ActivityInfo), the date of the activity and the date that the material was uploaded (with date fields). Then, we will also add a multiple select field to define what type of resources this record (and activity) includes.
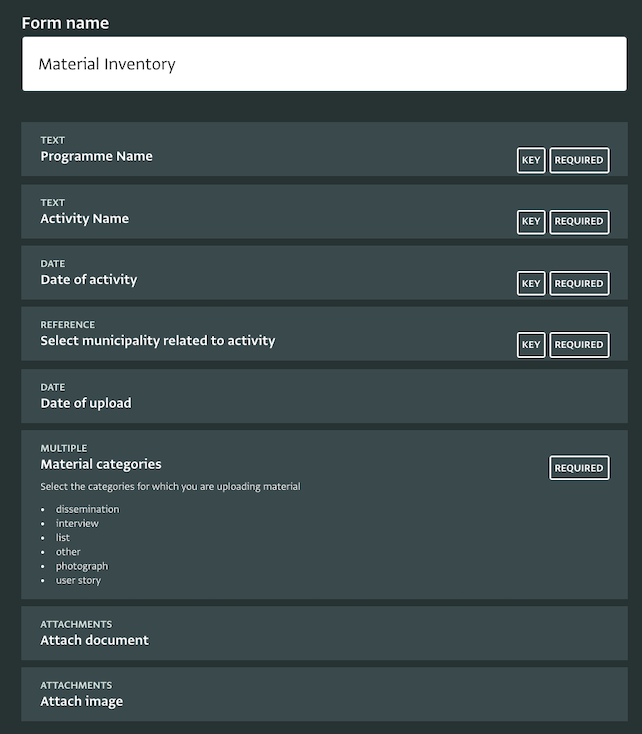

To avoid duplicate records for the same events we make ‘Key’ fields all the fields which identify the activity and make it unique. So in this example, there cannot be another record for an activity named ‘Workshop “IT fundamentals”, under the programme “Education for all”, which took place on March 9th, 2021 in Aa en Hunze, Drenthe. If a colleague tries to upload documents in a new record using the same information, they will be notified that such a record exists and they can edit that record instead.
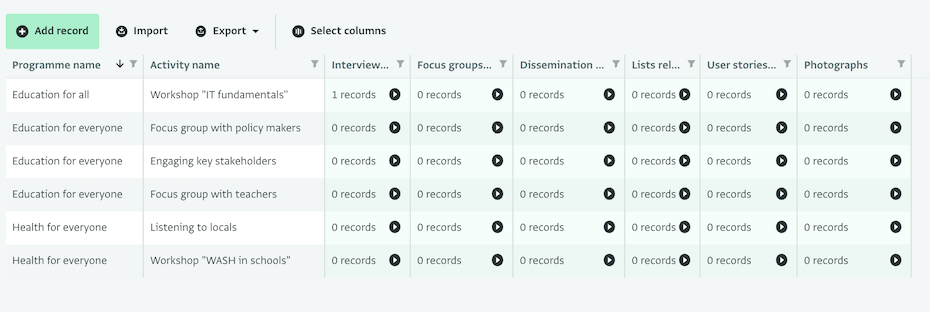
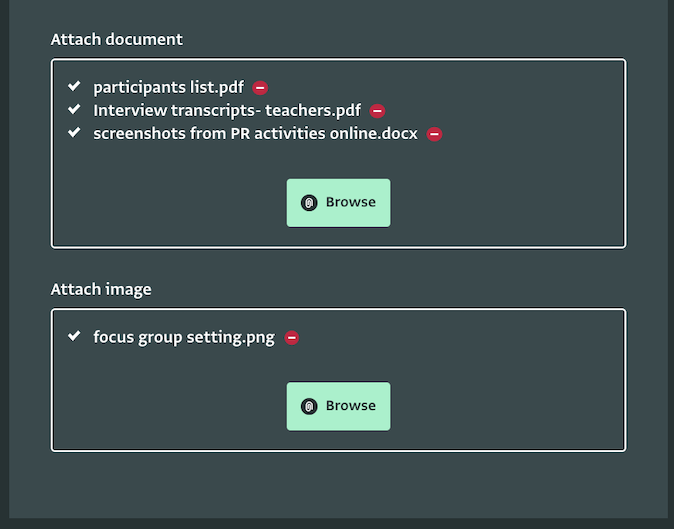
Another structure would be to collect all material related to an activity in the same record using various subforms for each type of material, as shown in the image below. This would create different, separate silos of material. Material would be more clearly separated but that could limit the overall overview we would have on the material on the platform.
Step three: Collect the attachments and the related information
Once the form is ready, you can start adding the resources or invite your colleagues to add them instead. You can easily drag and drop files to attachment fields or use the browse button to upload multiple attachments.
Note that you can import multiple records to save time using the importer but attachments need to be added separately to the imported records.
Step four: Search for a resource
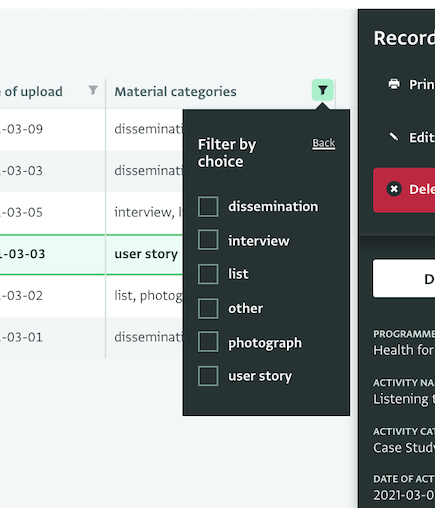
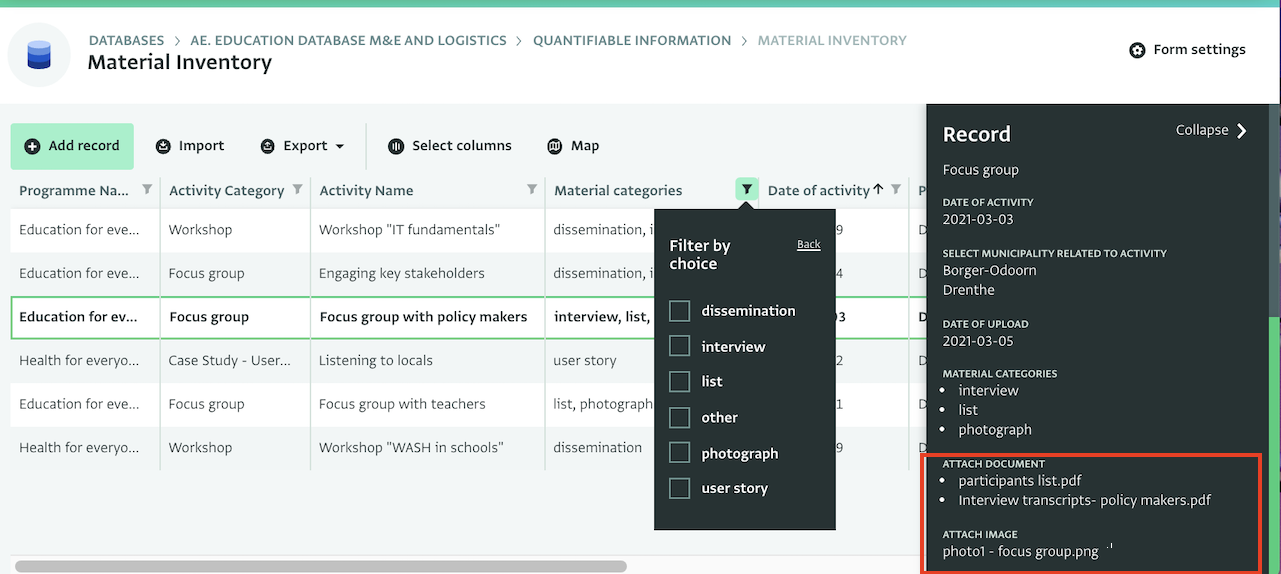
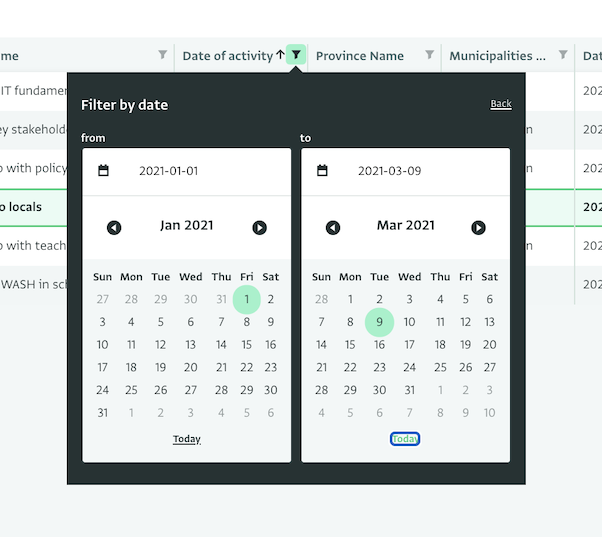
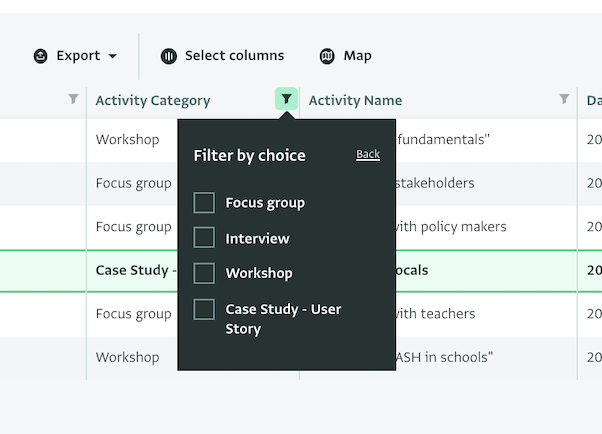
Once all resources have been added to your form, you can use various filters in the Table View of the Form to show only the resources you need. In our example, because we added such fields and information for these fields, we can filter by date ranges, material category, activity, programme, and municipality or province. We can use a single filter or a combination of filters.
If we are using a geographic reference in the form, we can also display the resources on a map using the Map View.
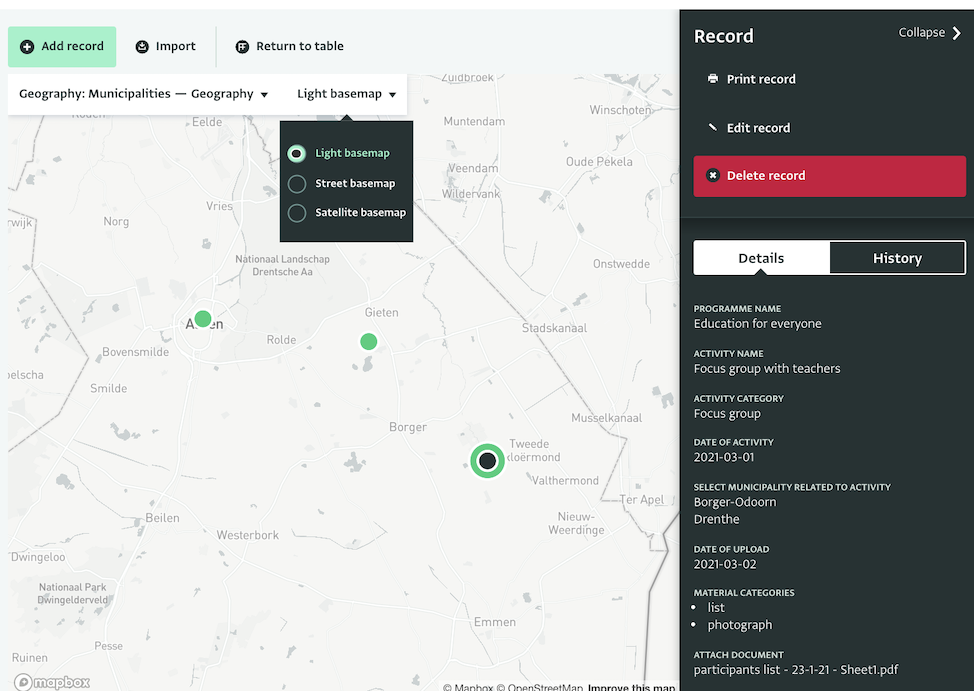
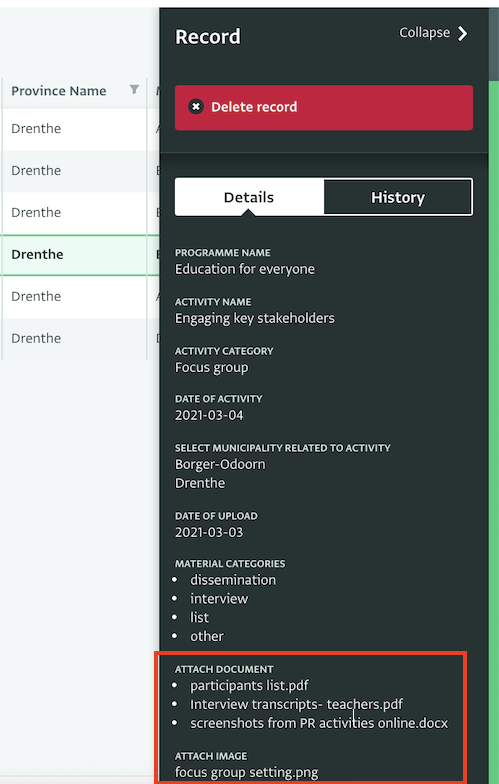
After selecting the record that includes the resource we are looking for, we can view the attachments it includes in the record details panel. Then, by clicking on the attachment we can easily download it to use it.
What do you think of this way of using ActivityInfo for storing your documents and images? Would you be using it? Don’t hesitate to contact us, if you need more information!