Importing questionnaires for data collection efficiently
In ActivityInfo, you can use as simple or as complicated forms for data collection as needed to support your M&E programmes or Information Management activities. You can design a form from scratch or import your existing questionnaire to the platform and start collecting data right away. When you do the latter, you can work very fast with long questionnaires and take advantage of the powerful form designer.
In this blog post, we take a look at how we can translate any questionnaire to fields in ActivityInfo and how we can prepare a spreadsheet to import as many questions as we need to the platform.
You can follow the full Webinar “Importing questionnaires efficiently” and practice along.
Step one: Examine the questions and find their respective field type
To start, we have to take a look at our questionnaire and start examining every question. As soon as we know what kind of questions we have in front of us, we can translate them to fields in ActivityInfo.
So for example, if you have a question that is open-ended, you might need a text field or if you are asking about an indicator, you need a quantity field. If you respondents need to select from a list of predefined questions, then you need a selection field or a reference field. Respectively, when asking for geography related information you can use a geo point field. When asking for information related to time periods you might need to use a date, month, week or fortnight field. If you want users to provide additional documents or images you will need an attachment field. Take a look at all the available fields in our User Manual.
In our spreadsheet, we need to call each field - corresponding to a question - with a specific name. You can view all the names you can use for all Field Types in our User Manual.
Step two: Add headers and fill in the necessary fields in the spreadsheet
Once you have a good understanding of all the questions included in your questionnaire, you can start working on the spreadsheet. Add the following headers in your spreadsheet:
| Headers | ||||||||||||
|---|---|---|---|---|---|---|---|---|---|---|---|---|
| FieldCode | FieldType | FieldName | FieldDescription | Required | Key | Units | Formula | Prefix Formula | Referenced Form | Relevance Condition | Validation Condition | Choice |
| optional | required | required | optional | optional | optional | optional | optional | optional | optional | optional | optional | required for selection fields |
Not all cells need to be filled in. Most of them are optional. If you omit the headers of optional fields you will still be able to upload the questions.
The required ones are the ones in the columns of:
- FieldType: defines what kind of field we will use and can be taken from the table of Field Types.
- FieldName: this is the actual question
- Choice: this is repeated for every option that can be used as an answer in selection fields; so it is only needed when using selection fields
Step three: Enrich the questions
While looking at your questionnaire you might decide that some questions should be required or need more context. You might also want to get unique replies based on one or more fields or define units for your indicators. For these, we will work with the columns: FieldDescription, Required, Key and Units. Read more about these properties in our user manual.
In the FieldDescription column, you can just type the description you want for every question. If you want to make a field required or key you can add TRUE, if not you can add FALSE. Please keep in mind that if you use a serial number field, this is the key for your form and you cannot add more keys in the form. In the units column, simply type the unit you want to use but note that it should only be filled for quantity field types.
| Simple questionnaire with basic properties | ||||||||||||
|---|---|---|---|---|---|---|---|---|---|---|---|---|
| FieldCode | FieldType | FieldName | FieldDescription | Required | Key | Units | Formula | Prefix Formula | Referenced Form | Relevance Condition | Validation Condition | Choice |
| text | Name of individual | Please provide the first and last name of the individual. Include middle name if available. | TRUE | TRUE | ||||||||
| narrative | Comments | Please add further comments, regarding the individual. | FALSE | FALSE | ||||||||
| single select | Was the individual sick? | Please select one answer. | TRUE | FALSE | Yes | |||||||
| single select | Was the individual sick? | Please select one answer. | TRUE | FALSE | No | |||||||
| quantity | How many days were the symptoms there? | days | ||||||||||
Step four: Add formulas
By adding formulas in our spreadsheet we make the questionnaire more interactive. We can define when a question will appear to the user, or when it can be counted as valid and we can automate some calculations in our form. Once again, you need to take a good look at your questionnaire and decide if and when formulas are needed. You can learn more about formulas in the article "Data quality and data analysis tips with formulas in ActivityInfo". In our user manual, you can view all formulas.
You can ask the following questions to decide on what you need:
Is the question relevant to all? If the question is not relevant to all, a relevance rule can be used to show the question only when a specific condition is fulfilled.
Are there restrictions for accepted answers? If there are restrictions for accepted answers, you can add validation rules to define specific conditions for accepting an answer.
Is there a need for quick analysis? If there is a need for quick analysis, you can add Calculated fields in your spreadsheet.
Please note that to make it easier to use each field in formulas, you must assign a code to the fields you want to use. The code can be as simple as a letter or more letters without spaces in between them.
| Formula for validation condition | ||||||||||||
|---|---|---|---|---|---|---|---|---|---|---|---|---|
| FieldCode | FieldType | FieldName | FieldDescription | Required | Key | Units | Formula | Prefix Formula | Referenced Form | Relevance Condition | Validation Condition | Choice |
| DoA | date | Date of Arrival | TRUE | TRUE | ||||||||
| DoI | date | Date of Intake | FALSE | FALSE | DoI > DoA | |||||||
In this table, we added codes to both fields and then we simply wrote the formula in the cell that corresponds to the question where we want the validation rule to apply. This validation rule determines that only dates after the Date of Arrival will be accepted in the Date of Intake field.
| Formula for relevance condition | ||||||||||||
|---|---|---|---|---|---|---|---|---|---|---|---|---|
| FieldCode | FieldType | FieldName | FieldDescription | Required | Key | Units | Formula | Prefix Formula | Referenced Form | Relevance Condition | Validation Condition | Choice |
| F1 | single select | Was the individual sick? | TRUE | FALSE | Yes | |||||||
| F1 | single select | Was the individual sick? | TRUE | FALSE | No | |||||||
| multiple select | Please select all symptoms | FALSE | FALSE | F1.Yes | Fever | |||||||
| multiple select | Please select all symptoms | FALSE | FALSE | F1.Yes | Cough | |||||||
| multiple select | Please select all symptoms | FALSE | FALSE | F1.Yes | Breathing difficulty | |||||||
In this table, we added a relevance rule to the multiple select field. The multiple select question “Please select all symptoms” will only appear if the answer to the single select question "Was the the individual sick" is “Yes”. Once again, we added a code to the single select question to make it easy to use.
| Formula for calculated field | ||||||||||||
|---|---|---|---|---|---|---|---|---|---|---|---|---|
| FieldCode | FieldType | FieldName | FieldDescription | Required | Key | Units | Formula | Prefix Formula | Referenced Form | Relevance Condition | Validation Condition | Choice |
| DoB | date | Date of Birth | FALSE | FALSE | ||||||||
| calculated | Age | FALSE | FALSE | YEARFRAC(DoB, TODAY()) | ||||||||
In this table, we added a formula for a calculated field. Note that the field type now is ‘calculated’ and the formula is added in the Formula column.
Tip: If you want to create your own formulas for validation and relevance rules based on other fields, but you are not sure how to write the formulas, you can design a draft form in ActivityInfo with some fields with relevance and validation rules using the form designer, where you don't need to write a formula on your own. Then, simply export the fields and view the formulas in the exported spreadsheet to take some inspiration for your own formulas.
Step five: reference other forms
In ActivityInfo, you can link forms to one another. This allows data entry users to select an answer in a form from a list of options that appears in another form. So for example, you might have in Form A a list of locations. Then, in Form B you can refer to this list of locations so users can select one of these locations from a drop-down list. When you want to reference a form in your spreadsheet, you need to have first added that form in ActivityInfo. You can either design that form or import a questionnaire using the method we discuss in this article. In any case, the form must already exist in ActivityInfo.
To reference that form you need to obtain the id of the form. To do that simply navigate to the Table View of that Form and copy it from the URL.

In the image above, you can see where exactly you can find the form id. In this example, we want to reference this list of programmes in the questionnaire we are creating in our spreadsheet.
| Referencing another form | ||||||||||||
|---|---|---|---|---|---|---|---|---|---|---|---|---|
| FieldCode | FieldType | FieldName | FieldDescription | Required | Key | Units | Formula | Prefix Formula | Referenced Form | Relevance Condition | Validation Condition | Choice |
| reference | Select programme from list | FALSE | FALSE | c5fk9s2kdyll9kg7 | ||||||||
For this reason, we will copy the code of the form that corresponds to this list and we will paste it in the reference form column in our spreadsheet. Of course note that we added a FieldType 'reference' to create the reference field. Please note that this specific form id won't work in your questionnaire, as the form we reference doesn't exist in your database.
Step six: Import the spreadsheet to ActivityInfo
| Full Questionnaire | ||||||||||||
|---|---|---|---|---|---|---|---|---|---|---|---|---|
| FieldCode | FieldType | FieldName | FieldDescription | Required | Key | Units | Formula | Prefix Formula | Referenced Form | Relevance Condition | Validation Condition | Choice |
| reference | Select programme | FALSE | FALSE | c99hpbikevarejtu | ||||||||
| DoA | date | Date of Arrival | TRUE | TRUE | ||||||||
| DoI | date | Date of Intake | TRUE | TRUE | DoI > DoA | |||||||
| week | Week of Reporting | FALSE | TRUE | |||||||||
| fortnight | Period of Departure | FALSE | FALSE | |||||||||
| month | Month of Repetition | FALSE | FALSE | |||||||||
| F1 | single select | Was the individual sick? | TRUE | FALSE | Yes | |||||||
| F1 | single select | Was the individual sick? | TRUE | FALSE | No | |||||||
| multiple select | Please select all symptoms | FALSE | FALSE | F1.Yes | Fever | |||||||
| multiple select | Please select all symptoms | FALSE | FALSE | F1.Yes | Cough | |||||||
| multiple select | Please select all symptoms | FALSE | FALSE | F1.Yes | Breathing difficulty | |||||||
| multiple select | Please select all symptoms | FALSE | FALSE | F1.Yes | Cold symptoms | |||||||
| attachment | Attach form of approval | FALSE | FALSE | |||||||||
| text | Name of individual | TRUE | TRUE | |||||||||
| narrative | Comments | FALSE | FALSE | |||||||||
| DoB | date | Date of Birth | FALSE | FALSE | ||||||||
| calculated | Age | FALSE | FALSE | YEARFRAC(DoB, TODAY()) | ||||||||
| D | quantity | How many days were the symptoms there? | FALSE | FALSE | days | |||||||
| geopoint | Provide GPS of reporting office | TRUE | FALSE | |||||||||
When the spreadsheet is ready, copy all the fields and add a new form in ActivityInfo. Give a title to the form, click on the "+" icon to reveal the field pallete.
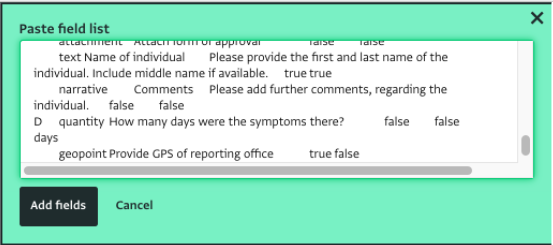
Click on "Paste field list from spreadsheet". Paste there all the fields and click on "Add fields".
The form is ready!
So that is how you can import long questionnaires to ActivityInfo. Now you can try it as well!