Language: English
After completing this tutorial, you will be able to create Power BI visualizations using data from ActivityInfo.
Before you start:
- Ensure you have Power BI Desktop installed. If you don't have it installed then you can download it from Microsoft's website.
- You need access to an ActivityInfo database.
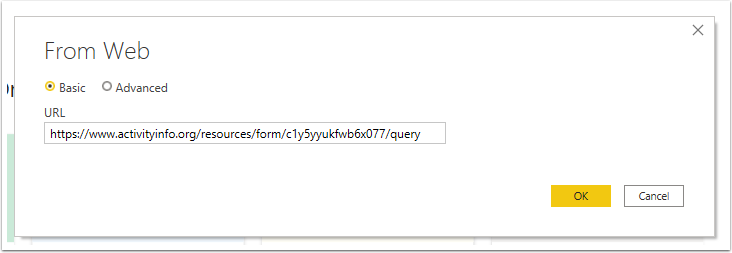
Obtain the URL of your Form in the Table View page
- Before you connect Power BI to your form in ActivityInfo, you will need to obtain the URL of the API endpoint for your Form
- In the Table View page of your Form, click on "Export" to reveal the drop-down menu and click on "Query as JSON".
Select whether you want the “Entire form” or “Currently Selected Columns” then copy the URL.
Get Data from ActivityInfo in Power BI
To connect ActivityInfo to Power BI, log into Power BI and follow these steps:
- Click "Get Data" and select "Web",
- In the dialog window, select the "Basic" option, paste the URL and click "OK",
- A dialog titled "Access Web content" should appear.
- From the side, choose "Basic"
- In the "User name" field enter the email you use to connect to ActivityInfo
- In the "Password" field, enter your personal API token, not your ActivityInfo password. Read more about adding a personal API token.
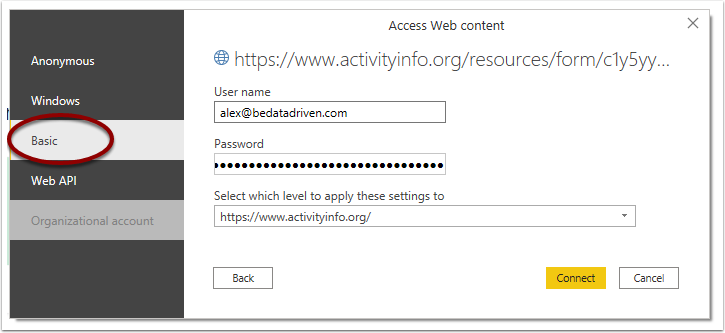
If you do not see the "Access Web content" and the connection is not successful. you may have previously entered credentials incorrectly. Please follow the instructions in the article Updating your credentials
Convert list to table format
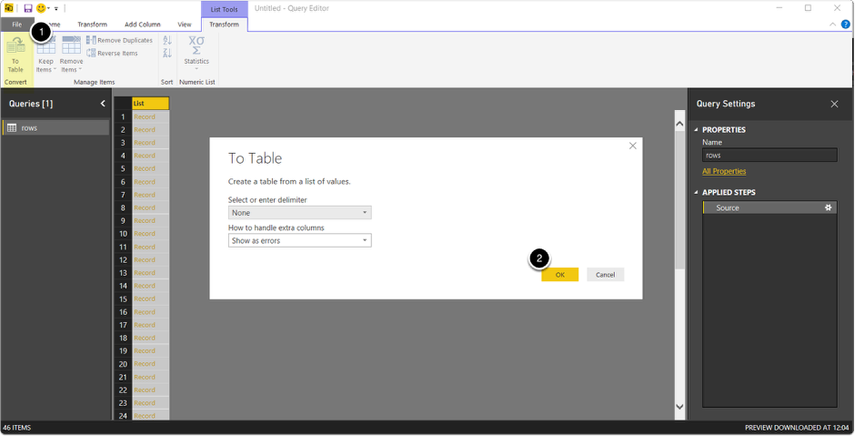
- After you have connected your form to Power BI, the Query Editor will open and display a "List" as the result. The following steps explain how to convert this list to a table.
Convert list result to table
- Click "To Table", a pop-up will appear inviting the user to select or enter delimiters and how to handle extra columns.
- Accept the default settings by clicking "OK".
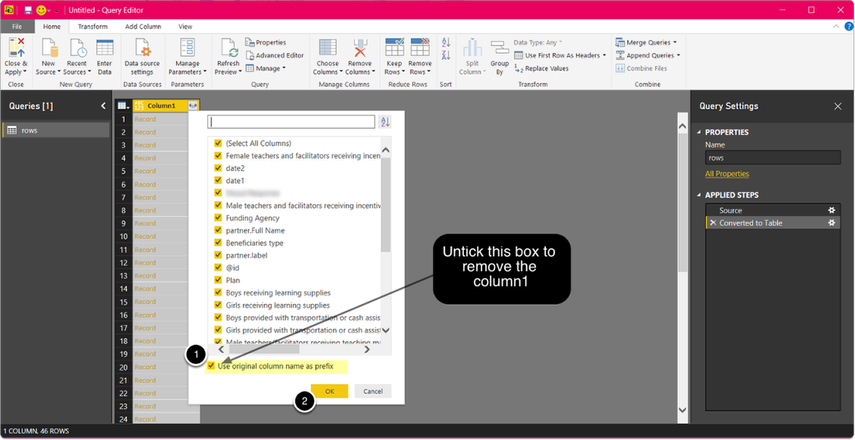
Select Columns
- Uncheck the "Use the original column name as prefix"
- Click "OK"
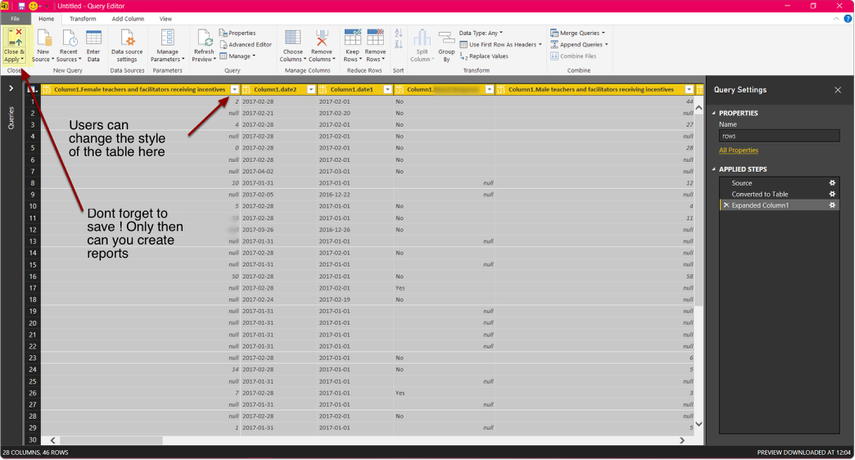
Make final structural changes to the table
- You can make further changes to your table as shown below. For example, re-order the columns, remove columns, re-name the columns etc.
You can configure a scheduled refresh of the data sources in Power BI.